Excise Tax Assessments
Overview
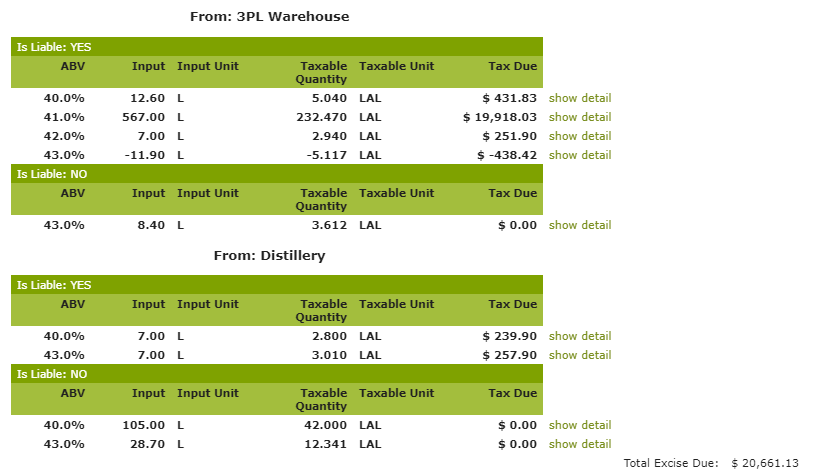
Vinsight will calculate your Excise Tax Assessments and display the results in a simple interactive report, enabling you to view the results from each bonded location broken down by type of transaction, applicable tax rate and whether excise liable or not.
It is important to note that the accuracy of this report relies on you. You need to ensure that your ‘Contacts’ and ‘Stock Items’ are correctly classified as Excise Tax Liable or not, that your bonded locations are properly identified and that your tax rates are correctly set in order to obtain an accurate report. After generating a report, you should do a sanity check on which items fall into the ‘Excise Liable’ and ‘Excise non liable’ parts of the report to quickly identify any glaring classification errors. Vinsight provides many features to help you delve further into the report and the transactions it is based on, to further check its accuracy. These features are detailed below.
In this document:
Creating/ Reviewing Excise Reports
Before creating an Excise Tax Report, ensure that you have configured the following:
You also must review the Excise Liability of your Contacts and Stock Items.
To create a Excise Tax Assessment Report go to Reports > Account > Excise Assessment.
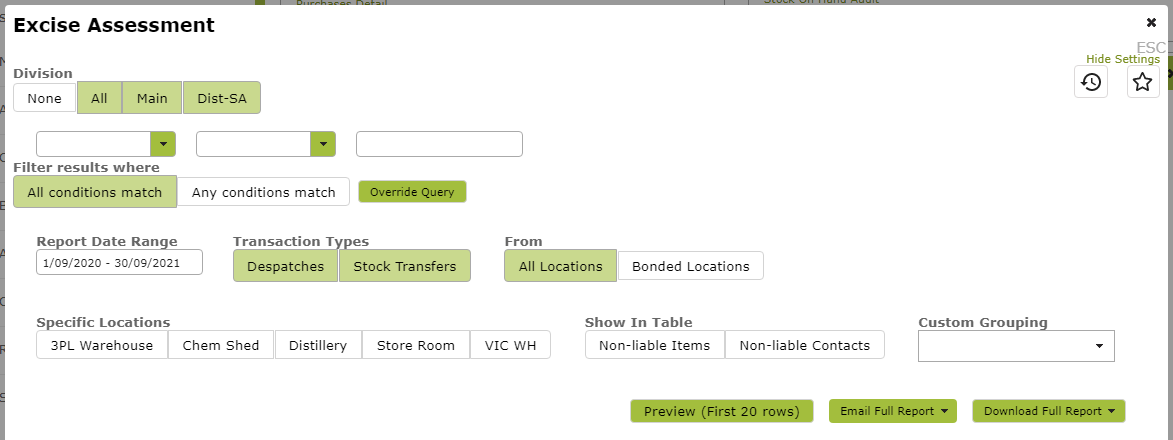
Once here, select the date range you wish to report on as well as the Division, Locations and Transaction Types you want to review.
Then click ‘Preview’ to review the report. This will generate a draft report for each bonded location detailing product movements and the resultant excise tax liability incurred (or credited).
For more information on the transactions which form the basis of the various calculations, simply click on the show detail link next to the line in question. For example, clicking on the ‘show detail’ link marked with the red arrow below:

will bring expand the line to show the following source transactions.
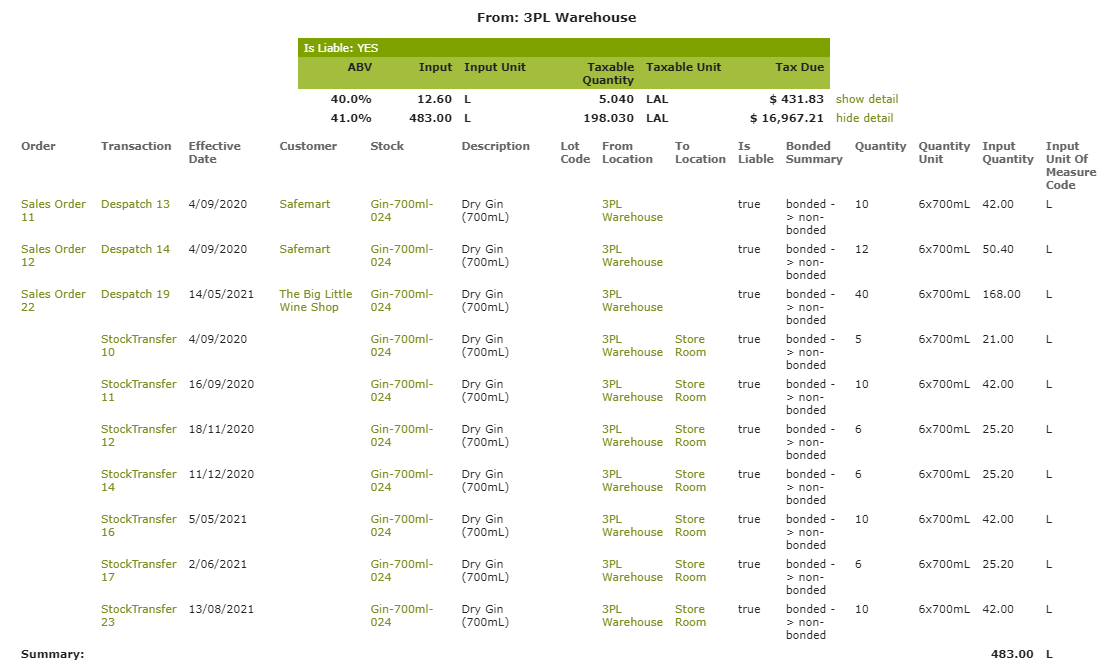
For even more detail, navigate to the Sales Order, Despatch or Transfer in question by clicking on the relevant Sales Order , Despatch or Transfer number.

At the bottom of the page, the excise tax assessment from each of the bonded locations is compiled to give you a total figure due.

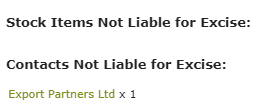
Footnotes – Contacts and Stock Items Not Liable for Excise:
At the bottom of the report you will see a list of Stock items and Contacts listed as not liable for excise in your App. Take a quick look here when reviewing your report to make sure there are not items or contacts marked as not liable that should be marked liable.
When you create a new assessment report for a particular reporting period, you should ensure you download and print a copy of the report for your records, using the ‘Download Full Report’ button. In addition you should save the report used for the relevant reporting period in the App.
To do this click the clock icon in the top right of the report.

Enter a name for the current report and click ‘Save’.
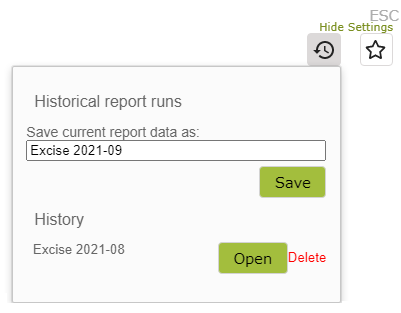
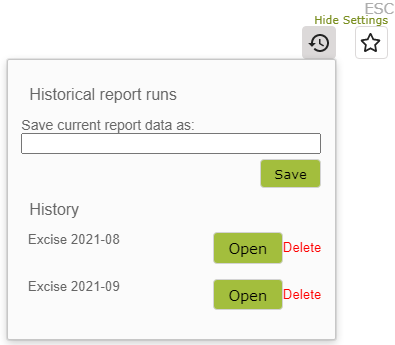
When you open the Excise Assessment and click the clock icon again, you will see a list of all saved reports. To open any of these historical assessments simply click the ‘Open’ button next to the report name.
Setting Up Excise Tax in Vinsight
1. Set New Excise Assessment Report Flag
Vinsight introduced a new style of Excise Reports in 2021. Before starting your set-up, ensure you have the new style report enabled by going to Settings > Advanced Settings > Vinsight Flags and clicking ‘On’ next to ‘New Excise Assessment’.
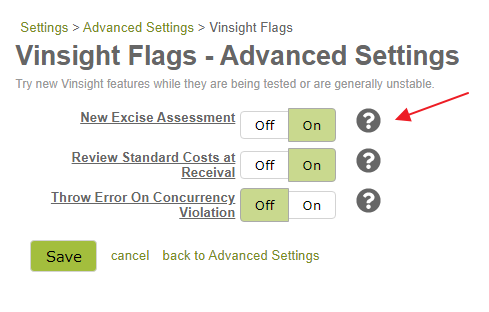
If the ‘New Excise Assessment’ flag is not visible here, it will simply mean that we have switched everyone over to the new style report and you can ignore this step.
2. Enable Excise Tax Plugin
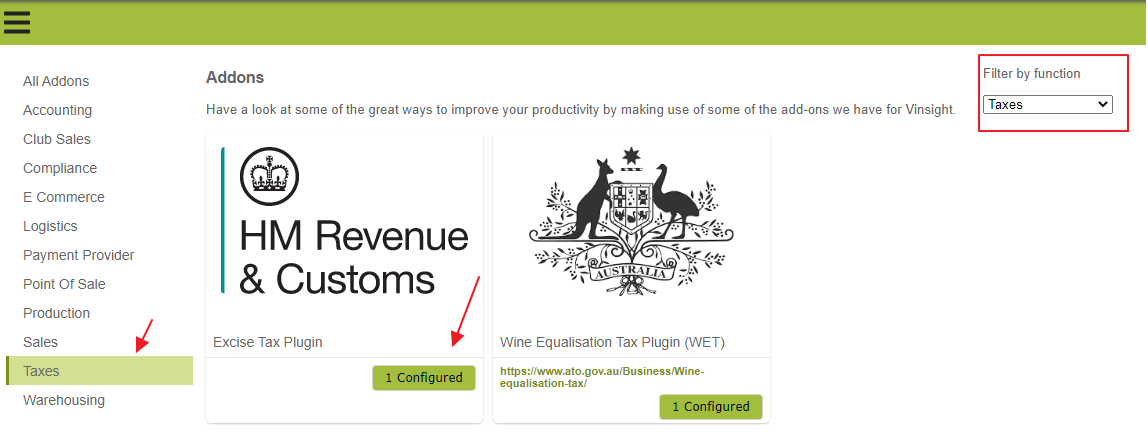
Excise Tax options in Vinsight can be turned on or off with the Excise Tax plugin at Settings > Addons > Excise Tax Plugin. (To find the plugin more quickly, select ‘Taxes’ from the Addons menu on the left of this page or select ‘Taxes’ from the ‘Filter by function’ drop down box.) The image may look different to the one you see. As long as it is called ‘Excise Tax Plugin’ you are in the right place!
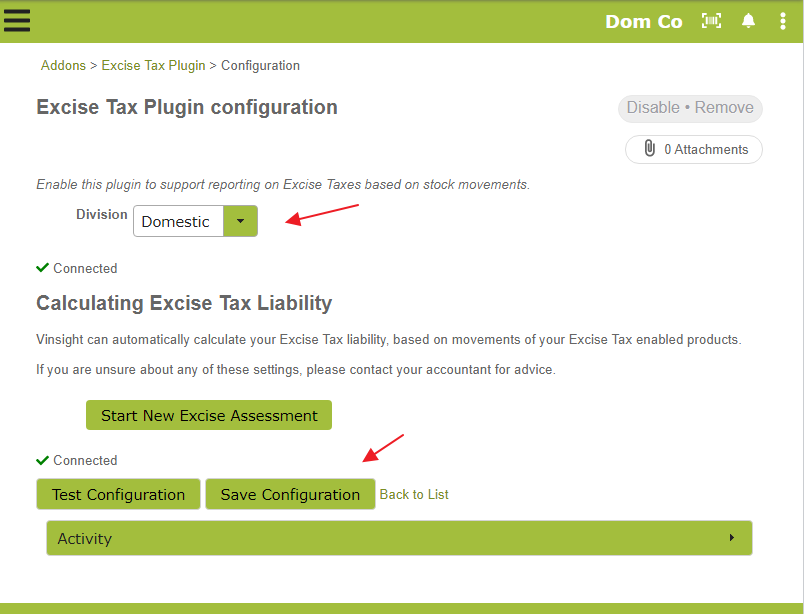
Here, ensure you select the Division and then click ‘Save Configuration’.
3. Enable Alcohol By Volume Plugin
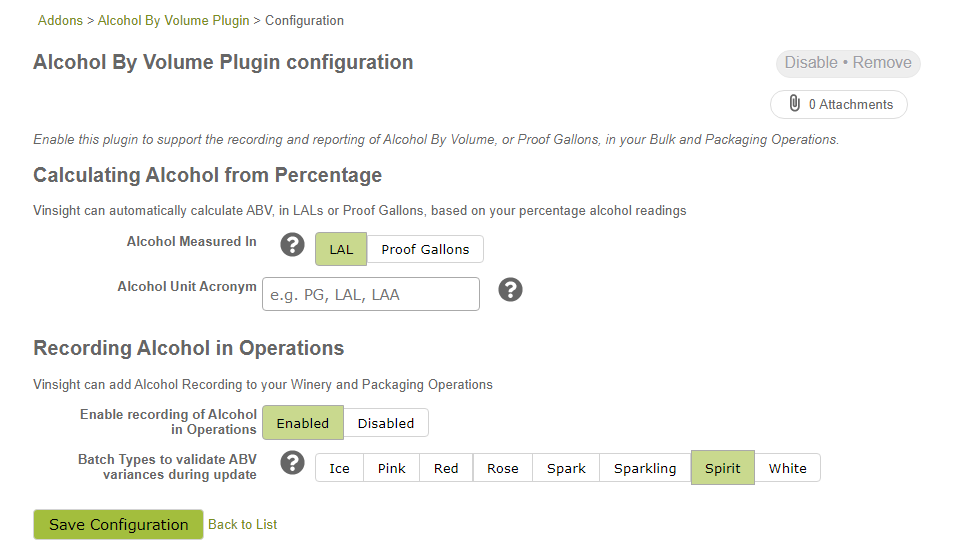
If you are a distillery, or any of your products are subject to an excise tax that is calculated on a per litres of alcohol or per proof gallon basis , you will also need to configure the Alcohol By Volume Plugin. To do this, go to Settings > Addons and filter by ‘Production’ to find the Addon.

Click ‘Setup’ and then configure the plugin as required. Click on the question marks if you are uncertain as to what a particular field does or sets. If you are a distillery that tracks LALs or PGs in bulk operations, you will want ‘Enable recording of Alcohol in Operations’ set to ‘Enabled’. However if this is not something you do and you require this plugin only for Excise Tax purposes you are better to set this value to ‘Disabled’, so that you are not confused by this extra layer in operations.
Setting Up Tax Type and Rates
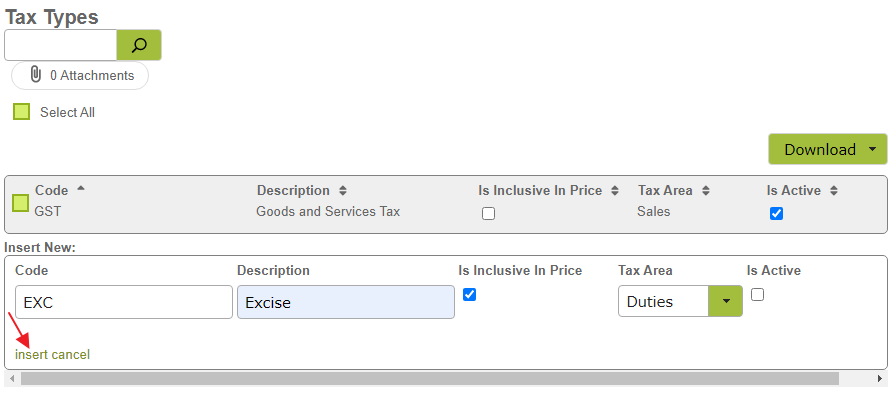
Go to Tax Types in the Settings > Account area, add ‘EXC’ as a Tax Code, enter a relevant description. Select ‘Duties’ from the Tax Area drop down menu and select the checkbox indicating it ‘Is Active’. Don’t forget to click ‘insert’ once you have entered this information.
Next go to the Tax Rates in the Settings > Account area and enter the relevant Excise Tax amounts. Ensure that the Tax Type is marked as ‘EXC’ and that the ‘Is Active’ check boxes are selected. Remember to click ‘insert’ at the end of each line.
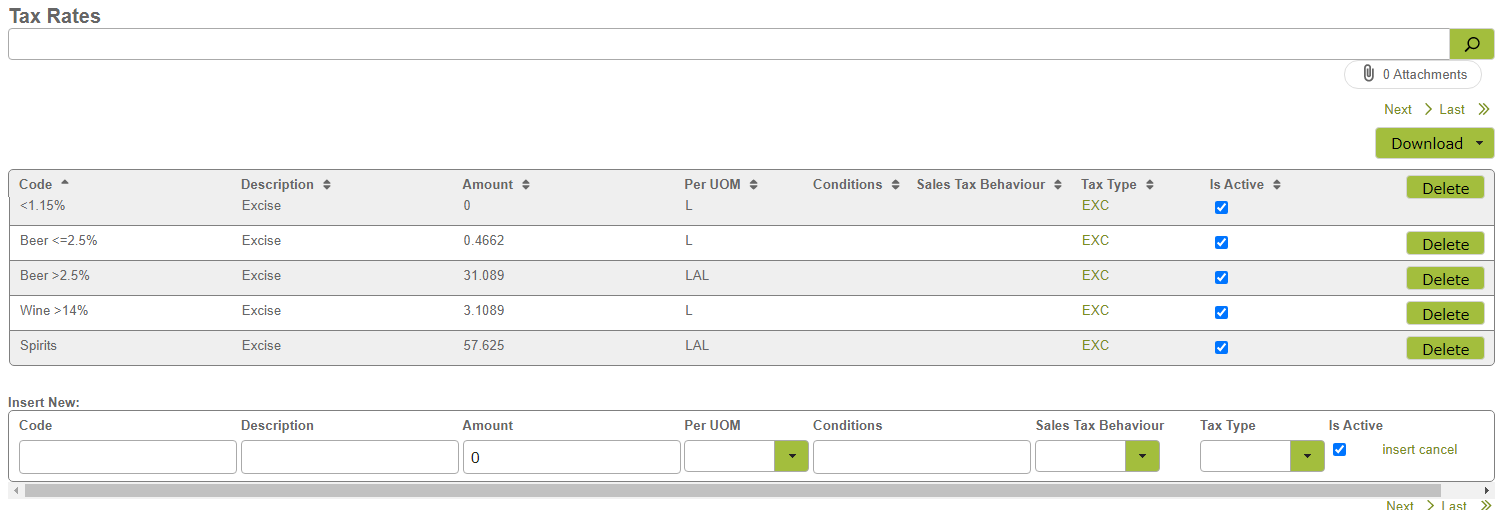
Please note that the ‘LAL’ Unit of Measure stands for ‘litres of alcohol’. If you need to enter this value, but do not see it in the drop down list, you will first need to add it to your Units of Measure at Settings > Units of Measure.
These rates will depend on which country you are in, here is an example from Australia (you are responsible for maintaining the rates) :

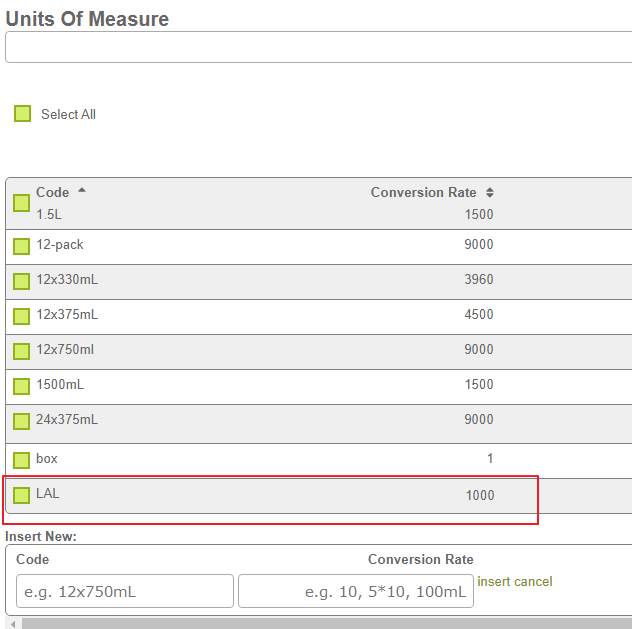
The same applies to proof gallons. If working in gallons and proof gallons, you will need to ensure this unit of measure is listed. The Code for this would be ‘PG’ and the Conversion Rate, ‘3785.41’.
Excise Duty Rates and Information by Country:
The following websites may be useful in determining rates, but please note, these are subject to change. In New Zealand, for example the rates are updated annually.
Setting Bonded Locations
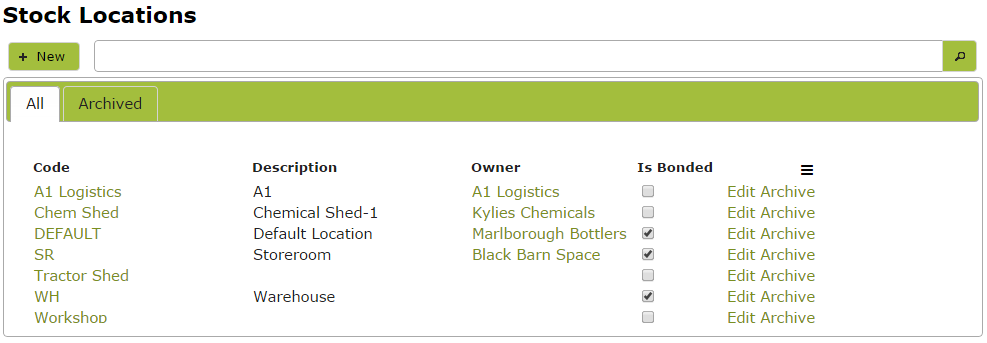
As Excise Tax is assessed as wine is removed from ‘bond’, you first need to ensure that your ‘bonded wine premises’ are marked as such. Go to ‘Stock Locations‘ in the Settings > Count area and select the “Is Bonded’ checkbox next to each of your bonded locations
Review Tax Liability for Contacts and Stock Items
The accuracy of your reporting relies on how you mark the liability settings of Contacts and Stock Items i.e are the products and the people you sell them to liable for Excise.
Contacts should be reviewed and the “Excise Tax Liable” value set based on their Excise Liability. For example Export customers would not be liable but regular domestic customers would be.
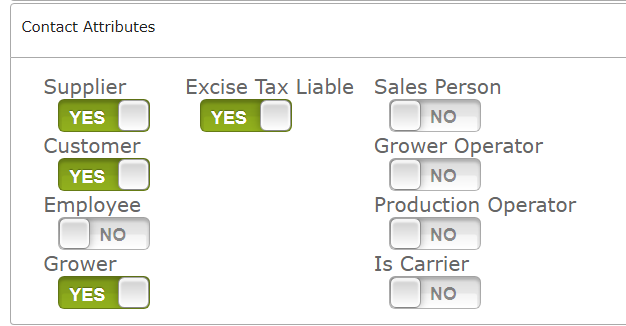
If your customer has a special Excise Rate (eg they are a food producer that has a concession) then you can enter this in the Contact, but be aware this will override all the calculations for that customer. You enter this in the Tax Overrides section of the Contact page:

This is also true for Stock Items that you are selling and purchasing. Products such as wine, cider, beer and spirits should be marked as liable in the ‘Excise Tax Liability’ area of the stock item, whereas other items such as t-shirts or promo items should be marked not-liable.

Percentage Alcohol By Volume: Set this property if the relevant tax rate is calculated per LAL (e.g. Spirits in the Tax Rates example above). Vinsight will need this value to determine amount of tax due. You do not need to set the ‘Percentage Alcohol By Volume’ if the relevant tax is calculated by overall volume (as e.g. Wine is in the Tax Rates example above).
Excisable Percentage Alcohol By Volume: You only need to set this property if the ‘excisable’ percentage of alcohol is different from the actual percentage of alcohol in the product. For example, if you are in a jurisdiction where the first 1.5% of alcohol of a particular product is not taxable, you would put the actual percentage of alcohol in the Percentage Alcohol By Volume field (6% in the following example) and the excisable percentage in the ‘Excisable Percentage Alcohol By Volume’ field (in the following example, 6 – 1.5 = 4.5%).

Similarly if your regulations specified, for example, that a product within a range of 11% to 14% alcohol should be taxed as if it were 12.5% alcohol (and the tax was calculated over alcohol volume rather than overall volume), you would include the 12.5% figure in the ‘Excisable Percentage Alcohol By Volume’.
Example Calculations:
- 700ml bottle of gin, with 41 percent alcohol being taxed at $57.625 per litre of alcohol the excise tax will be 0.7 x 0.41 x 57.625, so roughly $16.538 – Requires value for Percentage Alcohol By Volume.
- 750ml bottle of wine with over 14% alcohol being taxed at $3.1089 per litre the excise tax will be 0.75 x 3.1089, so roughly $2.33 – Does not require value for Percentage Alcohol By Volume.
- 330ml can of beer with alcohol content of 5% being taxed at $57.79 per litre of alcohol, where tax is only payable on the alcohol content above 1.15% by volume in the finished product. Requires value for Excisable Percentage of Alcohol By Volume (5%-1.15% = 3.85%). The excise calculation will be 0.33 * 0.0385 * 57.79, so roughly $0.73.
In addition, you need to open the ‘Sales, Purchases and Taxes’ part of the Stock Item and add the relevant tax rate to the ‘Other Sales Taxes” area.
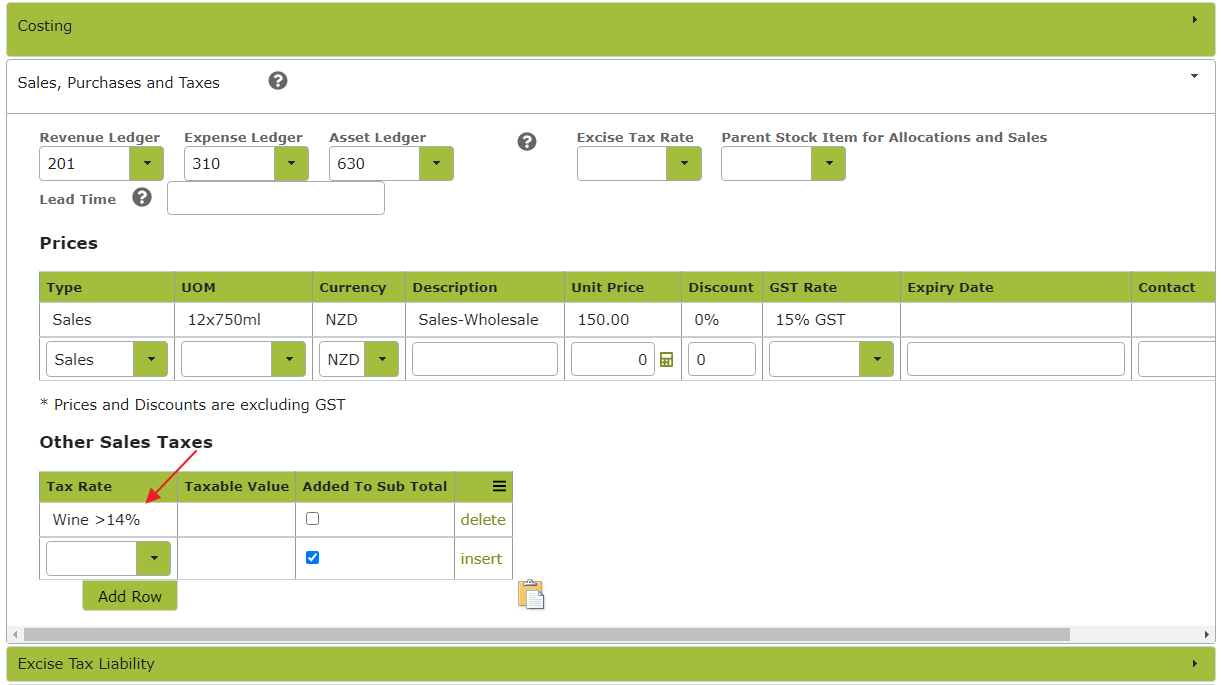
You may notice another Excise Tax Rate setting in this area of the Stock Item.

**Please note this is a setting for the old style report and you are not required to set it. This setting is likely to remain visible until we have converted all customers to the new style report. If it has been set, this is nothing to worry about either. It will not impact your data in any way.
