Stock Items
Overview
Stock Items in the Settings > Count area provides you with a way to manage your Stock Items. It encompasses bulk and grower additives, packaging and finished items. Set different attributes to identify whether you can sell or purchase the item, its tax liabilities and whether you want to track its inventory levels.
In this document:
Searching
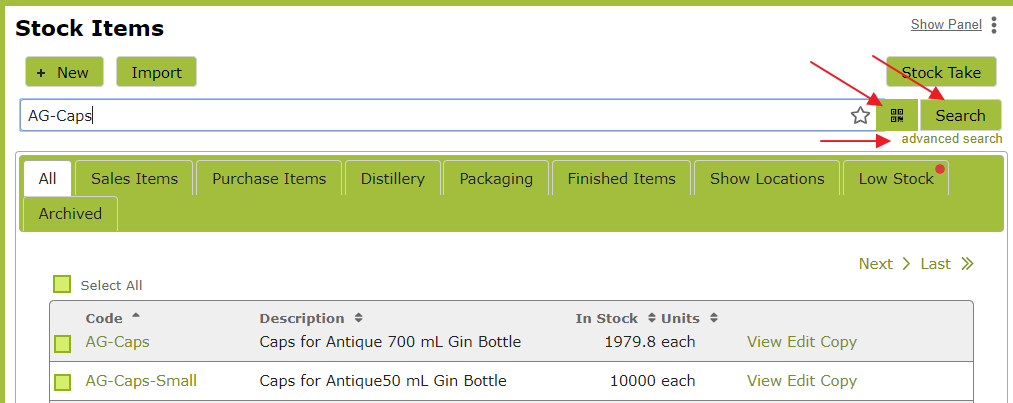
The Stock Items list works in the same way as all the other major lists in Vinsight. You can search for particular stock items by using the search box located next to the ‘New’ button near the top of the screen or the advanced search button directly below that. Also if you are on mobile (iPhone or Android) you can search for a product by scanning the barcode as well.
Creating
To create a new Stock Item, go to the Stock Item list in the Count > Stock Items area and click the ‘New’ button towards the top of the page. The properties of a Stock Item are divided up into different sections to make it easier to understand what’s going on. Each of these areas is dealt with separately below:
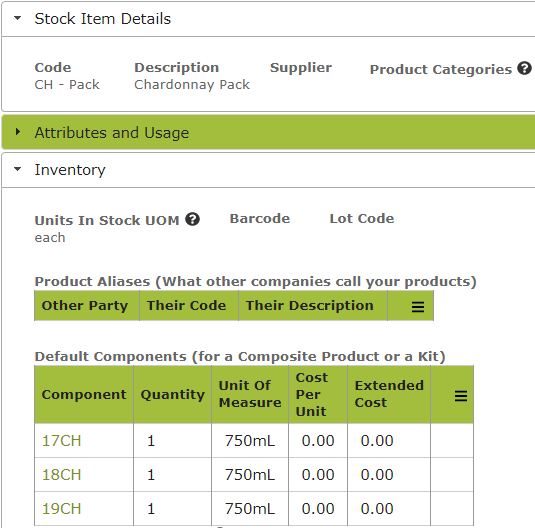
Stock Item Details
The Code field is required here. You can also give the Stock Item a description and a supplier. You should set yourself as the supplier if you are selling the item.
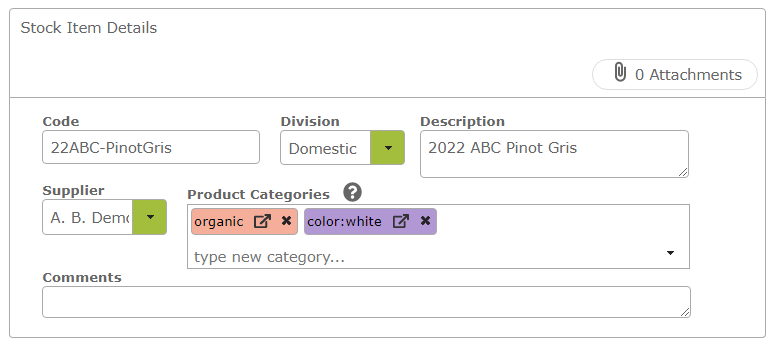
Product Categories are used so you can group products that are similar or substitutes together for reporting or operational use. You can have multiple categories for the same item. You can use either a simple category like organic or a category that has a value, like color:white, region:north or year:2015
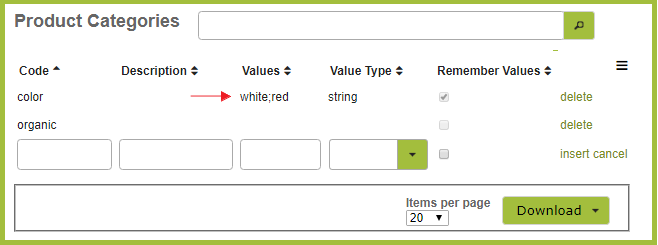
You can type a new category directly into the ‘Product Categories’ text box. Click ‘return’ or ‘enter’ after each new category that you add to ensure they are added separately. If typing a new category, it will automatically be added to the ‘Product Categories‘ (found in the Settings > Count area ). In the following example we have added ‘color:red’ as well as ‘color-white’ and ‘organic’. You can see that, when you look at the ‘Product Categories’, the values ‘white’ and ‘red’ are both listed as options in the ‘color’ category.
Attributes and Usage
This section tells Vinsight what type the item is and what you can do with it. If you tell Vinsight to track the inventory, it will keep a record of how much stock you have and , when you use some of the item, it will automatically decrease the quantity for you.

Stock Items are treated differently in the App depending on the attributes you set for them. Some key things to remember when setting attributes:
Bulk Additive: All ingredients/additives (e.g. yeast, sugar) should have this attribute set. Only stock items with this attribute set will appear in the drop-down list of possible ingredients in bulk operations.
Grower Additive: This is for items such as herbicides or pesticides (or even vineyard labour if required). Only stock items with this attribute set will appear in the drop-down list of possible additions in grower operations.
Packaging: All packaging items (e.g. bottles, caps, labels or cartons) should have this attribute set. Only stock items with this attribute set will appear in the drop-down list of possible packaging when bottling or labeling a product in the App.
Packaged Item: This attribute should be set for all finished products that you produce, e.g. 21-PT-CH-750ml. This attribute is used in the App to distinguish the stock items you produce from those used as packaging or ingredients.
Can Purchase / Can Sell: Setting the ‘Can Purchase” or “Can Sell” attributes will determine whether these items will appear in the drop down lists for Purchase Orders or Sales Orders.
WET Liable / Wine Tax Liable / Tax Liable: The particular attribute you see here may depend on the country you are in as well as which variant you are using (e.g. Wine, Beer, Cider, Spirits). This indicates whether the product would attract wine or other excise taxes.
Track Inventory: Select the ‘Track Inventory’ attribute for any items, whose quantity in stock you wish to track. These could be ingredients, packaging, finished items or any other sales or purchase items.
If a Stock Item is missing from a drop down list anywhere in the App, it will often be an ‘attribute’ issue. If this happens to you, check that the stock item’s attributes have been correctly selected.
Inventory / Conversion Rates / Operations
Here you are required to input various units of measure and their conversions. Go to Stock Item Units of Measure, for detailed information about the Inventory, Conversion Rates and Operations areas of the Stock Item or visit the following links, individually:
- Units In Stock UOM
- Base, Inner and Outer UOMs
- Stock Item Conversion Rates
- Stock Item Operations UOMs
Costing
Standard Cost is the cost per unit of stock item. When you use some of the stock item in an operation, this standard cost is used to work out what cost to attribute to the product the stock item is being added to. For example if the standard cost of a kg of PMS is $20 and you add 1 gram to a vessel, the bulk product in that vessel gets attributed with $0.02 (0.02 cents) as the cost of the added PMS.

For more information on setting the Standard Cost for a Stock Item see Setting Standard Costs.
Sales and Purchases
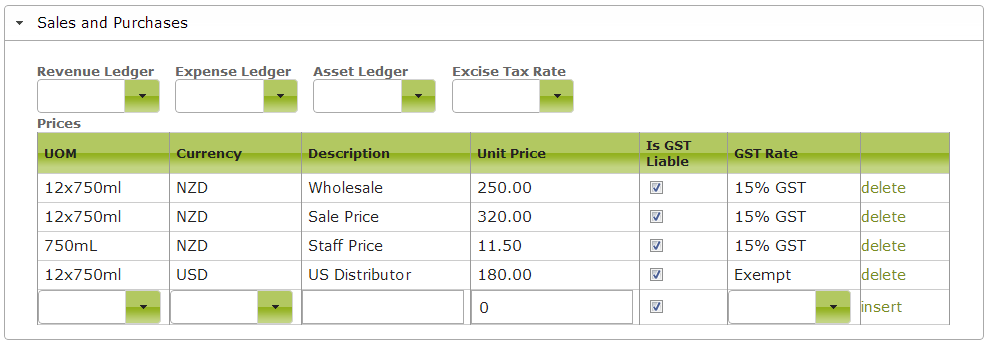
This section is where you detail how much you buy and/or sell the Stock Item for. For subscription levels that support price books, you can have multiple prices for each product and in different units of measure. Ensure that you correctly identify the price as ‘Sales’ or ‘Purchases’ in the Type column as the ‘Sales’ price will come up as the default price when creating a Sales Order for that product, currency and unit of measure. (You don’t want to mistakenly sell stock at the ‘Purchase’ price.) You can use the Prices table to build up different prices for Units Of Measure and Currency. There is also a place to set the Tax Rate of the item. The description field can be used to label prices for different customer categories.
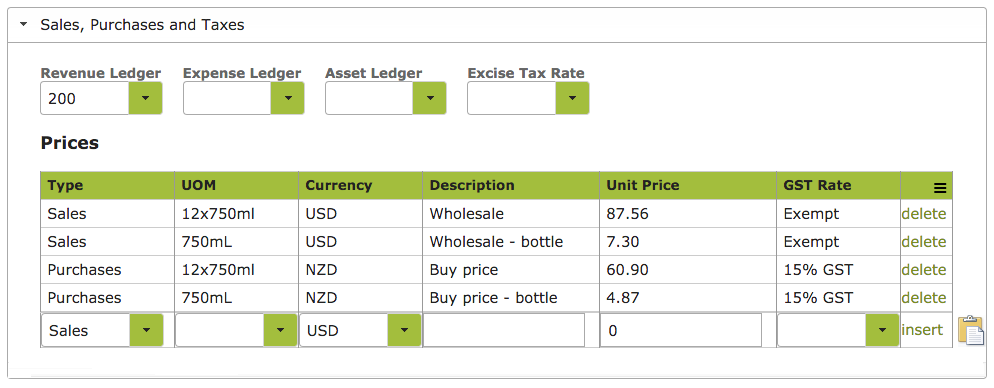
Make sure you press the “insert” link at the right side of the row you are inserting so it gets saved in the system.
For subscription levels that don’t support price books, you can define one sale price, then if needed you can override that price in each sales order. Purchases will auto-suggest the standard cost as the purchase price.
Ledger Codes for Xero
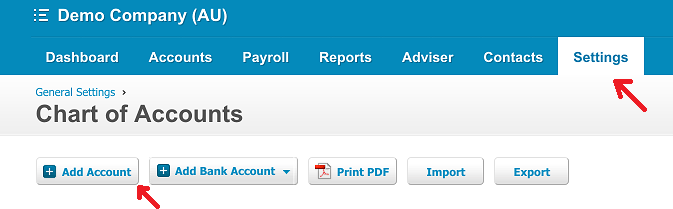
The Ledger Codes in the Sales and Purchase section are used when you post a Sales Order or Purchase Order to Xero. (If you do not use Xero, simply leave these ledger fields blank.) You can use the default codes set in Xero or you can create your own ledger codes. For example, you could to break your sales down into ‘201 Sales-Wine’, ‘202 Sales-Food’ and ‘203 Sales T-Shirts’. If you create your own codes, you must remember to add these Account Codes to your Xero account, using the ‘Add Account’ feature in the’Chart of Accounts’ area of the ‘Settings’ tab.
You can have combinations of letters or numbers as Ledger Codes, e.g. 200, 999, 260-a. Below is an example of Ledger codes being used in Vinsight and Xero:
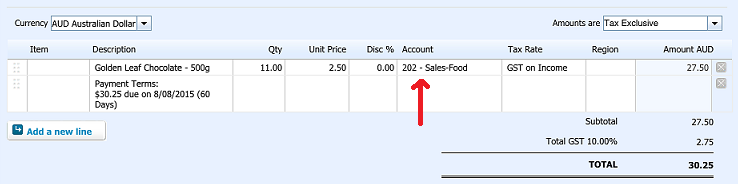
If you would prefer to break your sales in Xero down by customer type, for example, Sales-Export, Sales-Domestic and Sales-Direct, you do not need to fill in the ‘Revenue Ledger’ in the Stock Items. Instead edit the ‘Default Revenue Ledger Code’ in the ‘Ordering Details’ area of customer’s Contact page. See Contacts – Revenue Ledger Code for more details.
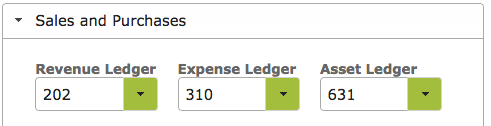
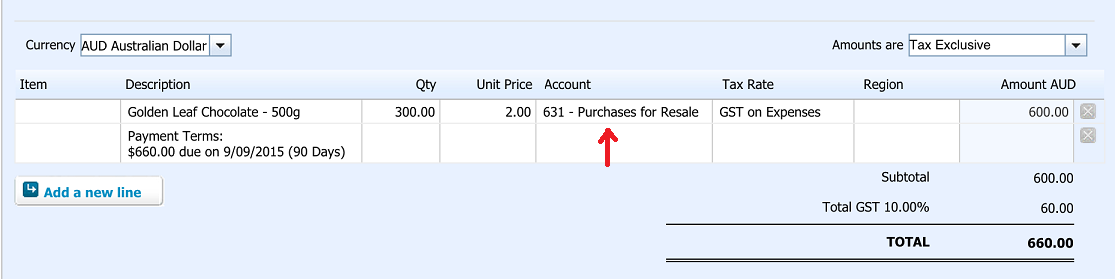
As the Stock Item, we are looking at here, Golden Leaf Chocolate, is something we purchase as well as sell, we have also entered codes in the Expense Ledger and Asset Ledger Fields. We have used the Xero Default Code “310 Cost of Goods Sold” in the Expense Ledger and a custom code we have created called “631 Purchases for Resale” in the Asset Ledger.
The Asset Ledger Code is the one that will show up on a purchase order posted to Xero for that product.
In summary, you need to decide how you wish to code items in Xero first and then put those codes into Vinsight.
Stock Allocations
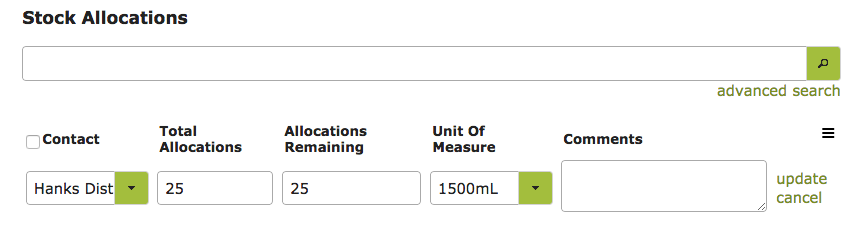
In this section you can allocate specific quantities of the stock to different customers. The allocation will be tracked and generate a warning if you try to sell more than the allocated amount to any particular customer.
In the following example, we allocate 25 of the 2012 ABC Chard Magnum to Hank’s Distributors.
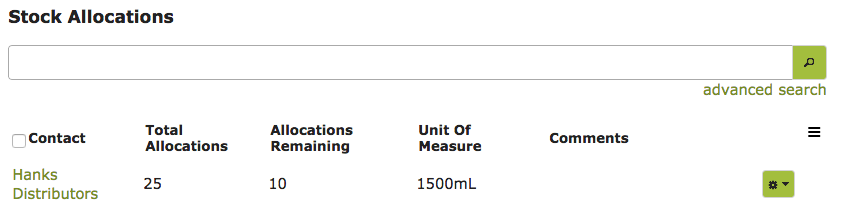
If we went on to despatch a sales order for 15 magnums of the 2012 ABC Chardonnay to Hank’s Distributors, the allocation will reduce accordingly to 10.
If we then proceeded to create a further sales order for another 20 magnums (exceeding the Allocations Remaining), we would receive a warning:
![]()
For more information see Stock Item Allocations.
Using Lot Codes
Lot codes are useful when you wish to track different ‘lots’ of the same Stock Item in inventory, but sell the item as a generic product, without specifying a particular lot code. This feature is available on our Standard or Premium subscriptions. (If you are wanting to track lot codes / expiry dates in items you purchase for use in your production process, rather than to sell, see Stock Item Expiry Dates instead.)
To use lot codes, first create and save a generic parent stock item (or identify an existing Stock Item that you wish to track by lot code).
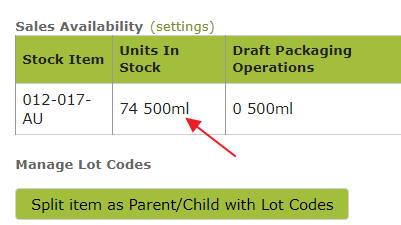
Once saved, expand the Inventory area of the stock item and look for the ‘Split item as Parent/Child with Lot Codes’ button. (If you cannot see this button, check that the ‘Can Sell’ and ‘Track Inventory’ attributes in the Stock Item are switched to ‘YES’ ).
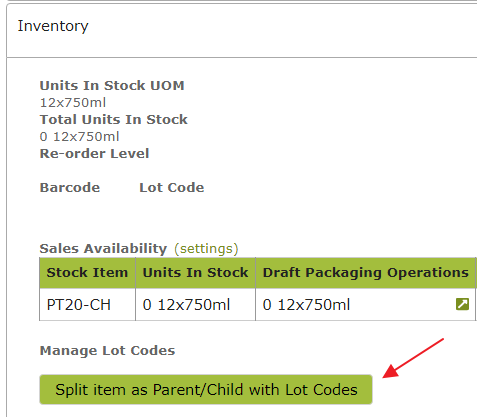
Clicking this button will bring up a window allowing you to name your first lot code.
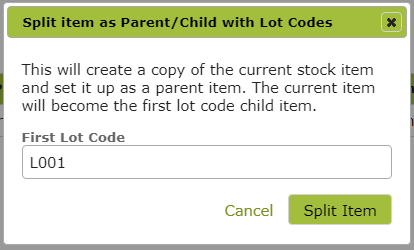
Click ‘Split Item’ to create the child Stock Item. You can repeat this process to add additional lots codes.
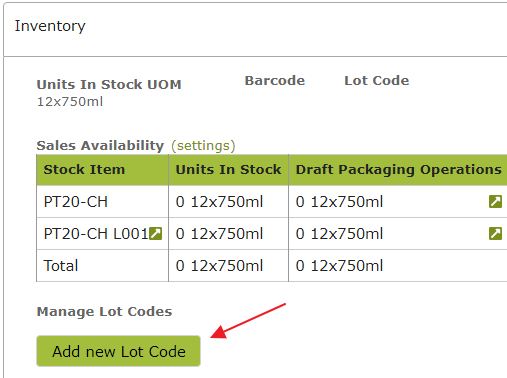
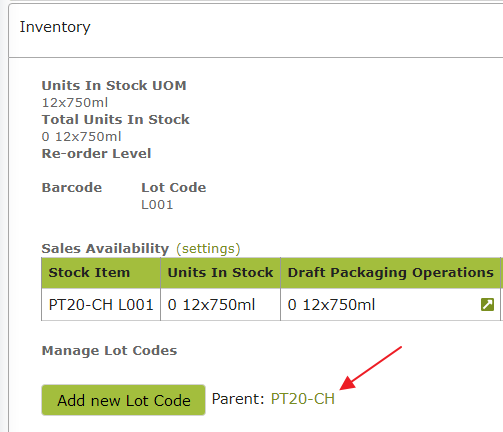
You will see the child stock items listed in the inventory area of the parent stock item as in the above image. Similarly if you expand the ‘Inventory’ area of one of the child stock items, you will see a link to the Parent.
If the Stock Item you are splitting has existing inventory in stock . . .
this inventory will be allocated to the first child stock item you create.

You do not need to have ‘WET Liable’ switched on in the child Stock Item as WET will be tracked through the parent. However we suggest that you leave it on anyway if the parent Stock Item is WET Liable, as there is no harm in doing so and it is less likely to cause confusion if this attribute is consistent with the parent.
When selling this product, simply select the parent item from the Stock Item drop down list on the Sales Order.

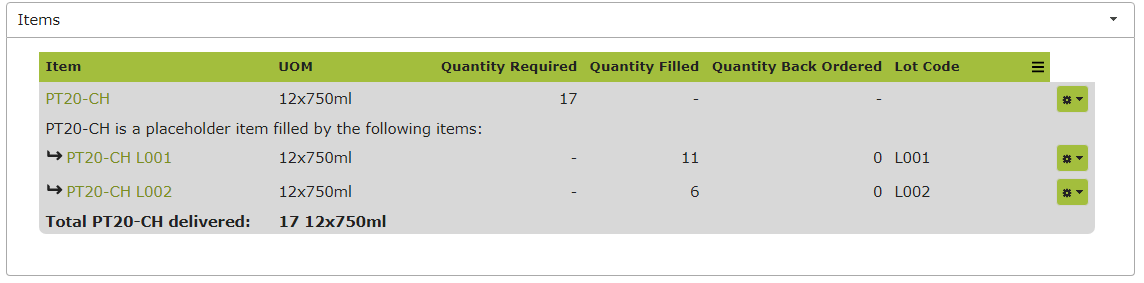
When you ‘Pick for Despatch’, and select the relevant Despatch location, you will see how the order will actually be fulfilled. Here our order for 17 cases of Plaintree 2020 Chardonnay is being fulfilled with 11 cases of PT20-CH-L001 (Lot Code L001) and 6 cases of PT20-CH-L002 (Lot Code L002).
Composite Products (Kits)
As well as creating individual products, Vinsight also enables you to create Composite Stock Items, made up of other individual Stock Items. For example, if you wish to market and sell a selection of different finished items in a single case, such as a ‘Summer Selection’ or ‘Red Selection’, you can create a separate Stock Item for that selection. When creating a new Composite Stock item, simply enter the relevant components in the Inventory area.
Ensure that the Purpose of Components slider is set to ‘Parts of a Kit’.
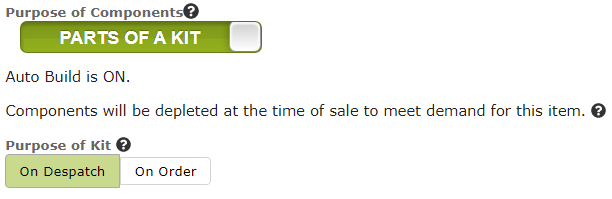
By default Vinsight expands Kits “On Despatch”
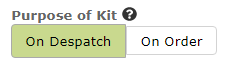
Purpose of Kit – On Despatch
When despatching an “On Despatch” Composite Stock Item, Vinsight will take care of selecting the individual bottles and removing them from inventory.

Purpose of Kit – On Order
This should be selected if you need to report on the sale of Kit Components or Kit Components has different Tax being applied e.g. WET or GST Free.

When saving a sales order with an “On Order” Composite Stock Item, Vinsight will expand the kit on the order.
For this to work you need to have a few prices setup in Vinsight.
First you need to pick a price list for the Composite Stock Item

Then you need to make sure that your Component Stock Items have that price list for the specific Unit Of Measure

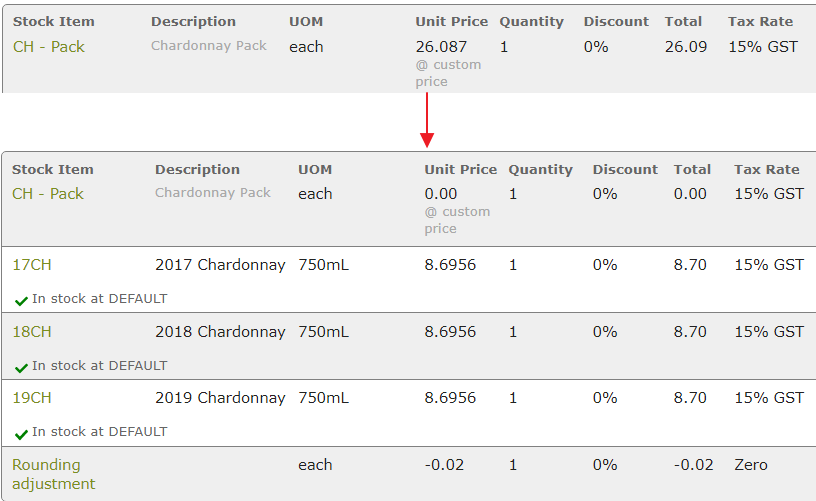
In the example I have setup, the Composite Stock Item sells for $30 GST inclusive with each of the Component Stock Items selling for $10 GST inclusive.
You will have noticed that the total price of Component Stock Items equals the price of the Composite Stock Item which means no discount was applied.
Purpose of Kit – On Order with Discount
Using the previous example. If we sell the kit now at $25 GST inclusive, this will happen when the item expands in the order.
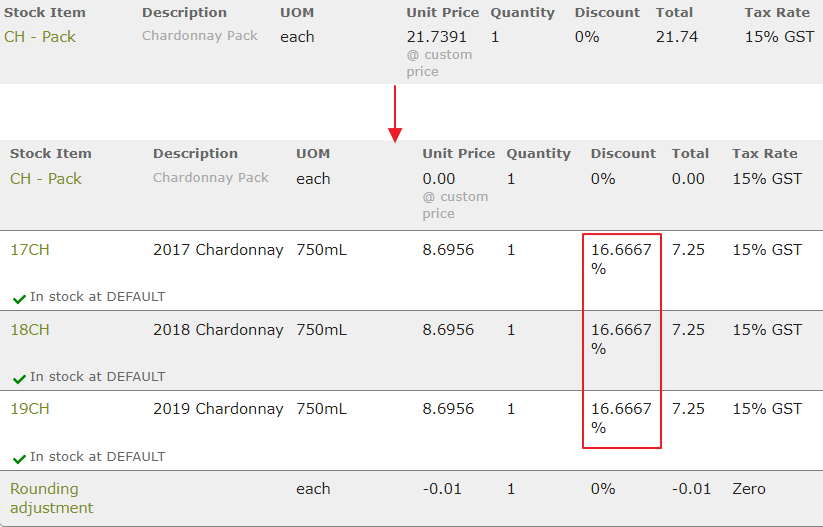
Since the total Price of Component Stock Items = $30 GST inclusive and the Composite Stock Item Price = $25.
We now apply a 16.67% ((25 – 30) / 30) discount on each of the Component Stock Items.
Purpose of Kit – On Order with GST Free Items
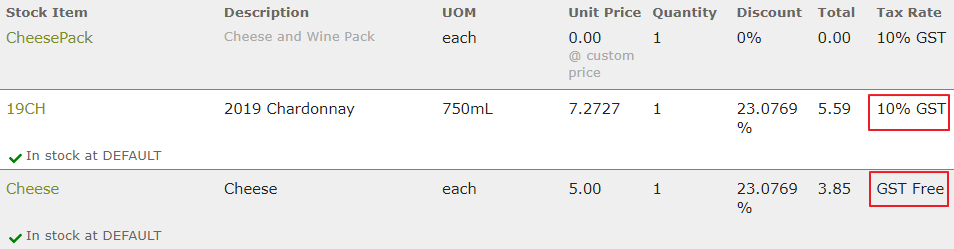
This example is set in Australia (using 10% GST) since they have Goods and Services that are GST Free.
We will be selling a Wine and Cheese pack


Here the Wine Price is $8 GST inclusive (after 10% GST)

And the Cheese Price $5 GST inclusive (After 0% GST)

This makes the total GST inclusive price of the Component Stock Items = $13 (8 + 5)
If we sell the pack for $10 GST inclusive, we make the assumption that the whole $10 has 10% GST included.
This makes our unit price 9.0909 (10/1.1) with a Tax Rate of 10% GST.

Since discount is calculated from GST inclusive prices, discount will be 23.08%((10-13)/ 13) after saving the sales order.
Composite Products with Lot Code Tracking
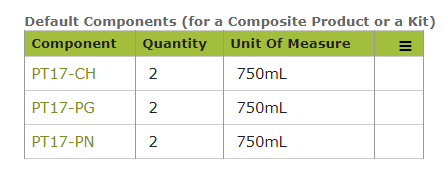
If the Composite Stock Item contains products you are tracking with lot codes (see Using Lot Codes ), simply select the generic parent products as the default components for the Composite Stock Item. Here we have created a ‘Mixed Case’ with the following default (lot code tracked) components.
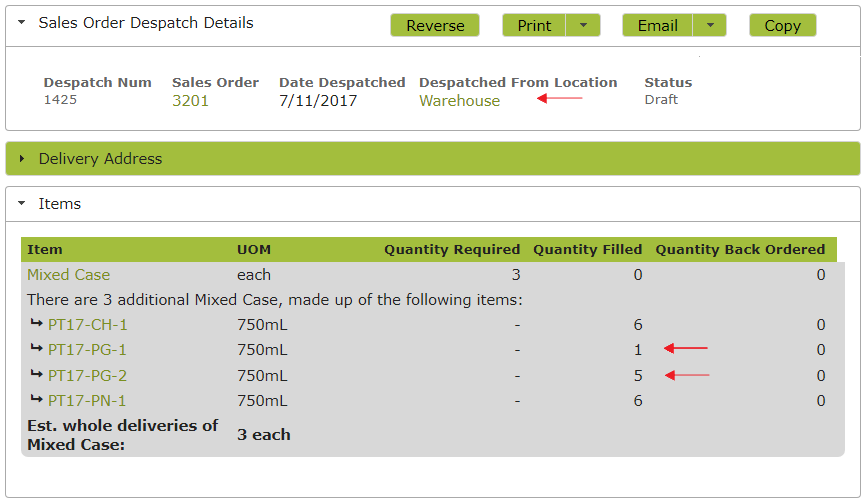
When picking for despatch following a sale, ensure that the ‘Despatched From Location’ is set to see a breakdown by lot code of the products used to make up the Composite Product.
In the following Despatch Note, you will see that, while the ‘Mixed Case’ is not present in stock as a separate item, there are sufficient products in stock to make up the 3 Mixed Cases required. In the case of PT17-PG, one of the six bottles required will be from Lot Code 1 and five from Lot Code 2.
If there are insufficient products in stock, the balance will be filled with the latest lot code temporarily and a warning to this effect will be present.
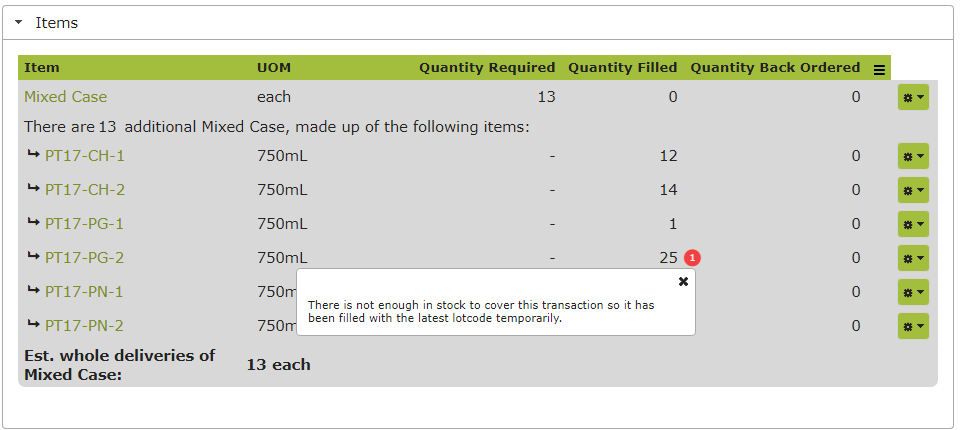
If the balance will, in reality, be filled with a new lot code, e.g., in the above example, PT17-PG-3, simply delete and then re-create this despatch, once the product with the new lot code has been brought into stock (through e.g. a purchase or a packaging operation).
Bill of Materials
An individual stock item such as a carton of bottled beverages may include other stock items you are tracking such as bottles, caps and cartons. These items can be detailed in the Inventory area of the composite Stock Item in question. These components will then be automatically added to operations during the manufacture of the item.
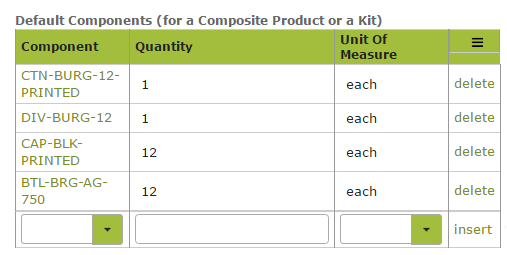
To create a Bill of Materials go to the Default Components section in the Inventory area of the Stock Item.
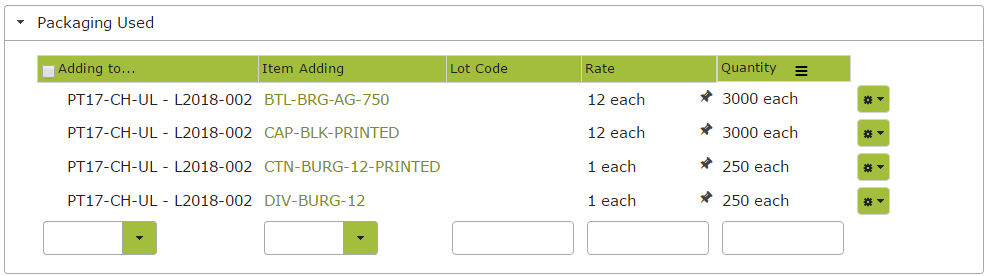
Select the default components you wish to include from the drop down list provided. Ensure that you select a quantity that corresponds with the unit of measure of the stock item itself. For example if the composite stock item is a 12 x 750ml carton of bottled product, then you might want to add one carton and one carton divider, but 12 bottles and 12 caps. See example below,
Ensure that the Purpose of Components Slider is set to ‘Bill of Materials’
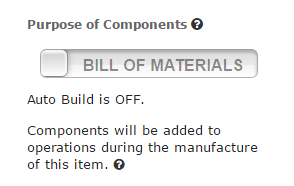
When bottling the default items will appear in the Packaging Used part of the packaging operation and take care of depleting them from inventory.
>> Vineyard