Overview
A Stock Take in Vinsight is the operation of adjusting stock item levels so that their recorded units in stock reflect what you physically have in stock.
In this document:
Video – How to record a Stock Take or adjust stock in Vinsight
Overview of Workflow
The basic workflow of a Stock Take is as follows:
- Download a spreadsheet from Vinsight that includes the Stock Items you want to adjust.
- Populate the spreadsheet with the correct stock levels.
- Upload the new spreadsheet back to Vinsight.
- The system will then go and create a Purchase Order for each location and receive them for you automatically.
Detailed Workflow
The first step to doing a Stock Take in Vinsight is to go to Stock Items in the Count > Stock Items. From there you can click on the “Stock Take” button:

This will open up the Stock Take view. Here you need to tick all the areas you are interested in adjusting. You can refine the spreadsheet by Location and by Stock Item type. If you leave everything unchecked, the spreadsheet will contain all stock items for all locations:
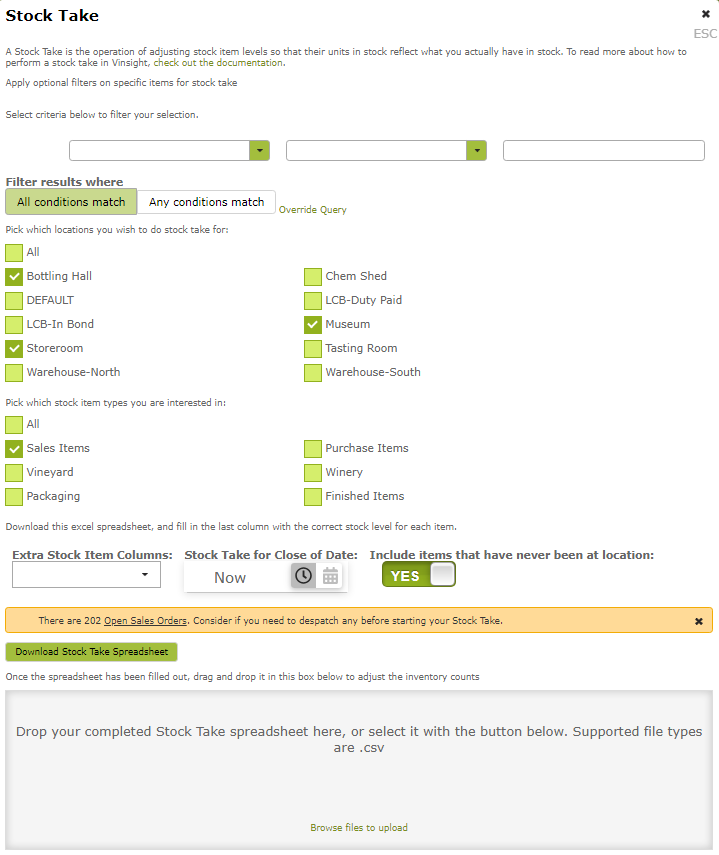
Also note that you can change the date that the stock take applies to. For example, you could do a Stock Take for the end of the previous month after the fact. Stock that is adjusted for a day in the past will come in to effect at the end of the selected day:

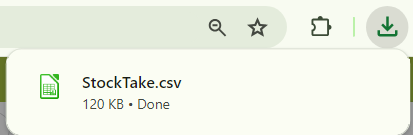
Click “Download Stock Take Spreadsheet” to download the spreadsheet to your computer. If you browser asks, you should press “Save”. A good place to save it is on your desktop, so that you can easily access it again when you are uploading it back to Vinsight:

Now open the file that you saved in Microsoft Excel or LibreOffice. It will look like this:

Enter the new unit in stock number under the column “Correct Units In Stock” (NB: If you type in the Current Units or make both columns the same the system will not see this line as needing adjusting).
You can also choose to edit the “Or Net Adjustment” column instead of “Correct Units In Stock”:

Save the spreadsheet, it may ask you if you are happy to save in csv format, just say yes:

Now take the saved spreadsheet file and either drag it in to the box at the bottom of the Stock Take view or click on the button to browse your file system for it:

Once you have uploaded the spreadsheet, you will be taken to this page:
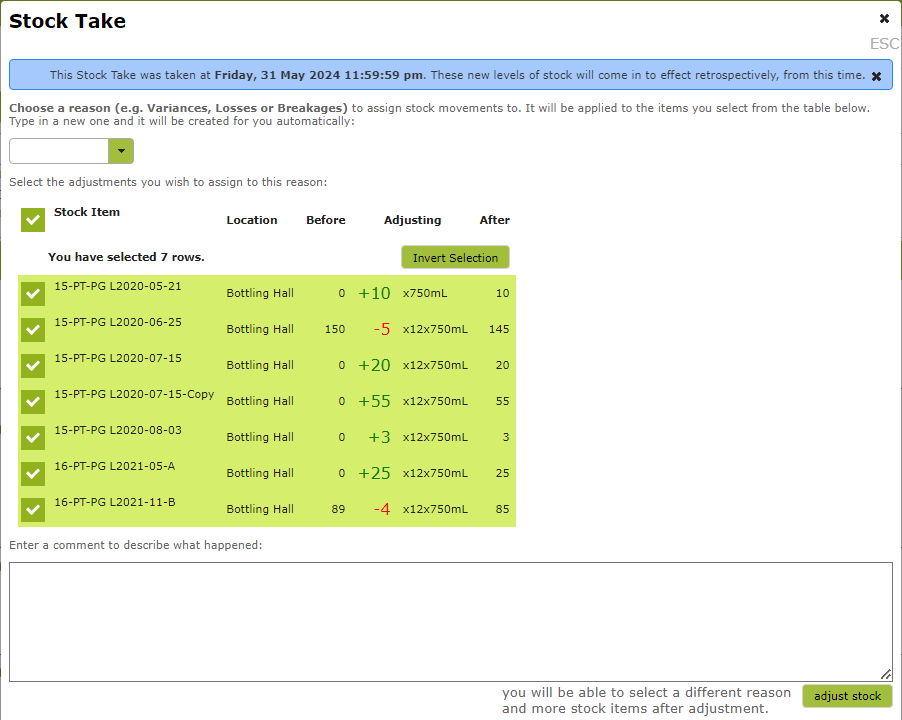
Here you can select reasons as to why the stock items are out of sync, for example “Breakages” or “Losses”. If the reason you wish to provide is not already in the drop down list, simply free type it in to the text field. In the table, you should check all the lines that relate to that reason, and then press “adjust stock”. If you have multiple reasons, just do them one at a time. After each adjustment, you will be taken back to this page to select more items and give them a different reason.
Pressing “adjust stock” will automatically create a Purchase Order for each different location of the selected items. It will use positive quantities to increase the stock level and negative ones to decrease it. The Purchase Order will be given a contact with the same name as the account reason you chose above. Then the Purchase Order will be automatically received to the correct location for you, so you don’t have to do anything after that.
When everything has finished, you will be presented will this screen. You can now close the view:
Stock Take Losses & Xero
When stock is adjusted down in Vinsight, using the Stock Take feature, a purchase order with negative quantities and a zero cost is created. When this purchase order is posted to Xero, it posts a zero amount to the ‘stock item asset ledger’ and a corresponding zero balance to the ‘accounts payable’ account. It will therefore have no impact on your accounts. The Stock Take feature is designed primarily to keep track of inventory levels in Vinsight.
Some customers choose to edit the ‘Breakages’ purchase order created to assign it a cost to reflect the resulting loss. When posting to Xero, this will post a negative amount to the ‘stock item asset ledger’ and an offsetting balance to the ‘accounts payable’ account. If you choose to do this, you will need to take the following steps to ensure your stock take adjustments translate smoothly into Xero.
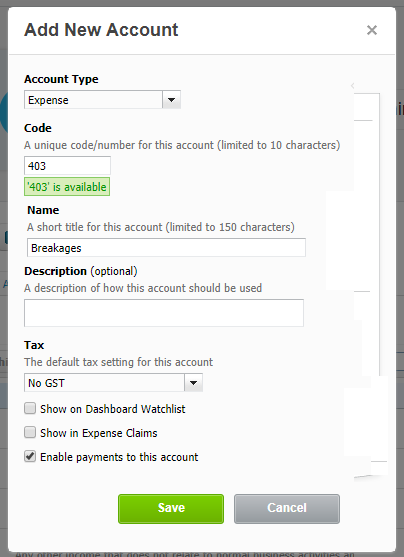
First, set up an expense account (or accounts) in Xero to deal with non-sale stock depletion, such as ‘Breakages’.
New accounts can be added in Xero by opening your Xero accounts and going to the in Settings > Chart of Accounts area . . .
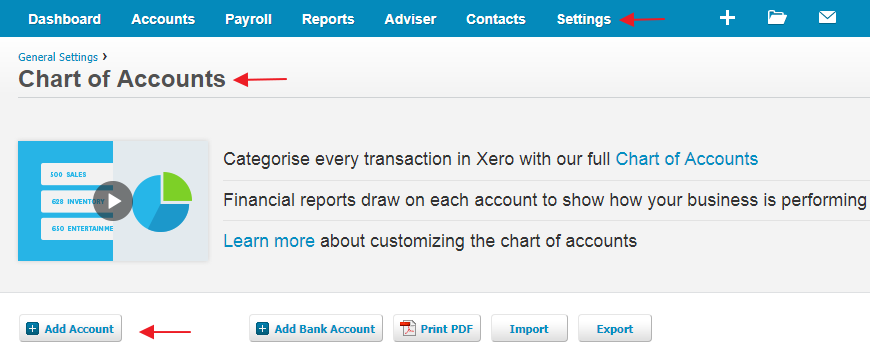
. . . and clicking ‘Add Account’.
Then you can apply a refund from this account to the credit note created.

The net effect of this is that stock asset decreases and the breakage expense increases.