Shipping Bulk Under Bond -Australian Excise Example
Overview
Use Bulk Despatches to despatch bulk out of a tank and the production facility e.g. when you sell bulk wine/beer/spirits or you are sending this back to a contract customer. If you are shipping this under-bond so that you do not create an Excise Duty Liability, you can set up documentation to support these requirements, such as a movement under bond with a movement permission.
This is common practice around the world and in many jurisdictions. Below is an example for Australian compliance , however you may also wish to see our New Zealand Example for documenting transfers between CCA bonded areas. Techniques from both of these may apply globally.
In this document:
Example Document
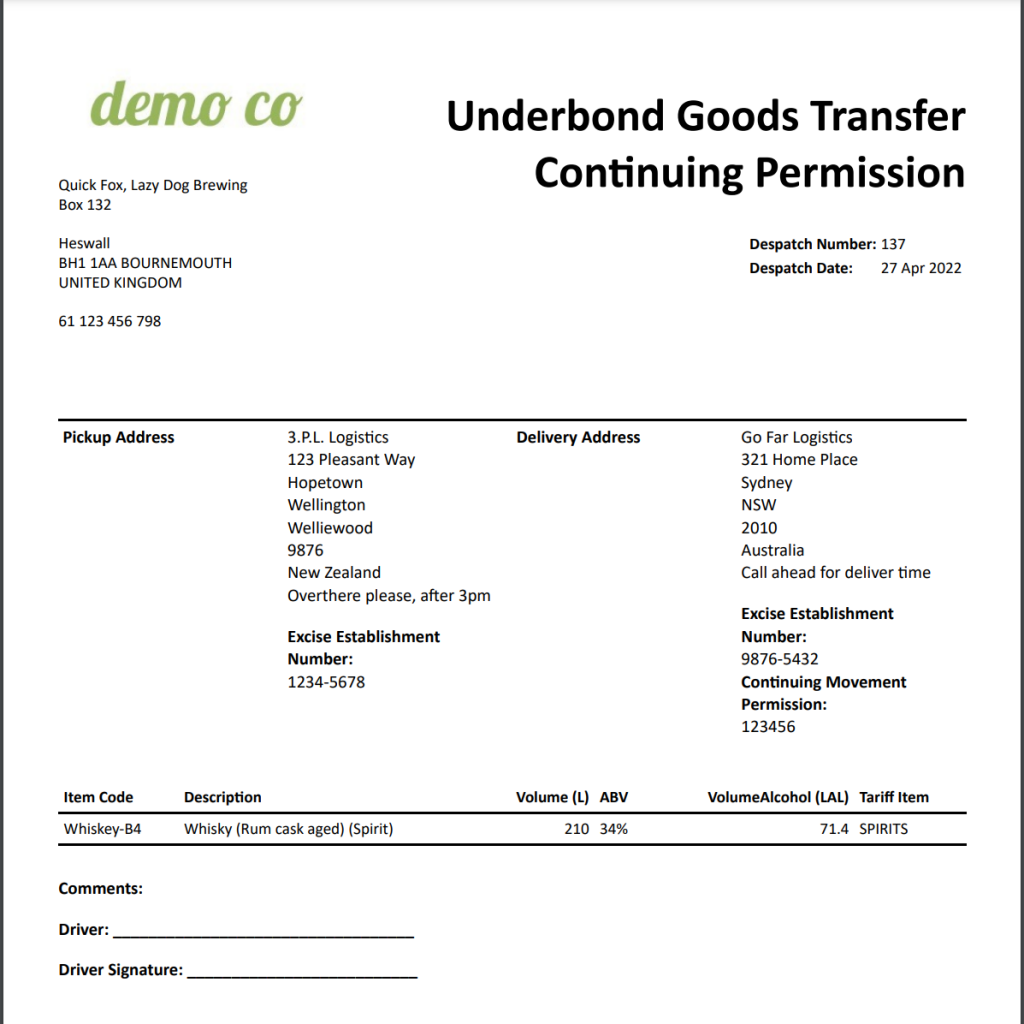
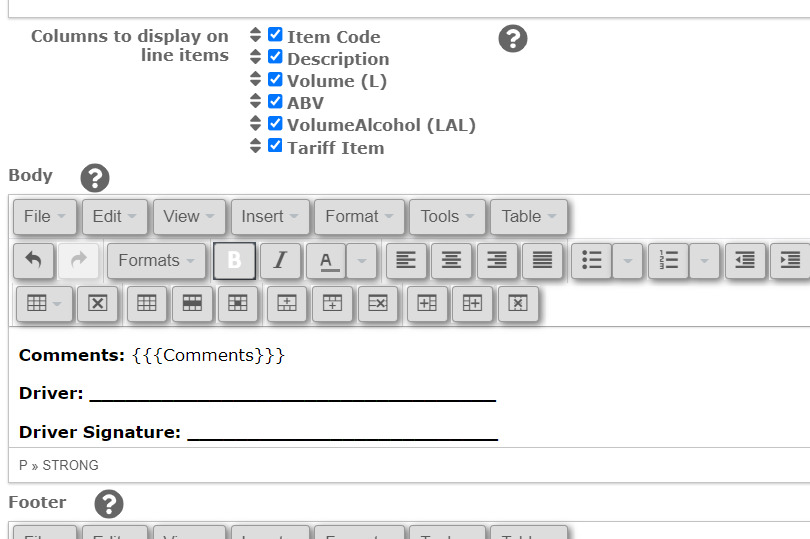
The key things to note in the document below are the Excise numbers and permission number for the Sender and Receiver. The Title of the document is flexible to meet your compliance needs. Also you can add the volume, alcohol volume, ABV and Excise Duty Rate to the items area. You can also customise the comments area for any extra bespoke needs you have.
eg:
Configuring the Settings
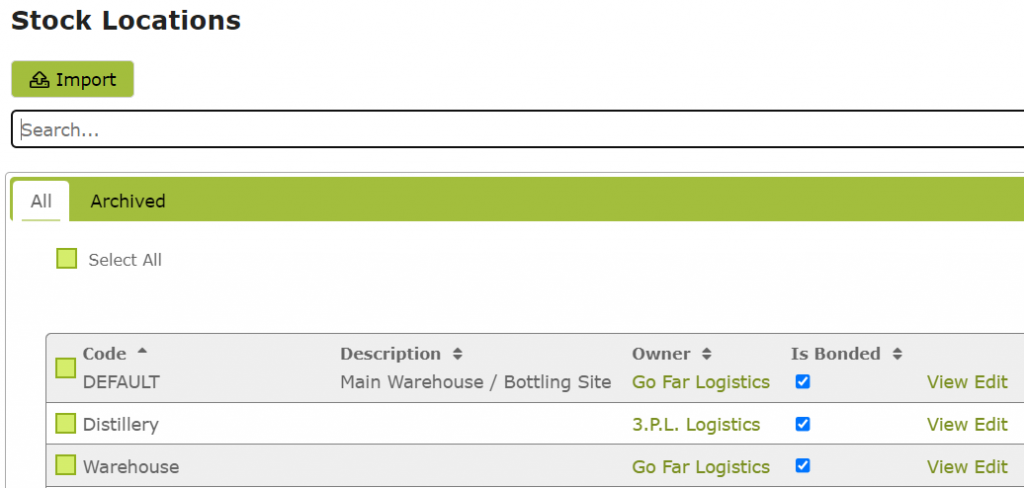
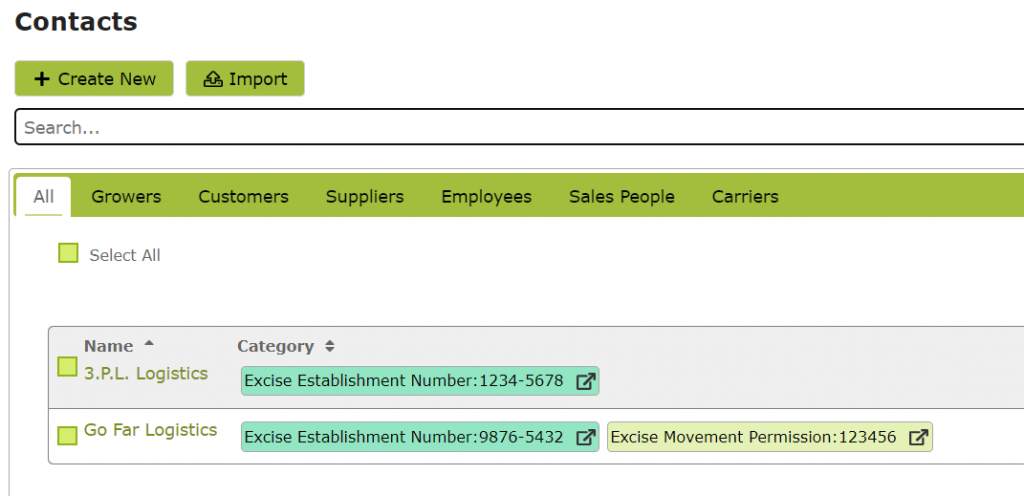
You will need to check that each location that is Bonded is linked to a specific Contact:
eg:
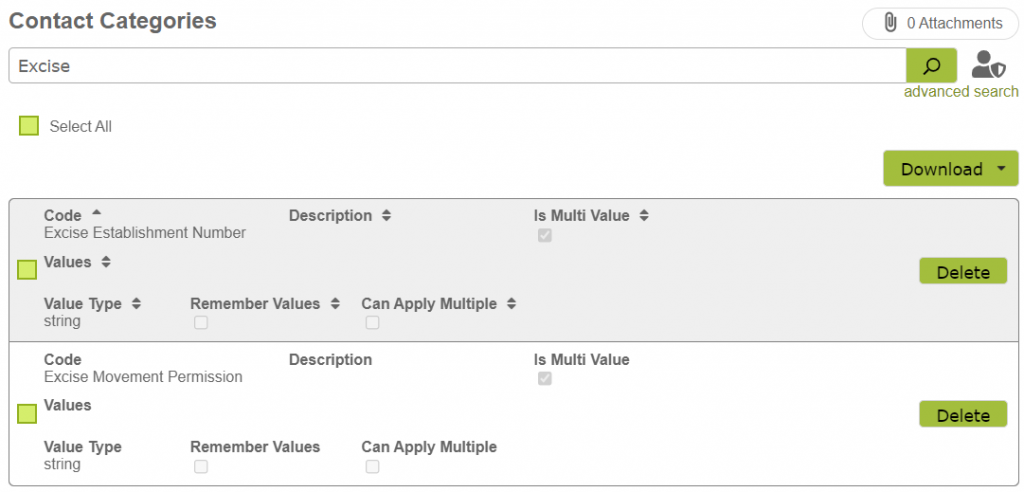
You will need to create Contact Categories to represent the required data for the Sender and Receiver to meet your compliance needs. Examples of these are “Excise Establishment Number” or Bond number, and “Movement Permissions”.
NB: Set the “Is Multi Value” check box, and set the “Value Type” to string.
eg:
You will need to make sure the Location owners have these categories set.
Generally you might associate a movement permission with the receiving contact, as a movement will be to their location.
eg:
Configuring the Movement
The Bulk Despatch will be to another party, the other party will be the Contact whose details are used to look up the Excise reference details above.
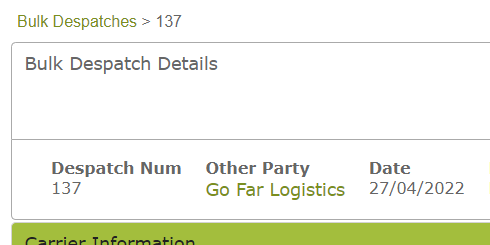
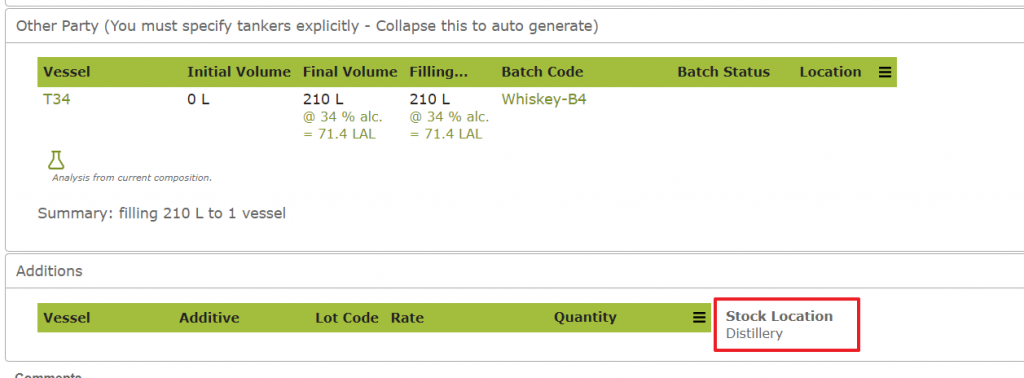
The Bulk Despatch will be linked to a Bulk Operation that has a location, this location should be set to the bonded location the bulk is leaving from.
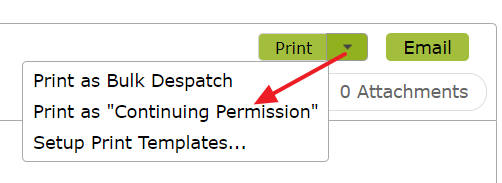
Creating Document Template
In a bulk despatch, you can create a new format for the document that you need to accompany the shipment, eg a “Movement underbond with Continuing Permission”.
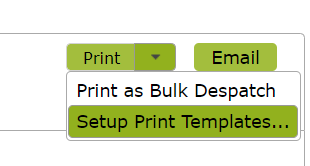
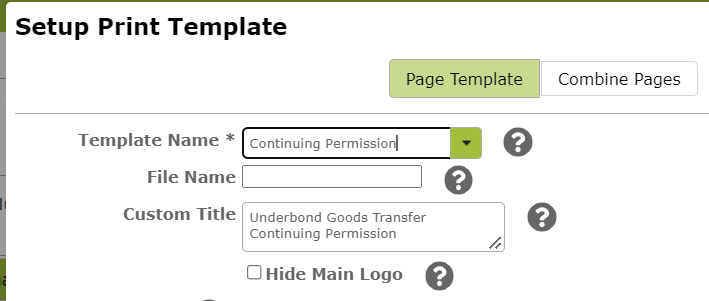
You do this by clicking the print drop down and choose “Setup Print Templates”.
Give the template a short name that will show on the menu, and a Custom Title that will appear at the top of the print out.
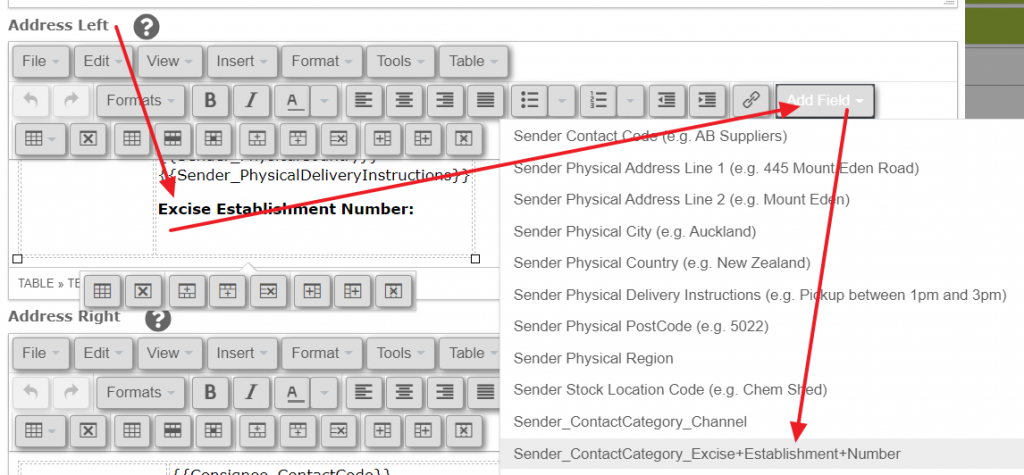
In the Sender Address area, add any title you need at the bottom, perhaps a new line, then use the “Add Field” to add the required categories from the Sender.
eg:
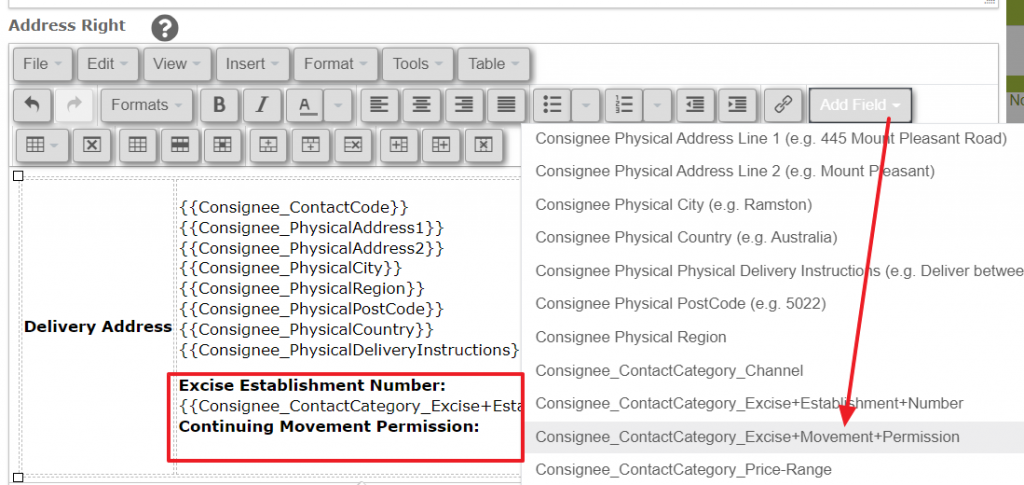
Do the same for the Receiver. You may be adding Multiple categories for the receiver eg:
Then any extra columns or comments:
Printing the Document
You can now use this Print Template whenever you need a document in this format, by choosing this option from the print menu: