Harvest Bookings
Overview
Harvest Bookings are used to keep track of when Harvest Deliveries are coming in to your winery. It is available to all customers on our “Premium Production” subscription.
In this document:
Create a Harvest Booking
Harvest Bookings are found in Grow > Pre-Harvest area.
To create a new Harvest Booking, go to Harvest Bookings and click the ‘New’ button. You will be taken to a page where you can enter all the details of the booking. Enter client (person requesting the processing) and recipient (the winery processing the booking, e.g. the delivery location) information and select the SubBlock. You can choose things such as the time and duration of the delivery, what the harvest and press methods are, and how many grapes are coming in as well as how often they will be delivered.
Here is an example Harvest Booking filled out:
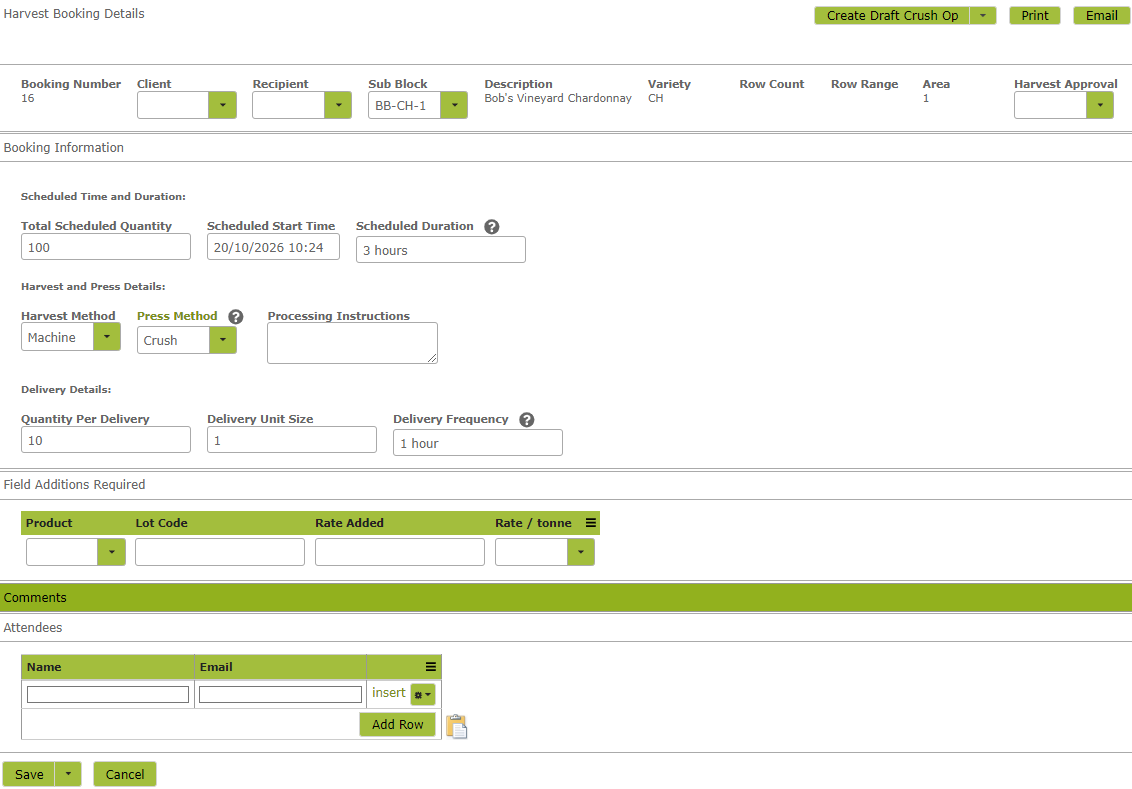
Once you have filled in the details you want, press the “Save” button to save it as a new Harvest Booking. You can now create a corresponding draft Harvest Operation by clicking the ‘Create Draft Harvest Op’ button at the top of the screen. (See Creating a Draft Crush Operation from a Harvest Booking for details about what to include in the draft operation at this stage of the process, or Creating/Importing Harvests for more general information about creating, viewing and working with Harvest Entries, the associated crush operations that bring them into the winery and linked purchase orders. For information about printing , emailing or creating a calendar appointment for the booking, see Exporting a Harvest Booking below.
Viewing the Harvest Bookings List
The list of Harvest Bookings will only display those that are within a certain window of time. The date is and hour are automatically filled out as today at 10am with an ‘Interval’ of +/- 3 days, so by default you will only see bookings in the list that are within 3 days in the past or future of that date and time.
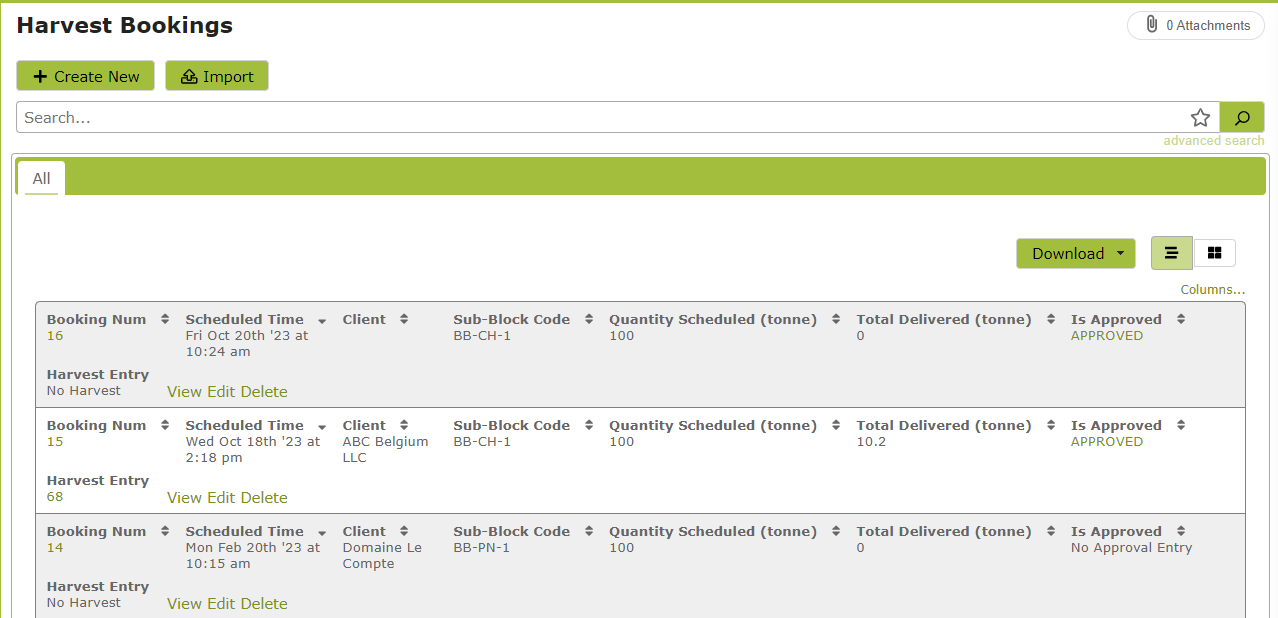
You can change the interval, date and hour and press “Refresh List” if you need to see Harvest Bookings outside the default range.
Exporting a Harvest Booking
You can export a Harvest Booking in 3 ways, by printing a PDF of the booking, downloading a calendar appointment that can be imported in to your calendar software such as Google Calendar or Microsoft Outlook, or by sending an email to the people involved.

Exporting as PDF or Calendar Appointment
To export the Harvest Booking as a PDF print out or Calendar Appointment, simply click ‘Print’ or ‘Calendar Appointment’ and your browser will download the file for you to open:
![]()
If you get the following notification, press ‘Keep’:

Emailing attendees from within Vinsight
To email the booking simply click ‘Email’. This will bring up a send email dialog with the addresses, subject and attachments pre entered for you:
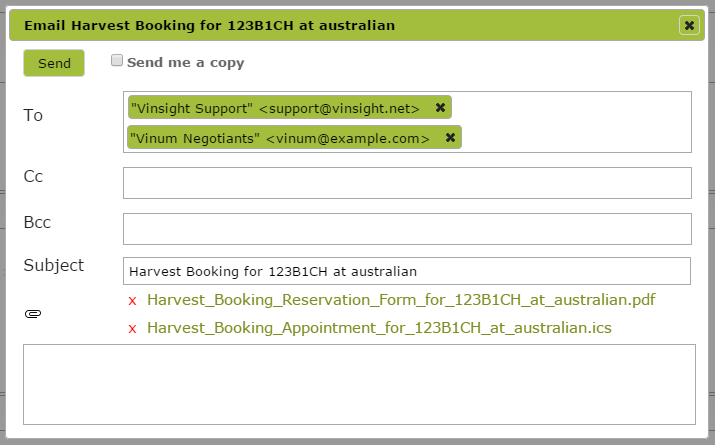
You can add more people in the ‘To’ line and they will automatically be inserted in to the Attendees list of the Harvest Booking. If you start typing a new address, a drop down menu will appear from which you may select an email address. If the address you want is not on the list, add the desired address using the following format:
“Name” <email address>; “Name” <email address>; “Name” <email address>
Practical use of Harvest Bookings
The Harvest Booking has practical usages for growers, winemakers and coordinators. When a grower gets a Harvest Booking, they know exactly how much fruit is expected of them, when it expected and where. Each of the trucks should be carrying a copy of the PDF form when they come to deliver the fruit, so that the winery can know who they are and what to do with the fruit.
The winemakers should also have copies of the PDF form that they can cross reference the fruit coming in with.
It is a good idea for the coordinator to set up a shared Harvest Bookings calendar, where they can import all the Bookings as appointments. This way it will be easily available for everyone to see, and any clashes can be resolved quickly.
Setting up a shared calendar in Google Calendar
Setting up a shared calendar in Outlook or Microsoft Exchange