User Management
Overview
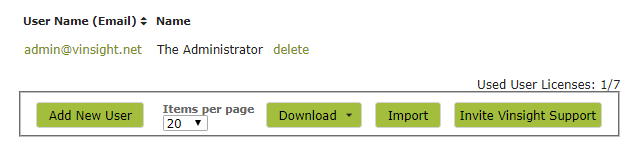
All current users of the app are listed on the ‘Users‘ page in the System Settings > Setup area. This is also where you add new users, set up their login details and, if on a subscription that supports it, identify the user’s roles. Bear in mind that you need to set the number of allowed users on the Subscriptions page.
In this document:
Adding Users
To add additional users to your subscription simply click the ‘Add New User’ button on the ‘Users‘ page.
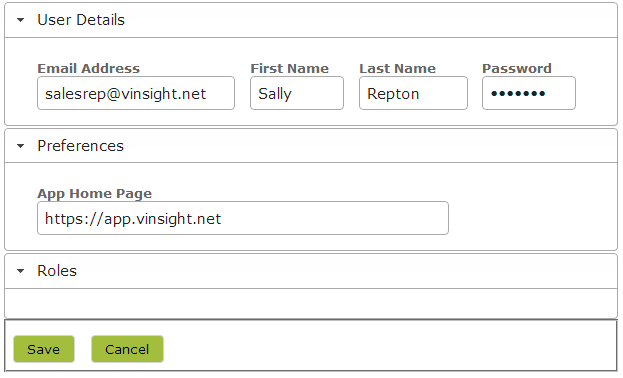
Add the new user’s name and email details and click ‘Save’. For the password you have two options. You can either set a random password and tell the user to use the ‘Forgot your password’ link to reset this to a password of their choice, or set a predetermined password.
User Roles
If you’re on one of our subscriptions that supports User Roles, you can control each user’s access to different parts of the app, by assigning them roles in the app and setting up permissions for those roles. Doing this will make using the app simpler for each user, as they will only see and be able to access the parts of the app that are relevant to them and their role. Setting up some access as ‘read only’ will also prevent a user mistakenly editing or deleting something they should really only be looking at.
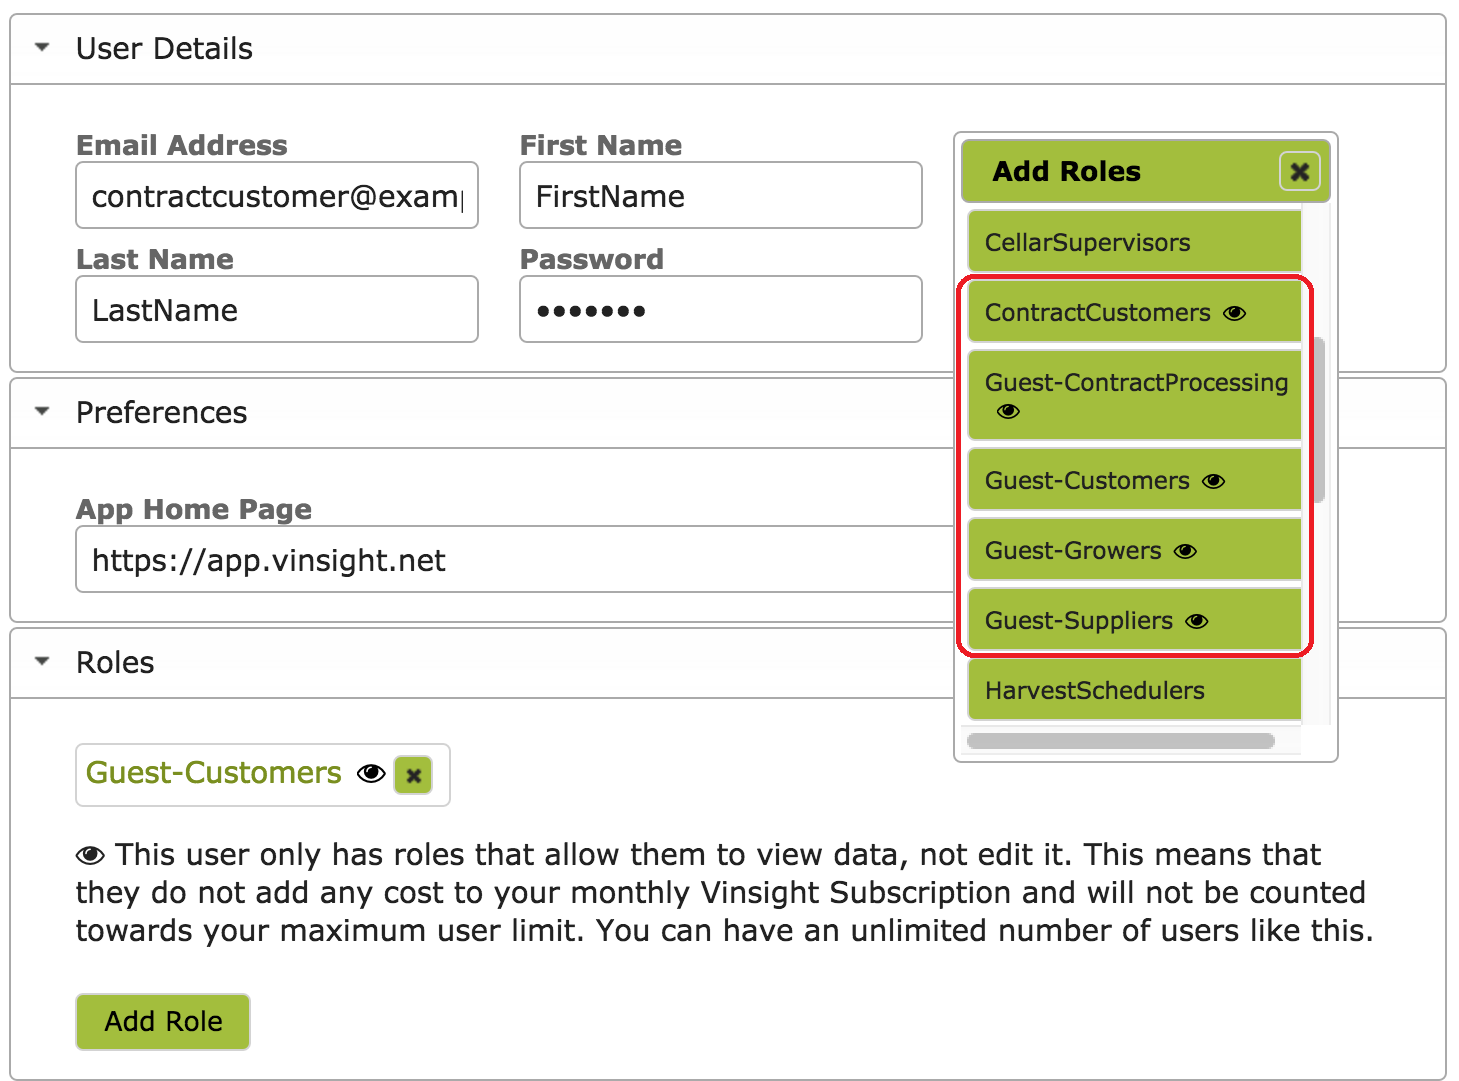
In the ‘Roles’ area, click the ‘Add Role’ button, select all roles that apply from the drop down menu and click ‘Save’.
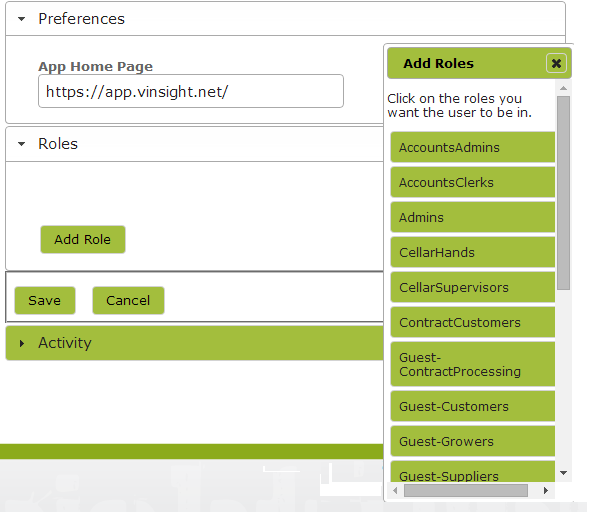
Ensure that the home page you set for them is a page you want them to see. For example, you may be happy for your Sales Reps to go to the Sales Dashboard, “https://app.vinsight.net/Dashboards/Sales”, whereas you may want an Inventory Administrator to go straight to the Stock Items page “https://app.vinsight.net/StockItems”. Edit this in the ‘Preferences’ -> ‘App Home Page’ area of the user page.
Import Role Defaults
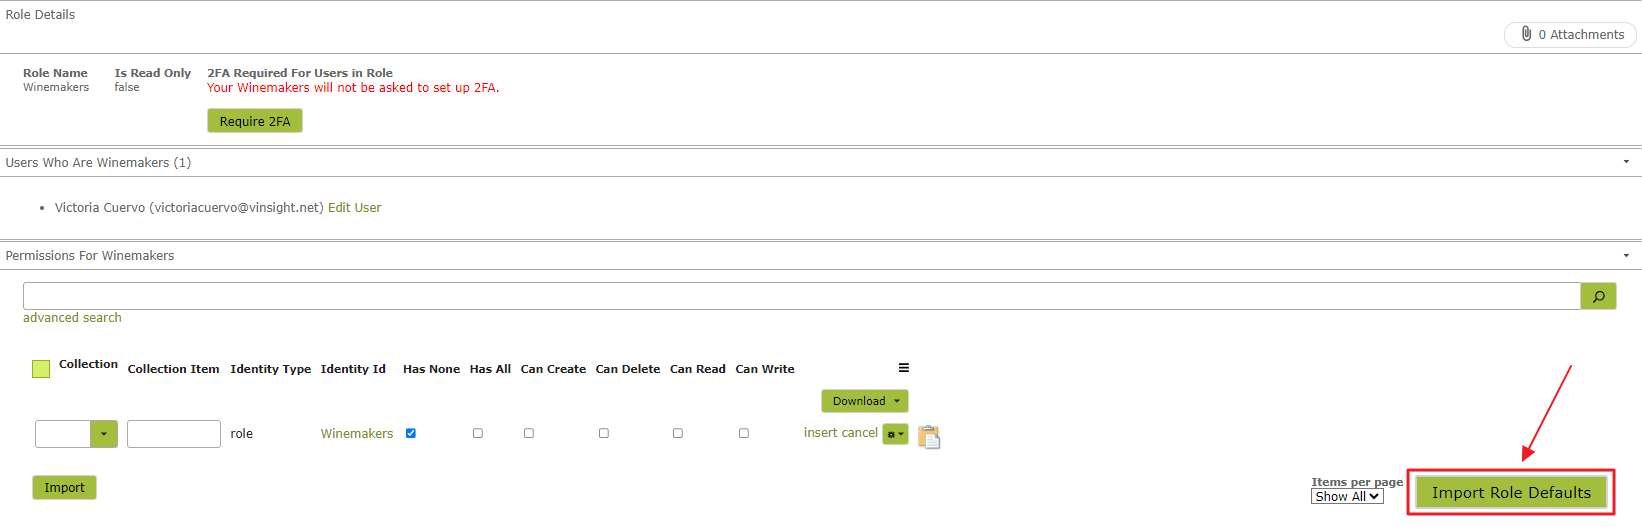
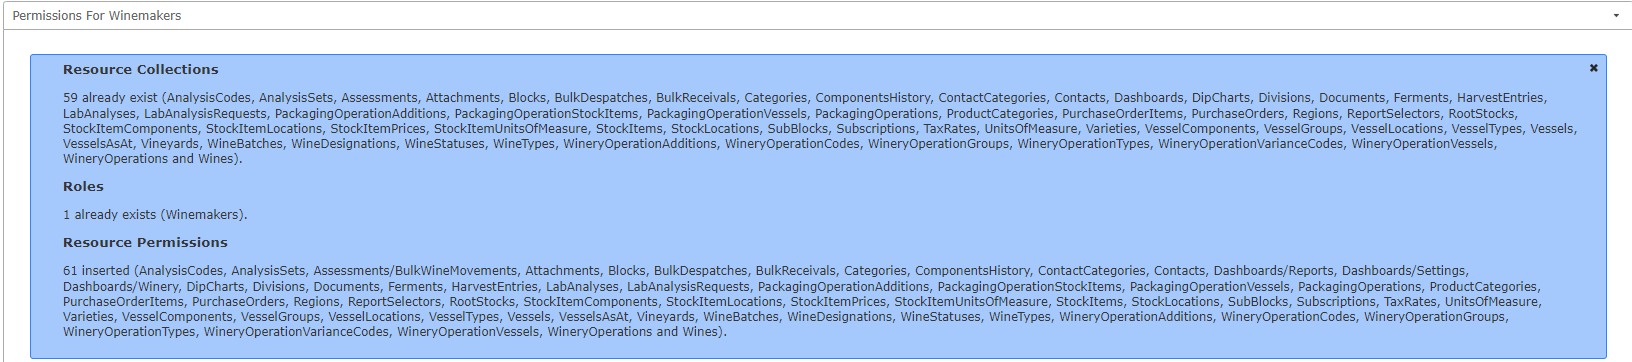
Some Roles do not have default permissions set up. If this is the first time you are adding a User, you will need to set the permissions and access for the role added. You will only need to do this once. After you have defined the permissions and access for a particular role, any new user assigned that role will automatically get the associated permissions. The below example corresponds to the “Winemaker” role:
Then the below message will show up:
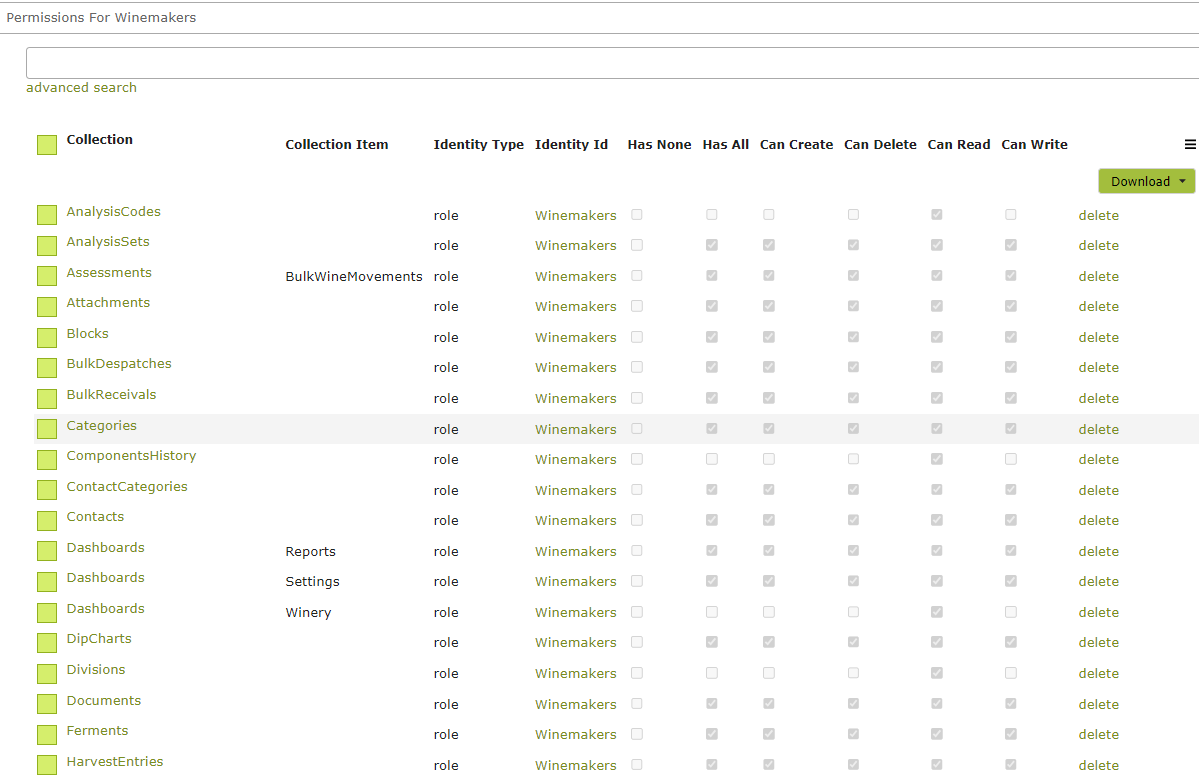
Then you can reload the page, then the role will show the default permissions as per below:
Sales Reps
If you are adding a ‘SalesRep’ role for the first time, you will see the following message:
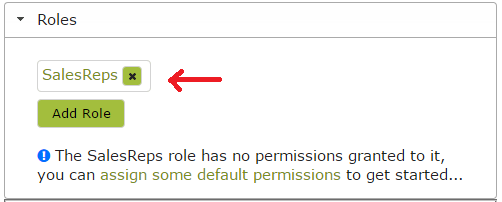
Click the ‘assign some default permissions’ link to add the default permissions, enabling the Sales Rep full access to the Contacts, Sales Orders and StockItemAllocations, as well as read only access to several other areas of the App, such as TaxRates and StockItems.
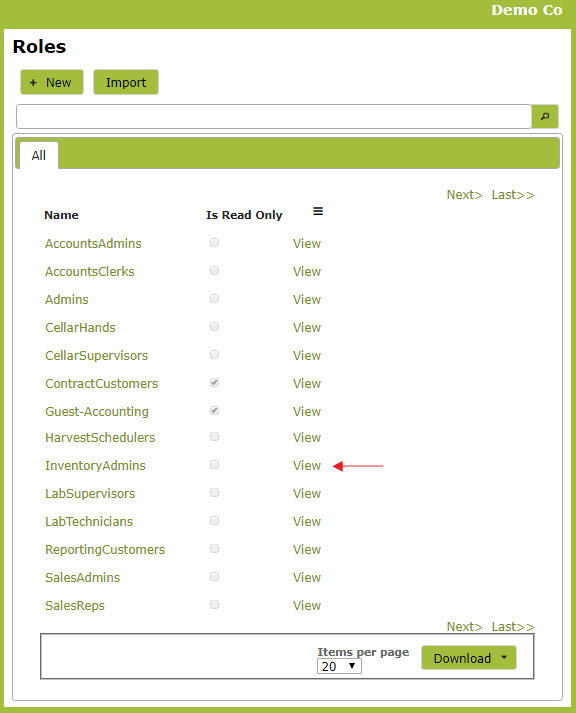
You can view these permissions by clicking on the ‘SalesReps’ link (see red arrow in above image). Alternatively click on ‘User Roles‘ in the Settings > Setup area and select ‘SalesReps’ from the list. Default Sales Rep permissions are shown below.
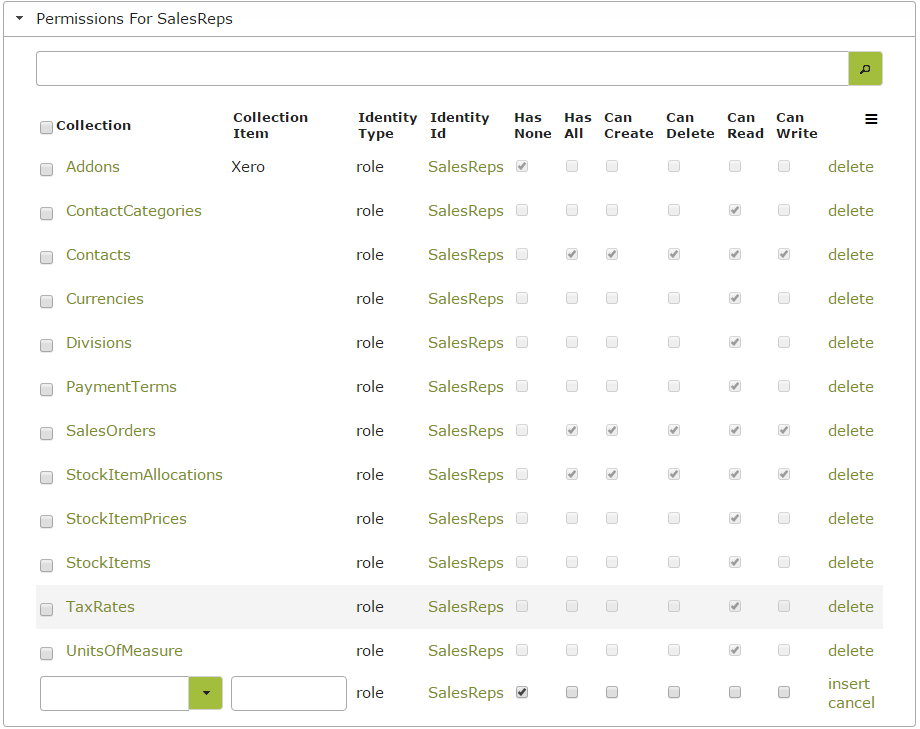
These permissions can be edited as you require. Note that if you edit the SalesRep permissions, these changes will apply to all users with that role. If one of your SalesReps additionally has some other role within your organization, you should to add another role to that user, rather than edit the SalesRep role to accommodate the particular rep. That way other SalesReps will not be affected.
Setting Role Permissions
To set the permissions for a new role, go to the ‘User Roles’ in the System Settings area. Select the role you wish to edit by clicking the name itself or the ‘view’ link next to it.
For example clicking on InventoryAdmins will bring up the InventoryAdmins role page. In the image below, this role currently has no permissions set.
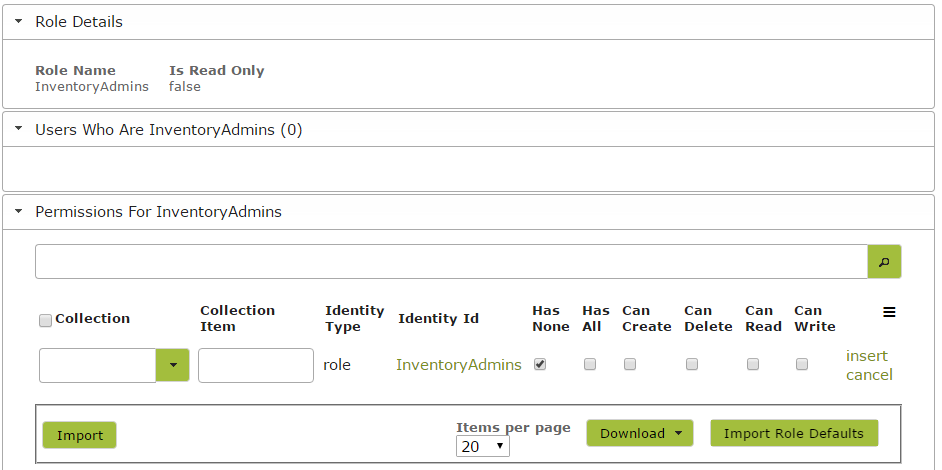
All possible permissions are listed in the ‘Collection’ drop down menu.
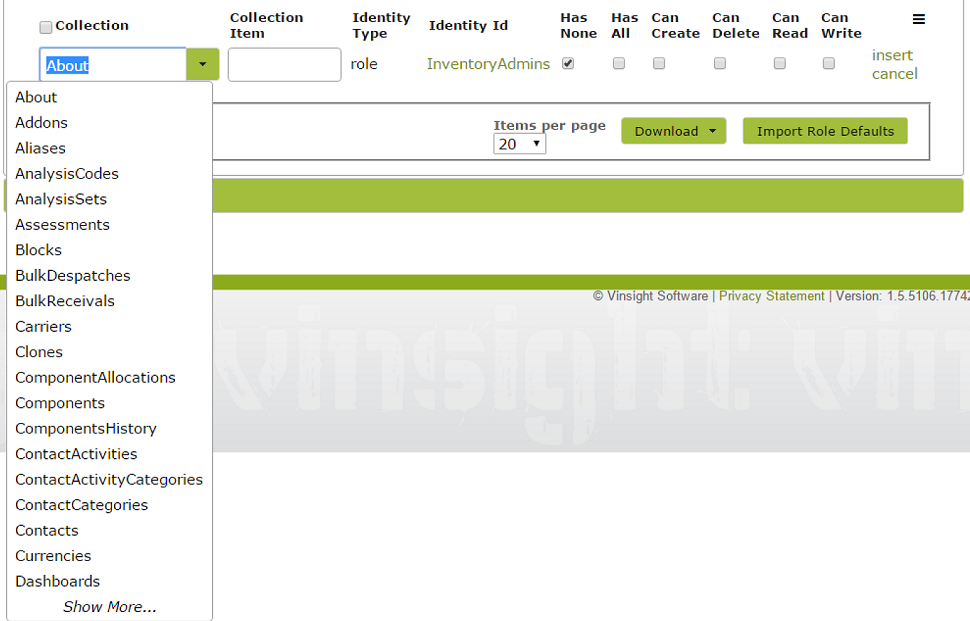
To add permissions to this role, select relevant categories from the Collection drop down menu and add one at a time. There are certain permissions that all users will need simply to be able to login in, namely ‘Divisions’ and ‘Subscriptions’. Make sure you give each role at least a ‘read’ access to these parts of the app. Do this by selecting ‘Divisions’ from the ‘Collection’ drop down list, ticking the ‘Can Read’ checkbox and clicking insert at the end of the line. Do the same for ‘Subscriptions’.

Once you have done that, as a first step, go through the ‘Collection’ list and identify parts of the app that appear obviously relevant to the role you are setting up. For example, if setting up a Inventory Adminstrator’s role, it will likely appear clear to you that you would need to give your new user create, delete, read and write access to Stock Items and Purchase Orders (Note, you can click the “Has All” check box to save yourself from clicking all permissions in a row individually.)
However, while some permissions will appear obvious, others will not. The easiest way to work out exactly which permissions the user/role will need, is to log in as the new user and attempt to use the app. (See Tip below.) If the necessary permissions are not set, the user will soon encounter pop up warnings, which will give you some guidance as to the permissions required.
| Tip: If you wish to login as both the administrator and another user on the same computer at the same time, try doing it in different browsers, e.g. login as the administrator on Chrome and the user on Firefox. Then switch between windows editing permissions on the administrator’s window and testing them in the users’s window. If using Chrome, another option is to first login as the administrator, then open a new ‘incognito’ window by right-clicking on the ‘Chrome’ icon and selecting ‘New incognito window’. Login as the user in the incognito window. Either of these methods will enable you to be logged in as two different users on the same computer. |
For example, you may have given your Inventory Administrator permission to create, edit, read and write ‘Stock Items’, but not have given them permissions to other areas of the app they will need to access, in order to create a new Stock Item.
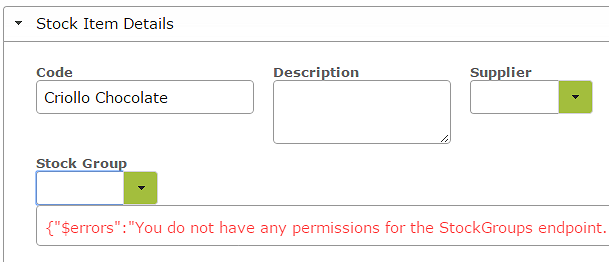
If so, when you login as the Inventory Adminstrator and attempt to create a new Stock Item, you will receive pop up warnings similar to this.

Such warnings should provide a clue as to which permissions are missing. The above message indicates that to create a Stock Item a user will need to have permissions to access the ProductGroups endpoint. Similarly the following message indicates that access to the StockGroups endpoint is required to create a Stock Item. Both these issues can be easily fixed by providing the InventoryAdmins role with at least a read access to “ProductGroups’ and “StockGroups” on the permissions page.
Use these pop up warnings as guides to ensure you have the correct permissions set.
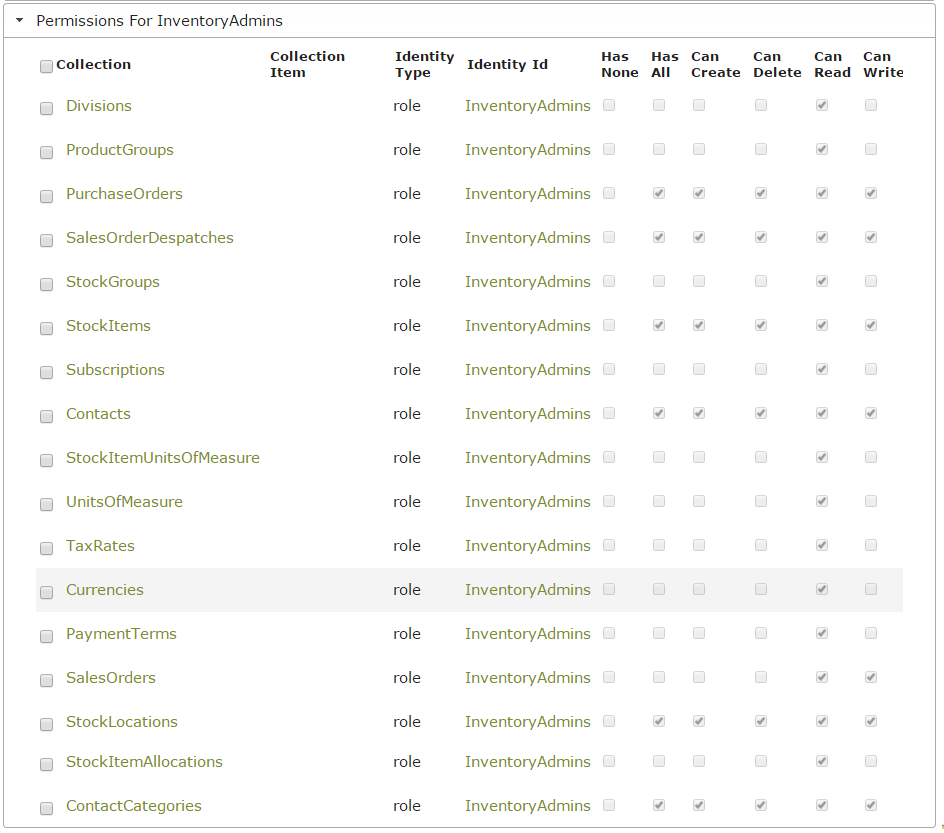
Below is an example of a set of permissions for an Inventory Administrators role. These permissions enable the Inventory Administrator to add and delete stock items, create purchase orders to order in new stock, read and write to sales orders to despatch stock, and create and delete contacts. Obviously your permissions for such a role may vary from this depending on the particular tasks encompassed in that role within your organization.
Adding Guest Users
You may wish to give someone read-only access to the App, without allowing them to edit any data. A ‘guest’ user is free and will not be counted towards your maximum user limit. (Please note you will need to be on a subscription that supports User Permissions to do this.)
The Roles with the little ‘eye’ next to them are all guest ‘read only’ roles.
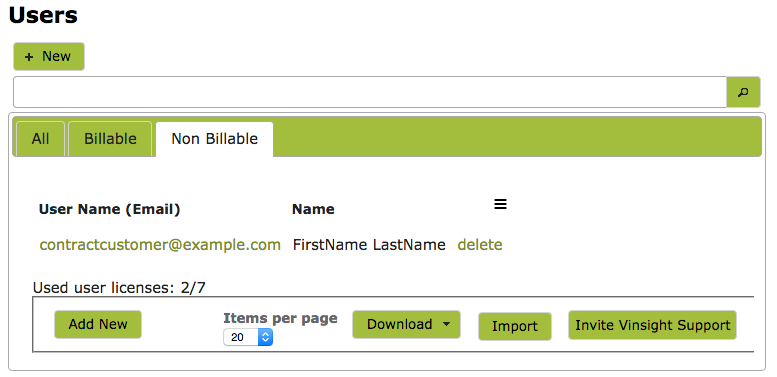
Once added, all guest users will be listed in the ‘Non-Billable’ tab on your Users page.
2 Factor Authentication (2FA)
For added security users can enable 2 Factor Authentication (2FA) so they need to use a username and password as well as a 2FA token. To understand more about 2FA in general, have a read here: https://authy.com/what-is-2fa/
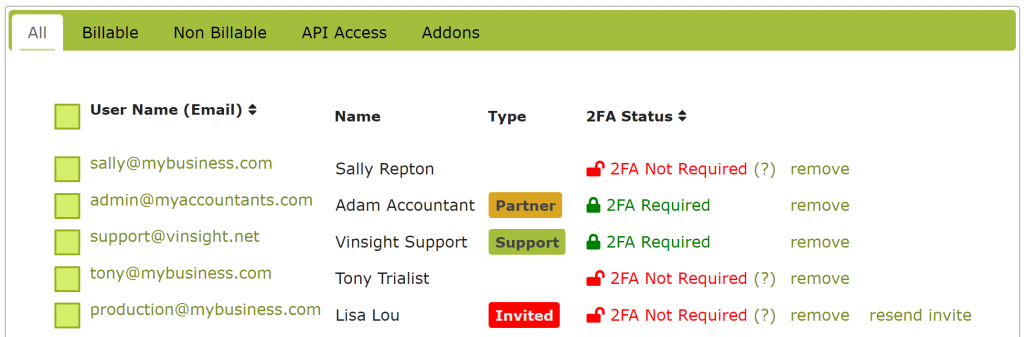
From the users list you can see who has 2FA enabled:
Only a user can setup their own 2FA, so setting up your own 2FA, you go to your own user page by either clicking “Preferences” on the main menu, or going to Settings > Setup > Users and clicking on your own username.
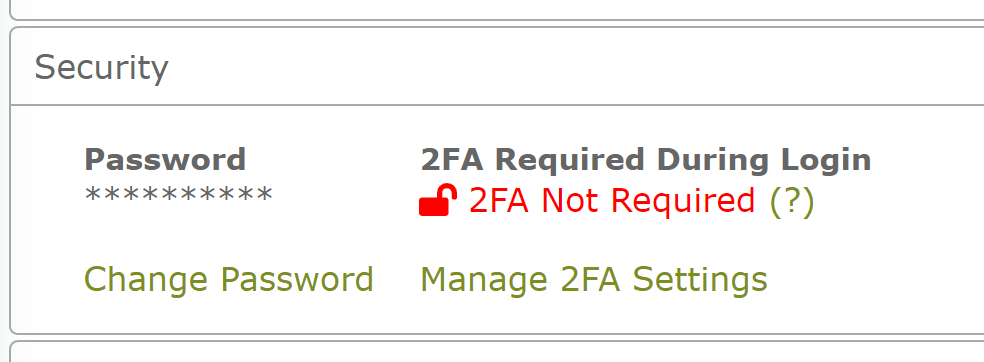
Then click “Manage 2FA Settings” in the Security area.
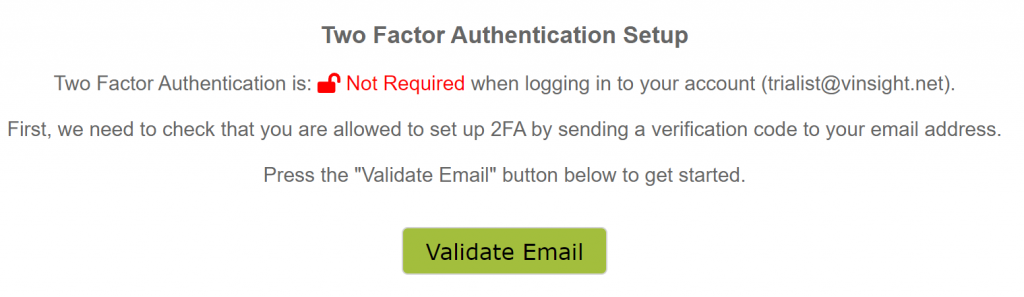
You will need to Validate your email by clicking the button.
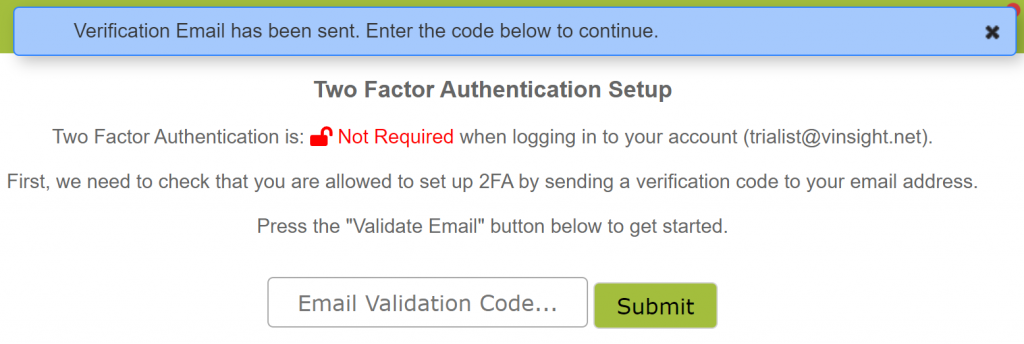
Find the Email in your inbox and copy the code and enter it like the image below:
Finally you need to use your 2FA app of choice like “Authy” for example.
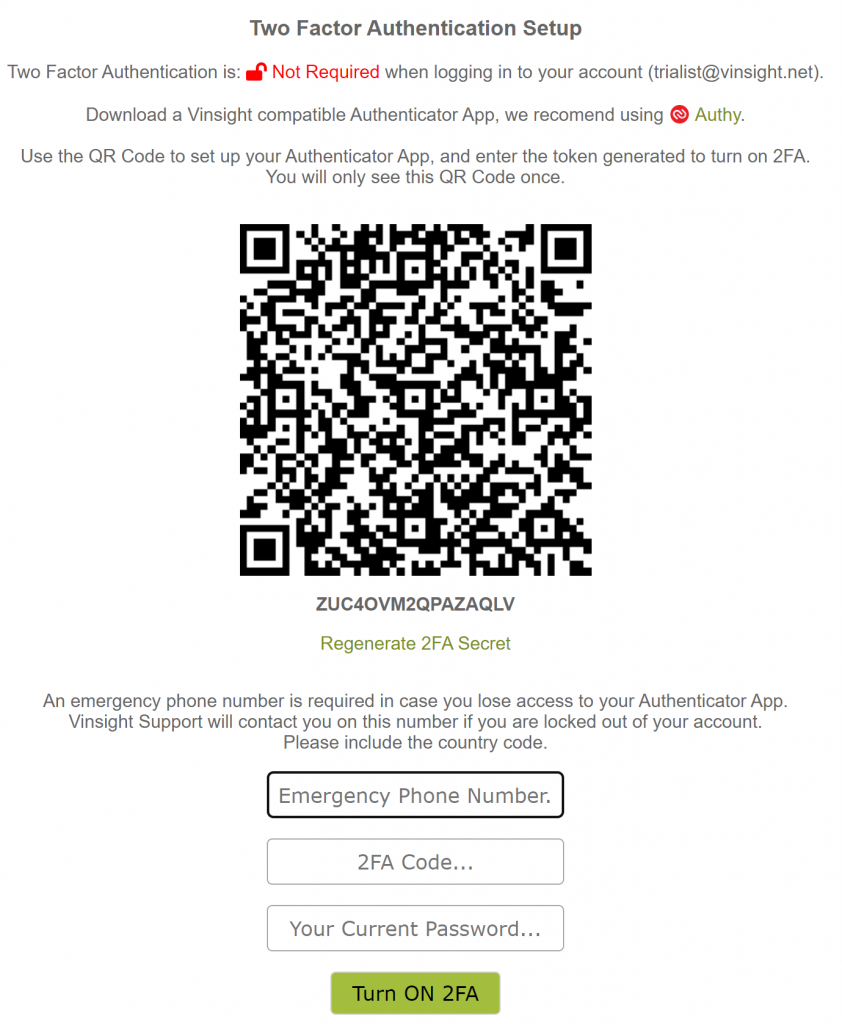
Now you will be prompted for an extra 2FA when you log in.
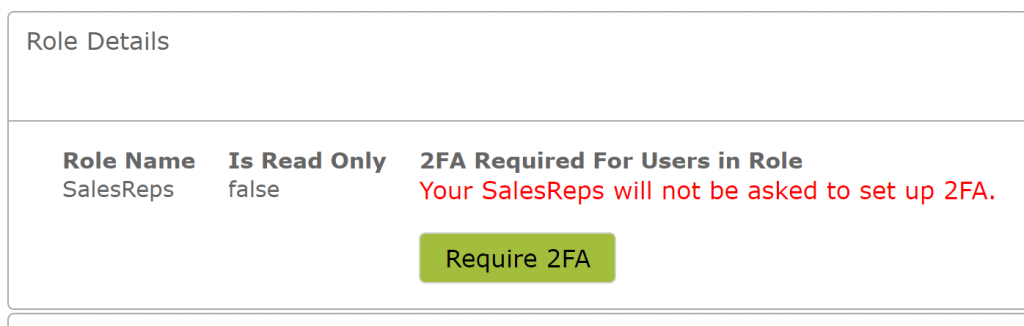
If, as an administrator of a Premium subscription, you wish to require certain users groups or roles to have to enable 2FA, you can do this on a role by role basis in Settings > Setup > Roles:
How to reset your password?
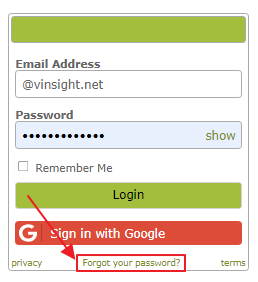
On the login screen you will find the below option:
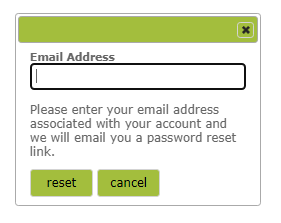
Then you will find the reset instructions as per below
Frequently Asked Questions:
- How do I change the email address I log in with?