Merging
Overview
Occasionally you may need to merge one item into another. For example two users may have entered the same stock item or contact into the App but given them slightly different names. Using ‘merge’ enables all the data from one item to be transferred into the other. The merge option is available on the following lists:
- Contacts
- Stock Items
- Stock Locations
- Varieties
- Wine Batches
- Wine Designations
In this document:
How to Merge
First go the the list page of the items you wish to merge. You may need to use ‘search‘ or ‘advanced search‘ to locate the item or items in question.
If you can see both items on the list, tick the check-box next to both.
If you only see one item, it is sufficient to select that single item and click ‘merge’. A pop up window will appear showing the item you selected as the ‘Loser’. Select the item you wish to merge with from the drop down menu in the ‘Winner’ box. Do not be concerned if the item in the ‘Loser’ box is the item you wish to retain. You will have the opportunity to swap the items, once both have been identified.

Once you have selected the second item, check to see whether the item you wish to be merged into the other and then deleted is in the ‘Loser’ box and the item you wish to be retained (with the data from both) is in the ‘Winner’ box. If the items are the wrong way around, simply click ‘Swap’ and they will be reversed.


Finally click ‘Merge’ to complete the change.
In the above example, once ‘Merge’ has been clicked, all data in the App originally entered under the name ‘ABC Distributor’ will be transferred to ‘ABC’. Please note that this process is irreversible.
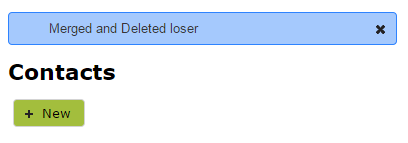
Once completed you will see a blue box at the top of the list page confirming the merge and consequent deletion.
Merge from Item Page
If you have already opened a ‘Contact’ or ‘Wine Batch’ that needs to be merged, there is no need to return to the list to start the merge process. You can use the ‘Merge’ feature from the item page itself, by selecting it from the ‘Actions’ drop-down menu.


