Overview
Our API offers a few different methods of authentication, in order of our preference:
- OAuth Access Tokens
- API keys that you can issue from within the app
- Basic authentication of username/password over SSL
Be sure to always send your requests using HTTPS because while we will reject or redirect any HTTP calls to HTTPS, your call will have sent your credentials in plain text for anyone listening to be able to intercept.
The following example uses cURL which can be installed on Windows (using cygwin), Mac (installed by default) or indeed any *nix installation (yum install curl or sudo apt-get install curl).
Authenticating via OAuth
Vinsight uses OAuth 2.0’s authorization code grant flow to issue access tokens on behalf of users. The following diagram illustrates the OAuth flow based on the actions of the user, your app, and Vinsight.
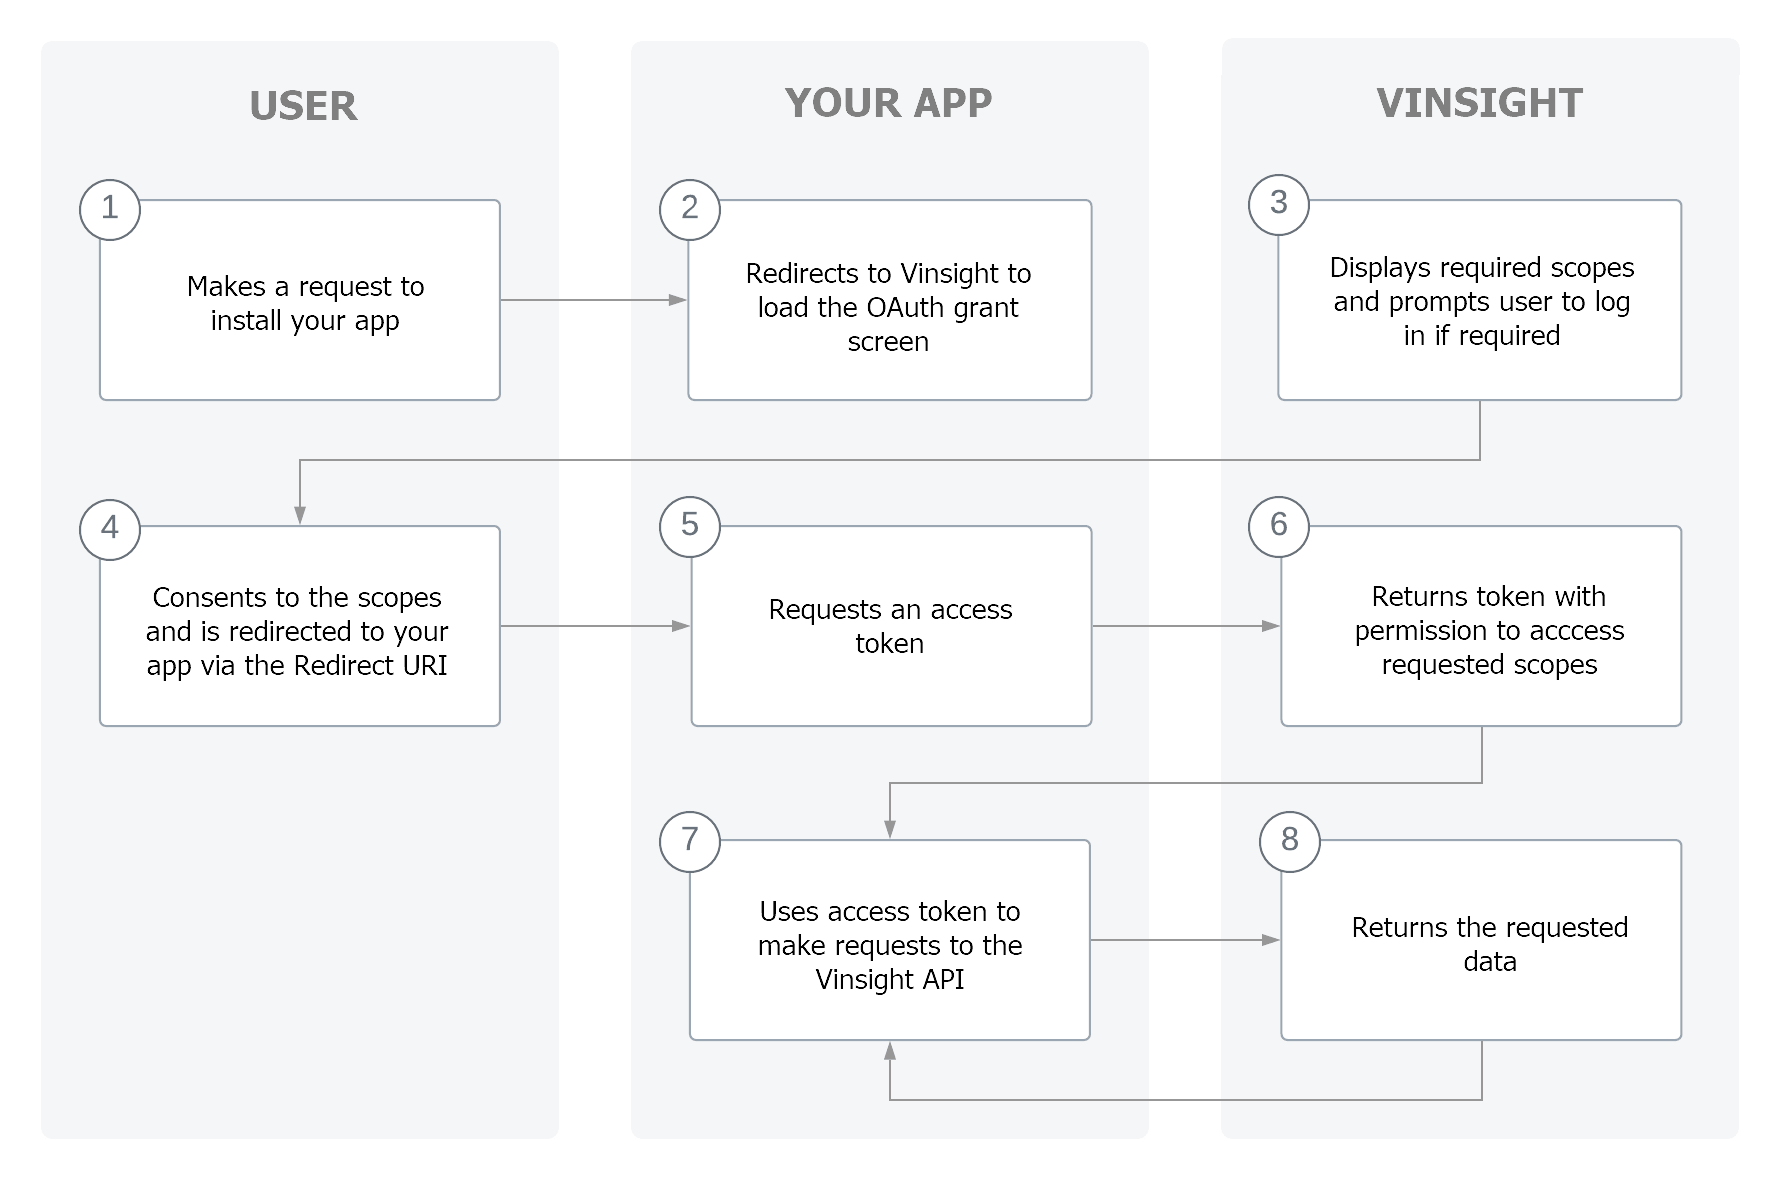
- The user makes a request to install your app.
- Your app redirects to Vinsight to load the OAuth grant screen and requests the required scopes.
- Vinsight displays a prompt to the user to give authorization to the app, and prompts the user to log in if required.
- The user consents to the scopes and is redirected to the
redirect_uriwith a unique code. - Your app makes an access token request to Vinsight using the
client_id,client_secret, and the uniquecode. - Vinsight returns the access token and requested scopes.
- Your app uses the access token to make requests to the Vinsight API.
- Vinsight returns the requested data.
2. Register your OAuth Application in Vinsight
In order to receive a client_id and client_secret , you will need to sign up to Vinsight and get your account converted to a Partner Account.
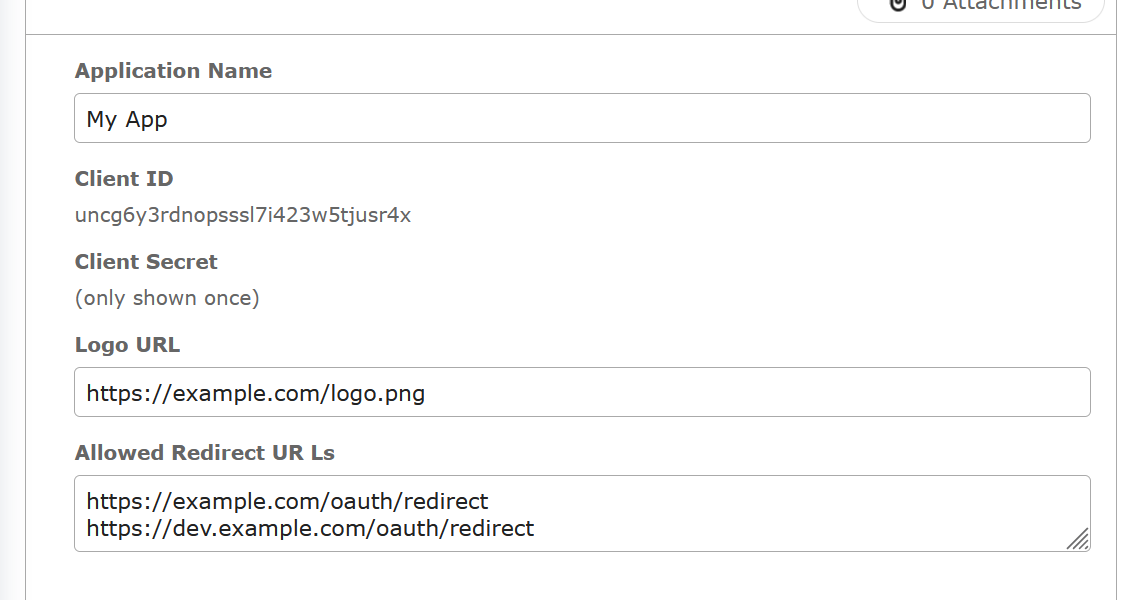
Once you have a Vinsight Partner Account, navigate to the OAuth Applications area. From here you can create a new OAuth Application and receive your client_id and client_secret.
Make sure you save the client_secretstraight away, as we can only show it to you once. If you need to regenerate a new client_secret, email support@vinsight.net.
3. Ask for permission
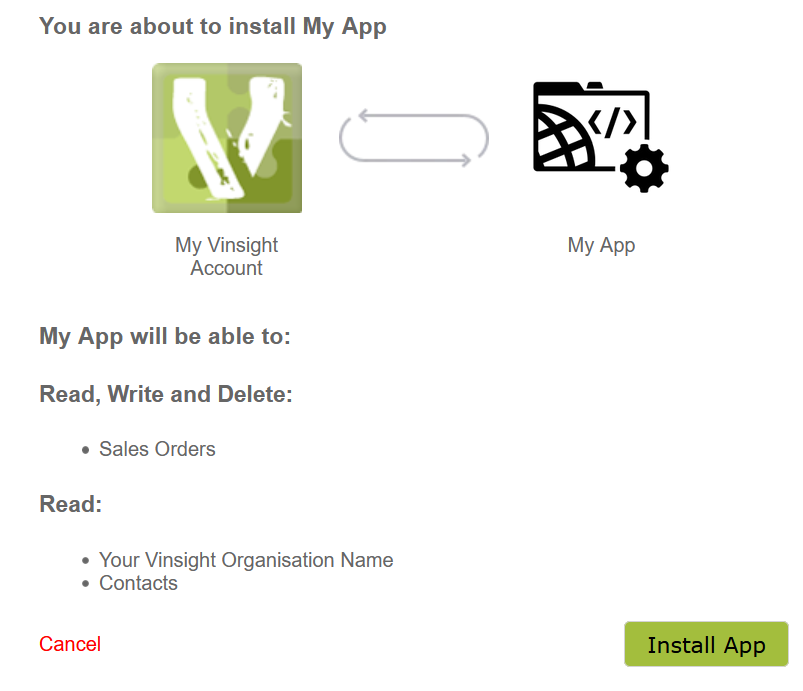
Before your app can access any Vinsight data, a user must grant permission to your app. Granting permission happens when a user clicks the link to install your app.
Show the installation screen for your app
To show the installation screen for your app inside Vinsight, redirect the user to the following URL with the query parmaters defined below:
https://app.vinsight.net/oauth/authorize?client_id={client_id}&scope={scopes}&redirect_uri={redirect_uri}&state={nonce}
| Query parameter | Description |
|---|---|
{client_id} |
The Client ID for your app as shown in your OAuth Application page. |
{scopes} |
A space-separated list of scopes. For example, to write Sales Orders and read Contacts, use scope=write_salesorders read_contacts. Any permission to write a resource includes the permission to read it. |
{redirect_uri} |
The URL to which a user is redirected after authorizing the app. The complete URL specified here must be added to your OAuth Application settings as an allowed redirection URL. Make sure you URL Encode this parameter. |
{nonce} |
A randomly selected value provided by your app that is unique for each authorization request. During the OAuth callback, your app must check that this value matches the one you provided during authorization. This mechanism is important for the security of your app. |
4. Confirm installation
When the user clicks the "Install App" button in the prompt, they're redirected to your app's server. The authorization_code is passed in the confirmation redirect:
https://example.com/oauth/redirect?code={authorization_code}&state={nonce}
Make sure that the state nonce returned to you is the same that you sent.
5. Get access token
Now you can exchange the authorization_code for an access token by sending a request to Vinsight's /oauth/access_token endpoint:
POST https://app.vinsight.net/oauth/access_token
| Query parameter | Description |
|---|---|
{client_id} |
The Client ID for your app as shown in your OAuth Application page. |
{client_secret} |
The Client Secret for your app as shown in your OAuth Application page when you first created it. |
{code} |
The authorization code provided in the redirect. |
The server responds with an access token:
{

"scope": "write_salesorders,read_contacts,read_stockitems",

"access_token": "eyJ0eXAiOiJ ... 3HgH3Yxsau2UE7k",

"token_id": "gbc2l2tz25 .... e7tq",

"expires_in": 31536000

}
The following values are returned:
| Value | Description |
|---|---|
access_token |
An API access token that can be used to access the user’s data as long as your app is installed. Your app should store the token somewhere to make authenticated requests. |
scope |
The list of access scopes that were granted to your app and are associated with the access token. |
token_id |
A unique installation ID to identify this connection. |
expires_in |
How many seconds the token is valid for. We currently set this to 1 year after which your user will need to re-authorize the connection manually by visiting the OAuth grant screen again. |
If the user re-authorises your application for any reason, all prior tokens for this Vinsight Organisation will become invalid.
Make sure you are always querying with the most recent access token, otherwise you will receive a 401 Unauthorised error.
6. Make Authenticated Requests
After your app has obtained an OAuth Access Token, it can make authenticated requets to our API. These requests are accompanied with a header X-Access: {access_token} where {access_token} is replaced with the token you received in the previous step.
curl -X GET \

https://app.vinsight.net/LoginContexts/Current.json \

-H 'X-Access: {access_token}'
Authenticating via API Keys
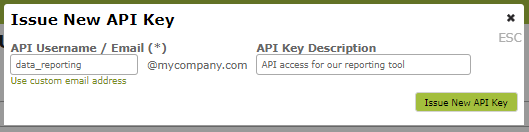
To get an API key go to 'Users' on the Settings > SetUp menu. Select the 'API Access' tab and then click "Issue New API Key"
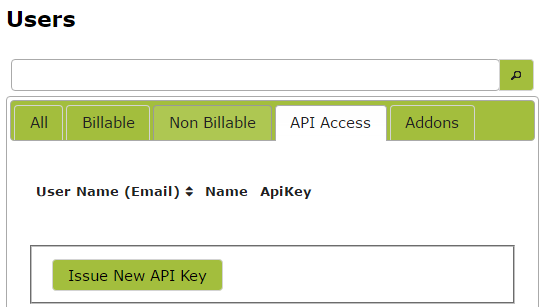
The API username should not be the same as one of your existing users. The best advice is to make it reflect what it will be used for.
So if you are going to use it to extract data for reporting, the "data_reporting" might be a good example.
You may also wish to toggle the "Auto Extend Expiry Date" otherwise the key with expire in 12 months.

An API Key will be issued that you can then use to access the API without logging on. Click the "copy" link to copy it to your clipboard.
Simply include '?api-key=[insert key here]' at the end of the url to do this. An example url seeking access to json formatted Sales Orders is set out below:
https://app.vinsight.net/SalesOrders.json?api-key=0123456789abcdef9876543210fedcba
NB: API keys are just special types of users, so if you are on a subscription that supports user permissions then by default an API key will have no permission to do anything, so you MUST remember to edit the API user after creation and add it to a suitable user role with suitable permissions eg "SalesReps" etc.
Authenticating using Cookies
POST to the LoginContext endpoint using your email address as username and your password, --data "" implies a post or you could send your credentials in the body of the post using --data "username=youremail%40yourdomain.com&password=yourpassword". Store any returned cookies in the file tempcookie.txt and accept json as a result.
curl -u youremail%40yourdomain.com:yourpassword --data "" --cookie-jar tempcookies.txt https://app.vinsight.net/LoginContexts?accept-types=json
Making requests using Cookies
GET entities from the Vessels endpoint in json format, making sure to send cookies from the tempcookies.txt file and same them to vessels.txt. Even though you have already authenticated sending the credentials (-u youremail%40yourdomain.com:yourpassword) with each call makes it unambiguous that you are doing an API call meaning that any errors should come back as text rather than html.
curl -u youremail%40yourdomain.com:yourpassword --output vessels.txt --cookie tempcookies.txt https://app.vinsight.net/Vessels?accept-types=json
>> Extra Help