Contacts
Overview
All information regarding the people or entities that your company or business deals with is stored in the ‘Contacts‘ page. The contacts are further subdivided into categories, such as ‘Growers’, ‘Customers’, ‘Suppliers’ and ‘Employees’. Once a person or entity has been set up in the contacts, you will be able to access their information from various parts of the app. For example, if creating a ‘Sales Order’ all contacts set up as ‘Customers’ in the contact list, will appear in the ‘Customer’ drop down menu.
The ‘Contacts‘ page is also the place where you can track and review customer interactions and order history. This information can be found by viewing the ‘Contact Activity’ and ‘Order History’ tabs for each customer and is explained in more detail on our Sales Management page.
In this document:
Listing Contacts
Go to Contacts (in the Contacts / People and Companies area). You will then be presented with a list of contacts. You can search for particular orders by using the search box located next to the ‘New’ button near the top of the screen. All contacts will have an ‘edit’ option to enable you to amend them.
Creating Contacts
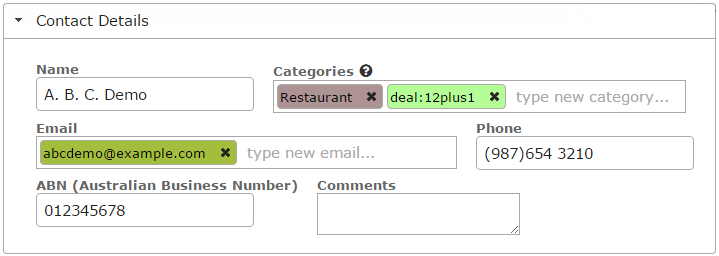
Create a new contact by clicking the ‘New’ button on the contact list. Enter the name, e-mail, phone etc. in the Contact Details area. Enter a category or categories, such as ‘Grower’, ‘Supplier’, or ‘Wine Club’ in the text box. A category can be simple, like ‘restaurant‘ or a category that has a value, such as ‘region:north‘ or deal:12plus1‘. In those examples the category is ‘region’ or ‘deal’ and the values are ‘north’ and ’12plus1′ respectively. A category can have more than one value. For example, you could also have ‘region:south‘ or ‘region:east‘. Similarly another customer may have the category ‘deal:10%discount‘.
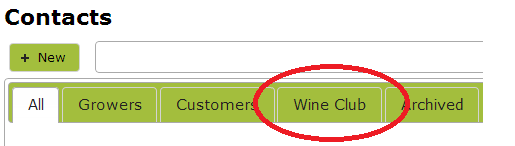
Once a category has been created, all contacts listed under that category will appear in a separate tab in the Contact list. For example, if you create a category ‘Wine Club’, the next time you view the Contacts list, ‘Wine Club’ will appear as a separate tab and will contain all contacts designated as belonging to that category. In addition, the next time you create a new contact, the new category you created will appear in the ‘Category’ drop down menu.
If you have added a category with more than one value such as ‘deal:12plus1’ and ‘deal:10%discount’, they will both appear under the ‘deal’ tab.
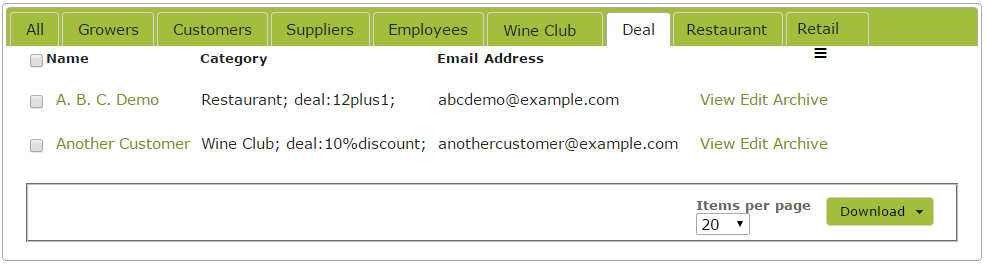
Similarly customers with the assigned categories, ‘region:north’, ‘region:south’ and ‘region:east’ would all appear under a ‘region’ tab.
Expand the ‘Contact Addresses’ field (by clicking anywhere in that button) and enter address information.
Contact Attributes
In the ‘Contact Attributes’ area, select all that apply. This will ensure that the particular contact is visible in various drop down menus in other parts of the app. For example any contact designated as a ‘Supplier’ will appear in the drop-down menus when creating Purchase Orders. Similarly a contact designated as a ‘Customer’ will appear in the drop-down menus when creating Sales Orders. Any contact can have more than one such designation.
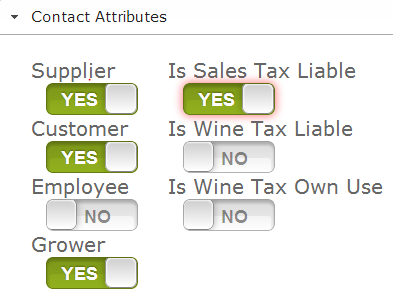
If this is a Supplier or Customer then you can store the default Payment Terms, Currency and for Sales Orders, the Revenue Ledger Code.

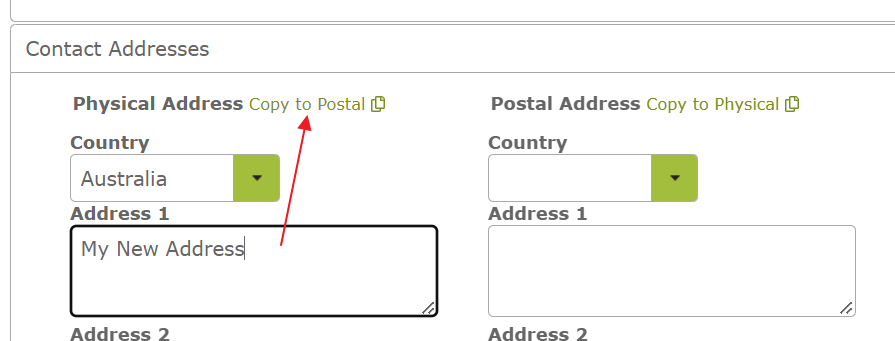
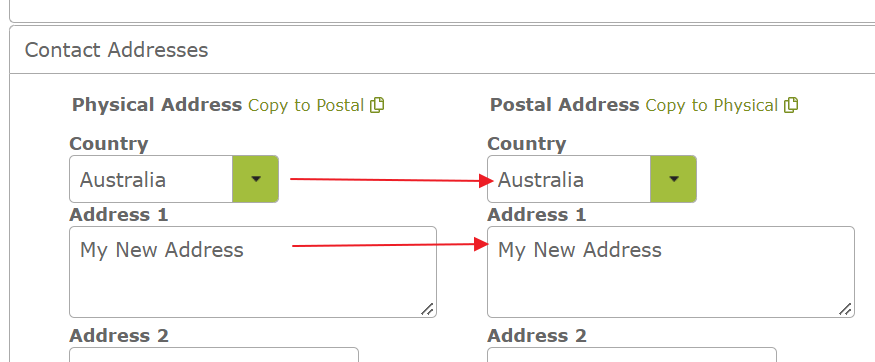
Addresses
There are 2 addresses for Contacts, a Physical (Delivery) and Postal (Billing) address. By default invoices use the Postal/Billing address.
If you have entered one address and simply want to use that for both addresses, use either the “Copy to Postal ” or “Copy to Physical” links to do this:
Once you have setup a contact for a different location, if you are to add a new location, you can just copy the contact of an existing location, change the name a bit and the addresses. This only works very well if all the other information is setup correctly in the existing contact, otherwise you will be copying across incorrect information.
If you were to have lots of different addresses for a customer, you would probably be using an importer to import the addresses. Similar you can just use the importer to import different contacts for these different addresses.
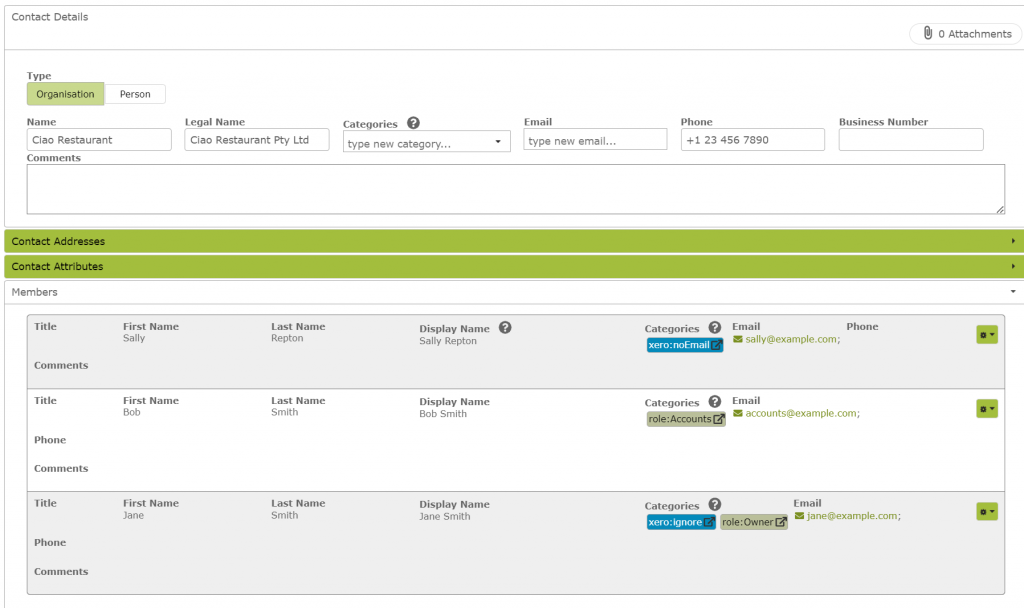
Members
Contacts can also have members. So a company like a Restaurant can have members like employees. This allows also allows each member to have a different email address and phone. You can tag members using categories like role:Owner, role:Buyer, or role:Accounts etc and for addons like Xero and Quickbooks you can control whether they are synced and if the email is used in that app for sending emails.
Through Billing
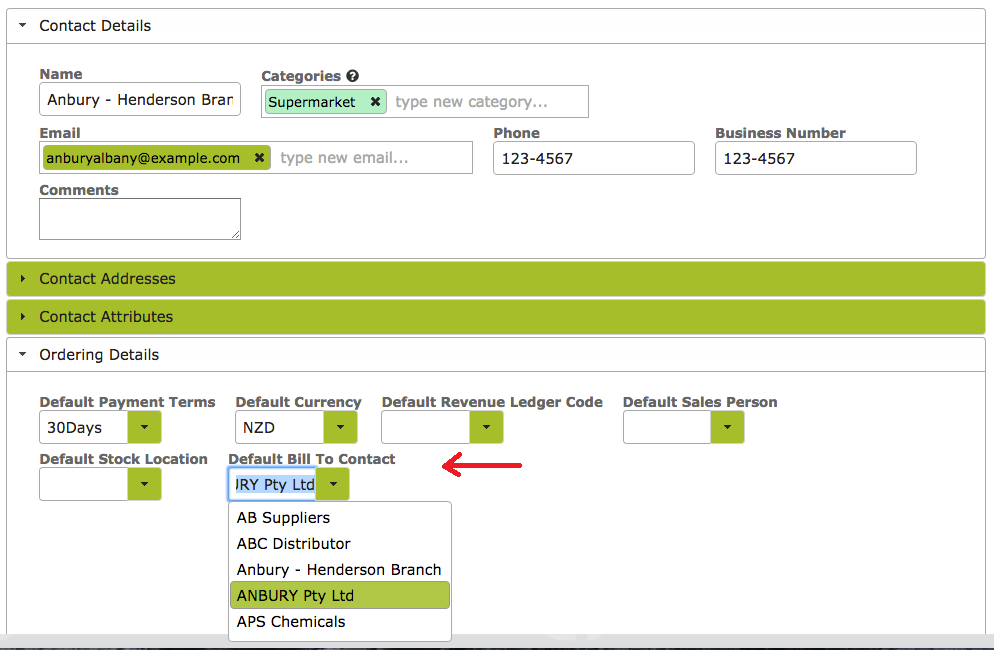
If bills for this contact will go through to another entity (e.g. the contact is an individual store but sales are billed to Head Office), select the Head Office name in the “Default Bill To Contact” text box in the ‘Ordering Details’ area.
Revenue Ledger Code (for Xero)
The Revenue Ledger Code in the Ordering Details section is used when you post a Sales Order or Purchase Order to Xero. If you do not use Xero, you can just leave this field blank.
If you do use Xero, and wish to track sales in your Profit & Loss statement by product type (e.g. Sales – Wine, Sales – Food, Sales – T-shirts), you should also leave the Default Revenue Ledger Code in the ‘Contact’ blank. To track by product type you will need to insert the Revenue Ledger Code in the Stock Item instead. See Stock Items – Ledger Codes for Xero.
The Revenue Ledger Code in the Ordering Details of a ‘Contact’ is only relevant if you use Xero and have chosen to categorize sales in Xero by customer type (e.g. Sales – Export, Sales – Domestic, Sales – Direct).
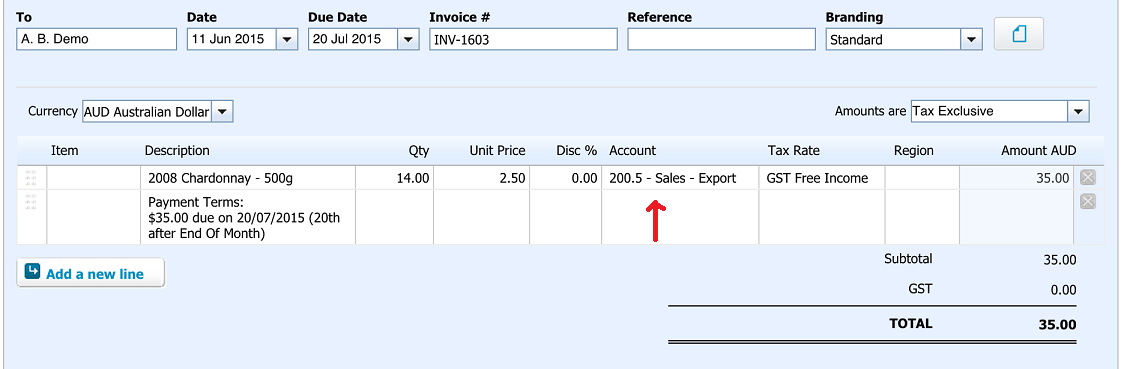
You can use the Default Xero codes or create custom ones.
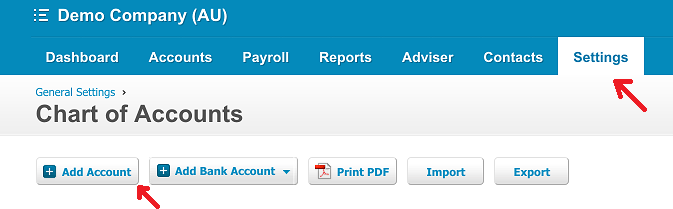
If you create your own codes, you must remember to add these Account Codes to your Xero account, using the ‘Add Account’ feature in the’Chart of Accounts’ area of the ‘Settings’ tab.
The Revenue Ledger Code accepts alpha numeric codes and if specified will override the revenue ledger from any items on a Sales Order when you are posting the order to your account system.
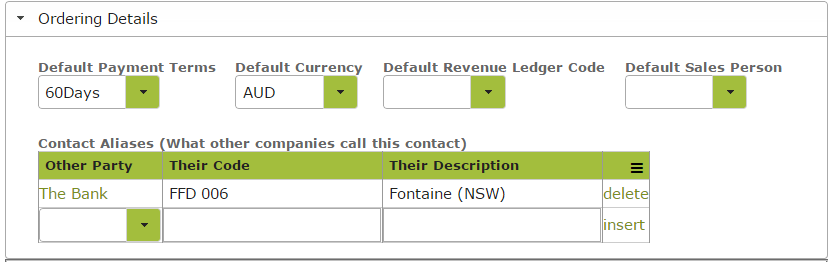
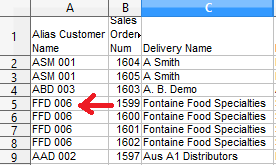
Contact Aliases
If your contacts are known by other parties as different names, you can put this information in the Contact Aliases area.
In the following example, we have noted in Fontaine Food Specialties’ Contact page that they are known by our financier, “The Bank” as FFD 006″.
Now, when you download information from Vinsight, (for example from the Sales Order list) and specify the “other party” that the information is for and that party’s codes will be included in the download.
Importing Contacts
You can import multiple contacts at once, from your other systems and spreadsheets with Vinsight’s import feature. See Importing Data for step by step instructions as to how to go about this.
Archiving Contacts
You can archive contacts that you do not need anymore. You can choose to do this either by bulk archiving or by clicking “Archive” within the Contacts site.
Bulk Archiving Contacts
You can download your Contact spreadsheet and reimport it with the contacts you have archived. How? Simply chance from the “TRUE” to “FALSE” within column “Is Active” as per below:

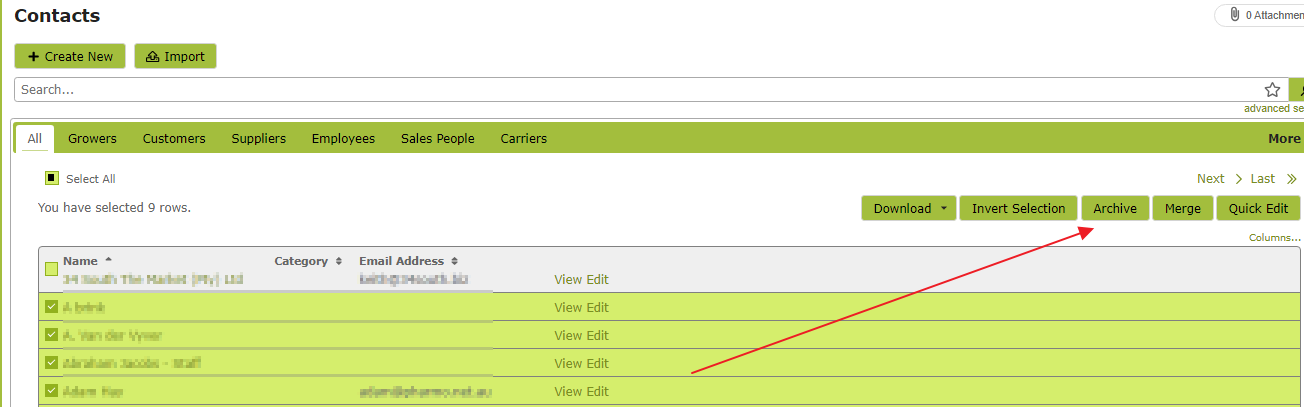
Archiving Contacts
If you need to Archive one or several Contacts, you can select the contact and then click “Archive” as per below: