Harvest
Overview:
This is where we record the quantity, date and source property/orchard/vineyard of the fruit coming into tank. A ‘Harvest Entry’ forms the basis of the information we use to create a crush operation. The ‘Harvest Entry’ is essentially the ‘paperwork’ required to record the harvest from the SubBlock and the fruit receival, whereas the linked bulk operation records the processing of the fruit received and bringing into vessel(s).
In this document:
Searching Harvests
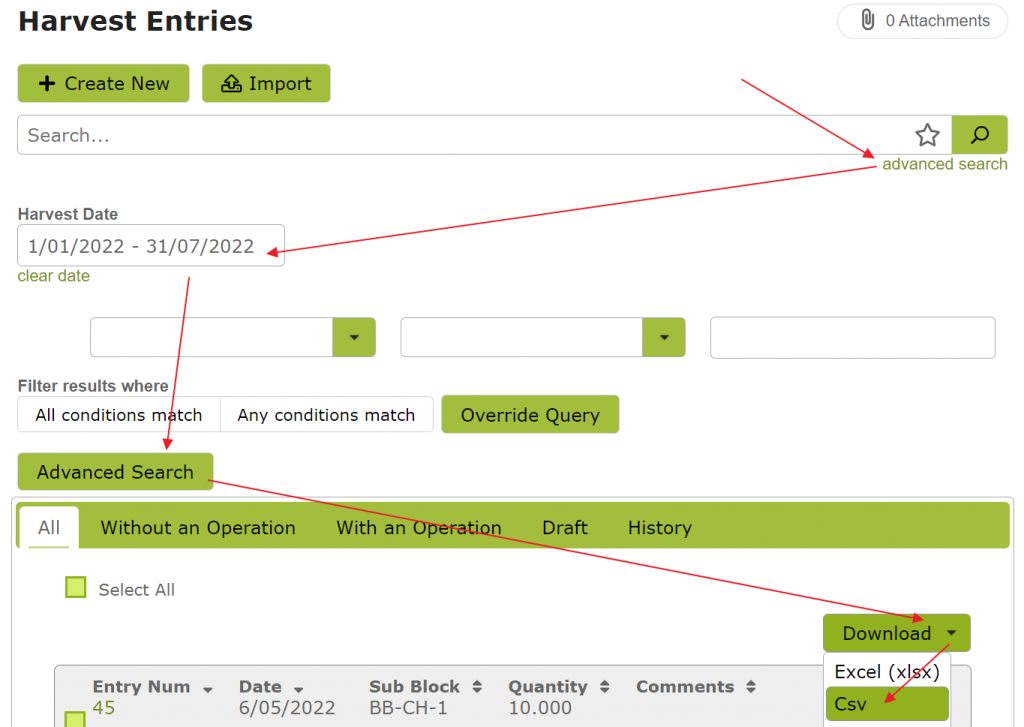
You will find the the list of existing harvests by clicking Harvest in the Make > Inbound area. You can search for particular harvests by using the search box located next to the ‘New’ button near the top of the screen or the advanced search button directly below that.
Viewing Harvests
Against each listed harvest entry you have the option to view your operation. As well as viewing the details of the harvest such as the sub-block, harvest date, logistics and costings, you can also trace where the fruit has ended up using the “Where Is It Now?” tab.
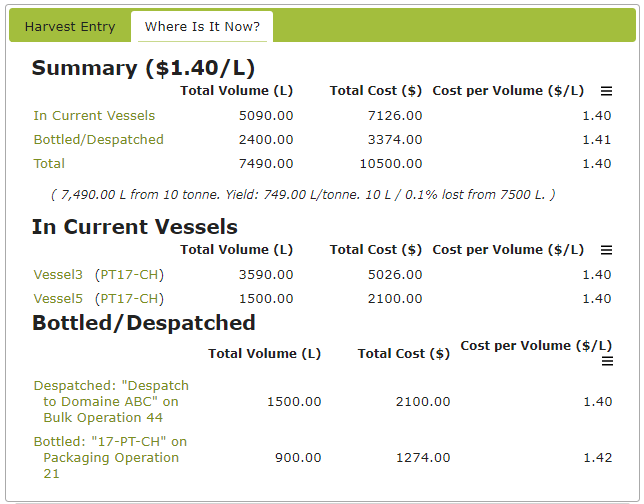
Where Is It Now?
Use the “Where Is It Now?” tab to find out where the bulk volume from that harvest currently is eg: currently in vessels, and/or has been bottled or despatched. You will also find related cost information if you are on a Subscription that supports costing. If in current vessels you will see which vessel it is in and can click on a link to that vessel (should you wish to obtain further details). Similarly you can link through to the relevant bottling or despatch operations by simply clicking the operation in question. This information can be particularly useful when doing traceability audits.
Creating/ Importing Harvests
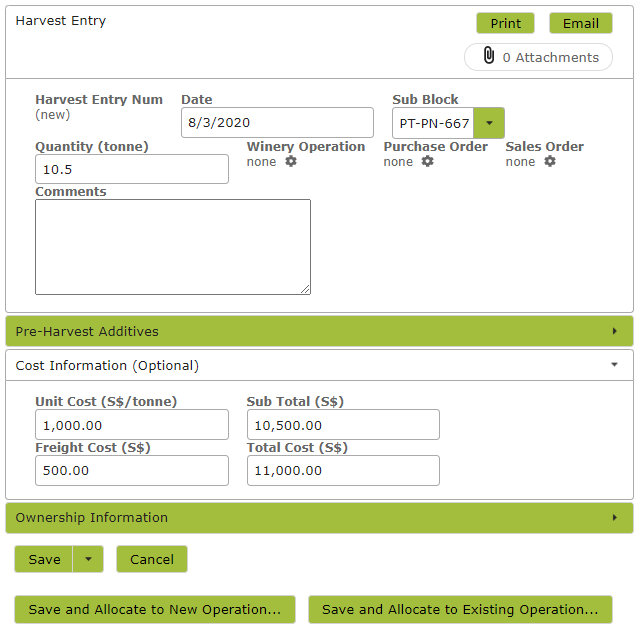
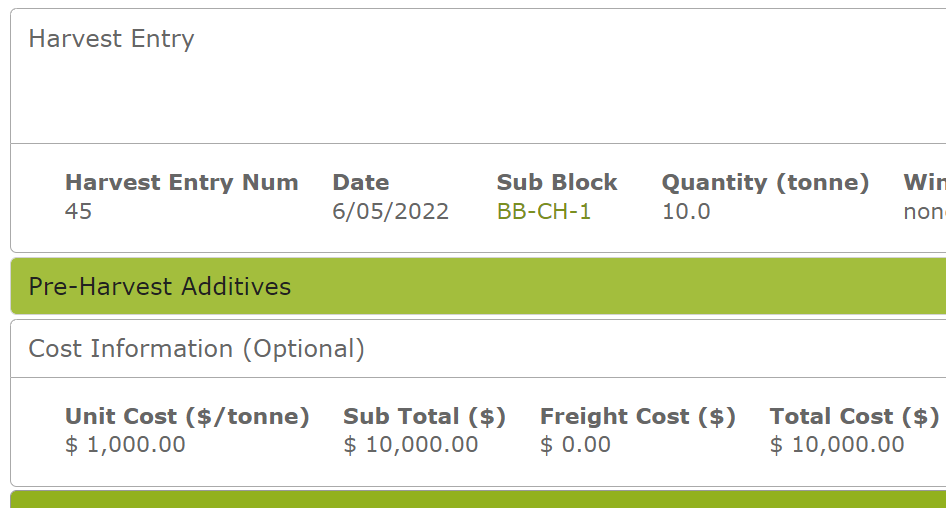
Before creating your first fruit delivery you must ensure you have pre-entered sub blocks so you can select the source of the fruit. You will then need to specify the correct date and add a ‘Sub Block’ from the drop down menu. If you are on our Standard or Premium Subscription, you have the option of adding cost information here (Read more about that here). You can also enter ownership information by expanding the ‘Ownership Information’ section towards the bottom of the page. If preparing the harvest entry for later execution, simply ‘Save’ the entry. If you want to action the entry and bring the fruit into tank, at the bottom of the page click the button ‘Save and Allocate to New Operation’ or ‘Save and Allocate to Existing Operation’ (if you have already created the operation).
The Associated Bulk Operation
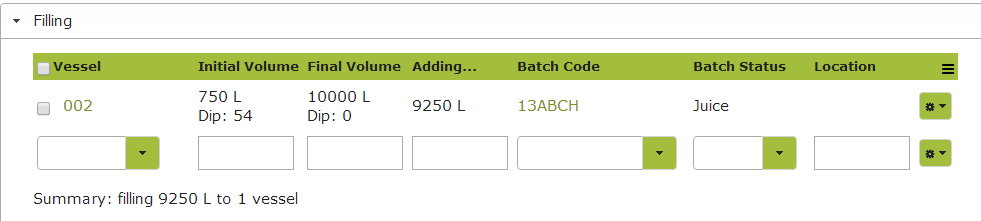
The linked operation will do the work of filling the tanks and putting the blend data on file for later reference. The source area of the operation will already contain the reference to the harvest data so all you need to do is select the vessel(s) to bring the fruit or pressed juice into. Of course, as with other operations you can also do additions to either the source fruit or the destination vessels. Be aware that, while the destination additions will be per litre or gallon, any additions to the fruit will be per tonne or ton. One other thing to note about operations that bring fruit into the vessels, is that while the operation code can be anything you like (such as ‘Press Chardonnay’ or ‘Crush and Destem Cabernet’) the parent type of the operation code must be ‘Crush’ because, in the app, this effectively means ‘bring fruit into the tank’ or ‘convert a tonnage to a liquid volume’.
The Associated Purchase Order
(for subscriptions that have costing features)
If purchasing fruit (as opposed to harvesting it from your own property), you will want to link the Harvest Entry to the related Purchase Order. This way the costs associated with the purchase will flow through into the production process as well as to the Current Asset Ledger (if using Xero or some other accountancy package). (For more details see “Linking Purchase & Sales Orders).
The Associated Sales Order
(for subscriptions that have costing features)
In addition if you are selling fruit, then you can link the harvest to a Sales Order that records that transaction. This way you do not have to have fruit come into the production process but you can still record the harvest and the transaction can flow through a sales order into your revenue accounts. (For more details see “Linking Purchase & Sales Orders“).
Importing Data
You may create multiple harvest entries in one go by simply inputting the relevant detail into a spreadsheet (such as Excel or CSV) and importing the whole lot at once. To do this, instead of selecting ‘New’ to create the new harvest entry, simply select the ‘Import’ button towards the bottom of the page. See How to Import Data for more information on the import process.
Updating Harvests
Once you have entered your pick date and tonnage received, you can allocate this harvest to a new or an existing operation by clicking either ‘Save and Allocate to New Operation’ or ‘Save and Allocate to Existing Operation’. This will save your harvest and open up the associated operation. Select a vessel(s) to fill, add any additions to tanks, then click ‘Save’ to create a draft or ‘Save and Update’ to process your crush operation. You can save your harvest entry at any time, by clicking ‘Save and Continue Editing’ from the ‘Save’ drop down menu. If inputting several entries at once, select ‘Save and Add New’ from ‘Save’ drop down menu to go straight to new Harvest Entry template.
Editing Harvests
You can edit any details about the harvest before the bulk operation has been updated, and certain details such as date, quantity and comments after the operation has been updated. If you have one of the subscriptions that supports costings, then you can also update the costs of Harvests using a spreadsheet and this will update the value of the wine that has been made from that fruit. (Read more about costings here: Managing Harvest Costs)
Download the Harvests from the season/vintage that you want to update:
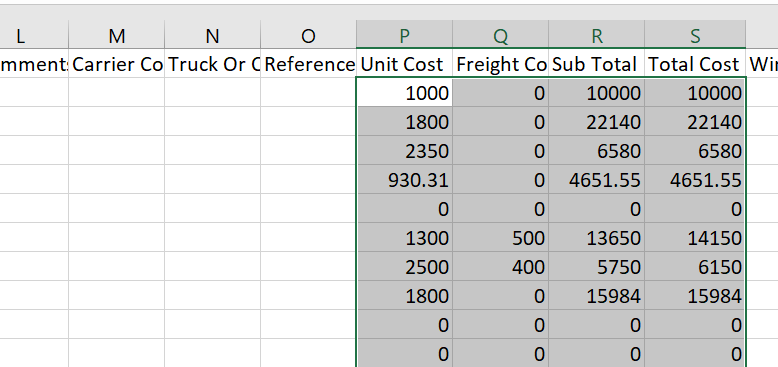
In the spreadsheet, update the costing columns as needed, ensuring the most important “Total Cost” is correct:
Then import them back into the Harvest Entries importer. Once imported, this will have updated the costs for those harvests:
Emailing Harvests
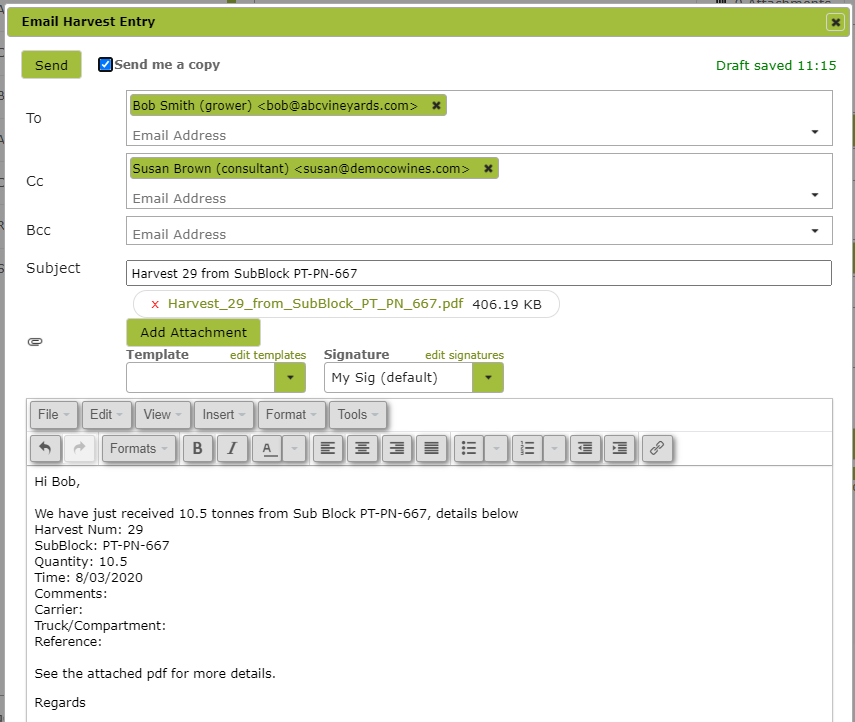
You may wish to email a copy of the harvest record to the grower, or your viticulturist, for example. To do this, simply click the ‘Email’ button at the top of the Harvest Entry page. A default email containing harvest details and attaching a pdf record of the harvest will be created automatically. Edit, to personalise, and send.
Deleting Harvests
You cannot delete a harvest entry once the bulk operation linked to it is updated. You can however delete the Harvest entry prior to updating your operation.