Sending Tracking Codes to Xero
Overview
Xero allows you to track up to two custom categories in your sales and purchase orders. Automatically send tracking information from Vinsight to Xero to make the most of this feature.
In this topic:
Tracking in Xero
Xero allows you to track up to two sales categories. Set up these categories in Vinsight and the tracking information will flow through when you post your sales and purchase orders to Xero.
Here is an example of a Xero invoice showing two categories, “market” and “brand”:
![]()
Automatically Send Tracking Information from Vinsight to Xero.
Take the following steps to automatically send tracking information from Vinsight to Xero:
1. Set up Categories in Xero
First, ensure that you have set up your tracking categories in Xero. The categories in Xero are case-sensitive so try be consistent in your use or non-use of captials when creating the categories.
![]()
2. Set up Categories in Vinsight
Categories in Vinsight can be either Product Categories (relating to the product you are selling) or Contact Categories (relating to the customer you are selling to).
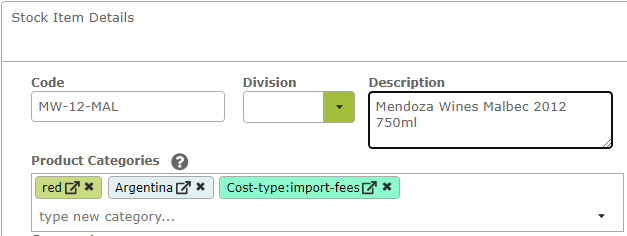
Product Categories:
Product Categories are found in the Settings > Count area.
When creating a category in Vinsight the ‘Code’ should match the ‘Tracking Category Name’ in Xero and the ‘Values’ should match the ‘Category Options’ in Xero. When entering, separate the individual ‘values’ with semicolons. As noted above, both the ‘Code’ and the ‘Values’ will need to be in the same case as the ‘Tracking Category Name’ and ‘Category Options’ in Xero.
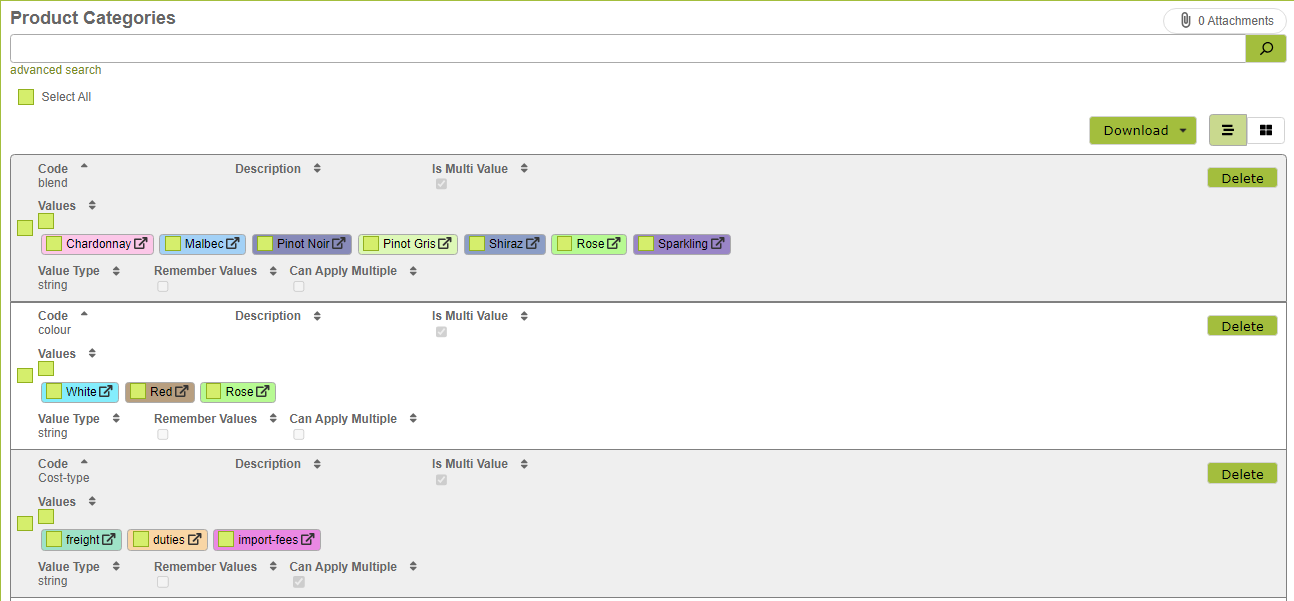
These categories will now appear in the drop down menu for the Product Categories field in the Stock Item Details area of the Stock Item. You will need to mark your Stock Items with the relevant categories in order for the Sales and Purchase Orders of that Stock Item to post that information into Xero.
Note: New Product Categories can also be added directly from the Stock Item page. See here for more information.
Contact Categories:
Contact Categories are found in the Settings > Contacts area. They are set up in exactly the same way as Product Categories.
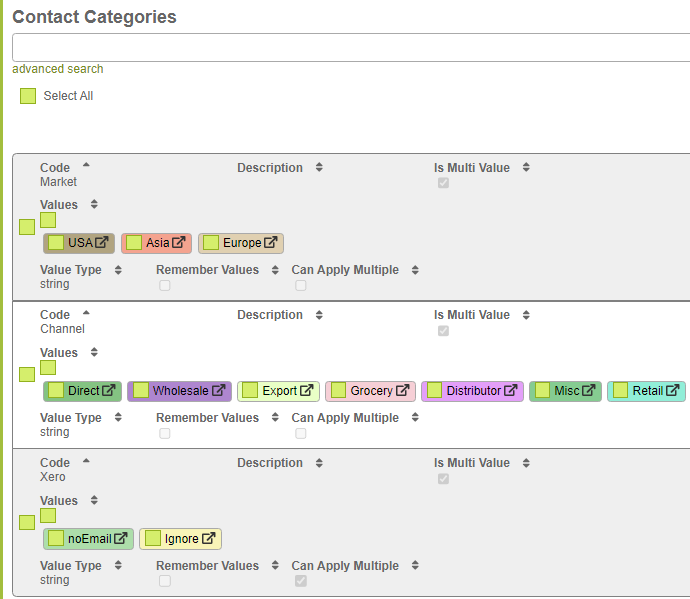
Once set up, these options will appear in the drop-down menu for the ‘Categories’ field in the Contact Details area of the Contact. You will need to mark your Contacts with the relevant categories in order for the Sales Orders to that Customer to pass that category on to the Xero invoice.
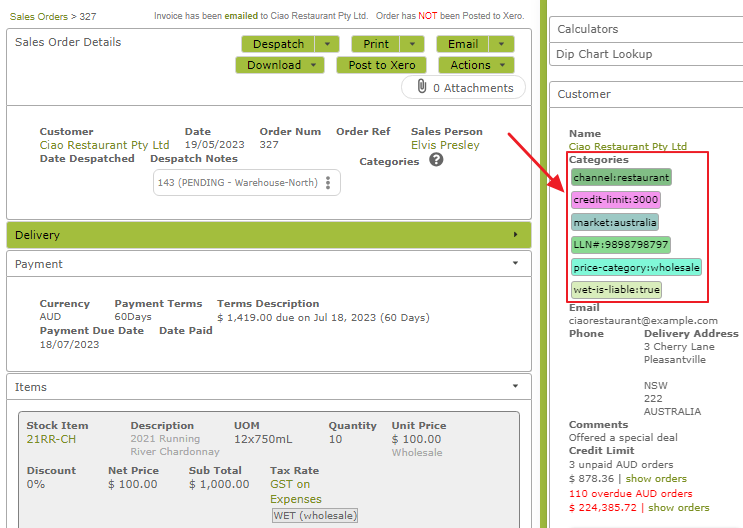
You will also be able to see the Categories of a customer in the ‘Show Panel’ area of a Sales Order created for that customer.
Click here for more information about Vinsight Contact Categories.
3. Choose Categories to Send to Xero
Vinsight allows you to add and track as many categories as makes sense to you. However Xero only allows two tracking categories. You must therefore select the two Vinsight categories you wish to track in Xero. These 2 include the options for sending Division or Sales people as tracking codes so if you choose to send the Sales Person, then you will only have space to send one other tracking code.
Go to ‘Add-ons’ in the Settings > Setup area. Click the ‘Configured’ button next to the Xero logo and select the link that relates to the Xero connection you wish to configure. Ensure you are connected to Xero. Select the two categories you wish to track in Xero from the ‘Categories as Tracking Codes’ drop down menu.

Remember to click ‘Save’ once you have selected your categories. This tracking information will now automatically appear on your Xero invoices. Click the following image to view larger.
![]()