Editing Analysis Sets
Overview
Analysis Sets are a way to change what columns are showing on the lab analysis table based on your current use case. Changing to another analysis set on the lab analysis table does not filter the results you can see, it just changes the columns of the tables so you only need to see what you are working with.
Vinsight comes pre loaded with a few common analysis sets, Ferment Chart, Finished Wine and Maturity Monitoring. Each has a different set of columns defined which are useful for their context.
If you find that one of these sets is very close to what you need, but is maybe just missing a column that you need to keep track of, you can simply edit the analysis set to add, re order or remove columns.
Key Concepts
As mentioned above, Analysis Sets are a way to change what columns are showing on the lab analysis table based on your current use case. Changing to another analysis set on the lab analysis table does not filter the results you can see, it just changes the columns of the tables so you only need to see what you are working with.
This helps keep your current working and search area less cluttered if you are only doing a few analyses.
You can rename an analysis field that so that it is easier to read or more brief, eg you could rename “Alcohol” to “ABV” or “Titratable Acidity” to “TA”.
You could also use an Analysis that you will never use, to store the result of an analysis type that is not defined. eg if you never do Enzymatic Glucose testing then you could rename that field to something that you do need. Be aware that you cannot store multiple different values in the same field so it is a one to one relationship (see Gotchas below.
Gotchas
The most common issue is when people try to store multiple values into one field by renaming the same field with more than one name. Just remember, keep your renaming of fields to be one-off.
System Defined Analysis Sets
Several areas and features have their own system defined analysis sets. Do not delete these and keep in mind their purpose when editing them:
- Maturity Monitoring: These are the analyses that are used if you monitor fruit maturity so often a sugar measurement eg Baumé, Brix, Specific Gravity or Oechsle, maybe pH and then an acidity measure etc.
- Bulk Operation: Designed to allow one or two analyses to show directly on a Bulk Operation eg ABV, Free SO2 or similar
- Ferment Chart: These are the analyses used during fermentation so again often a density or sugar measurement eg Baumé, Brix, Specific Gravity or Oechsle and perhaps temperature
- Default: A fall back set of analyses of your choosing.
How to edit an Analysis Set
To edit an analysis set, you will need to go to Analysis Sets in the Settings > Analyze area.
Here you will see a list of the current analysis sets. Simply click one to edit. In this example we are going to edit the Maturity Monitoring analysis set to add a Baume column.
While editing an analysis set, you will be using a table that looks like this:
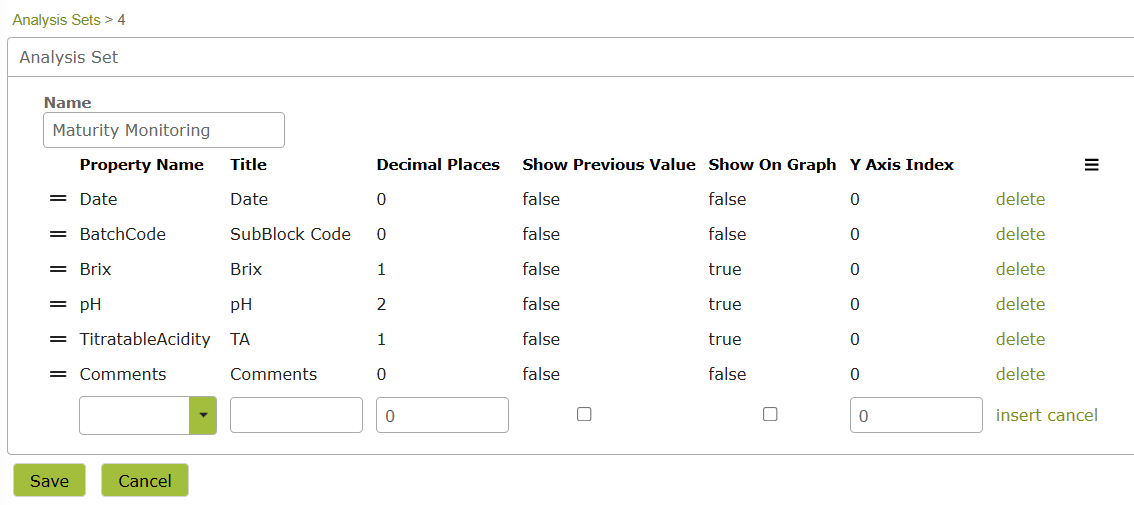
To add a column, simply start typing its name in to the drop down list under “property name” and select it:

Then if you want, you can change the title to give the column a different display name in the Lab Analysis table.
Choose the number of decimal places you wish to track, and if you want to be able to see this property on a graph or not. Then press “insert”:

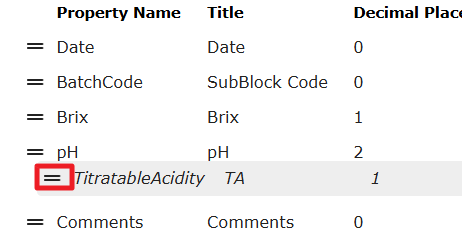
While you are here, you can delete column you don’t use, or switch the order of columns around by clicking on the double-bar handle and dragging the row up or down:
To adjust which data is displayed on graphs simply go to the ‘Show On Graph’ column, set the properties you wish to display to ‘true’ and all others to ‘false’.
IMPORTANT: Your analysis set must have at the Date and BatchCode columns as a minimum. If they are deleted the Lab Analysis table may not work correctly.
When you have finished editing, simply press “Save” and you’re done.
