Vessel QR Label Printing In Vinsight
Overview
As a part of our new Barcode and QR Code scanning workflow, we have included the ability for Vinsight to generate and print labels for your Vessels so you can see basic vessel information at a glance, use your mobile device to scan the label to get more detailed “real time” information, and perform operations on the vessel(s).
In this document:
Notes before getting started
- For printing vessel labels in particular, we recommend using the latest version of Google Chrome on desktop. This is because the print dialog in chrome gives you the best print preview and allows you to easily customise the label margins for the best fit.
- Vinsight will not provide support for setting up printer drivers on your computers.
How To Print the Vessel Labels
-
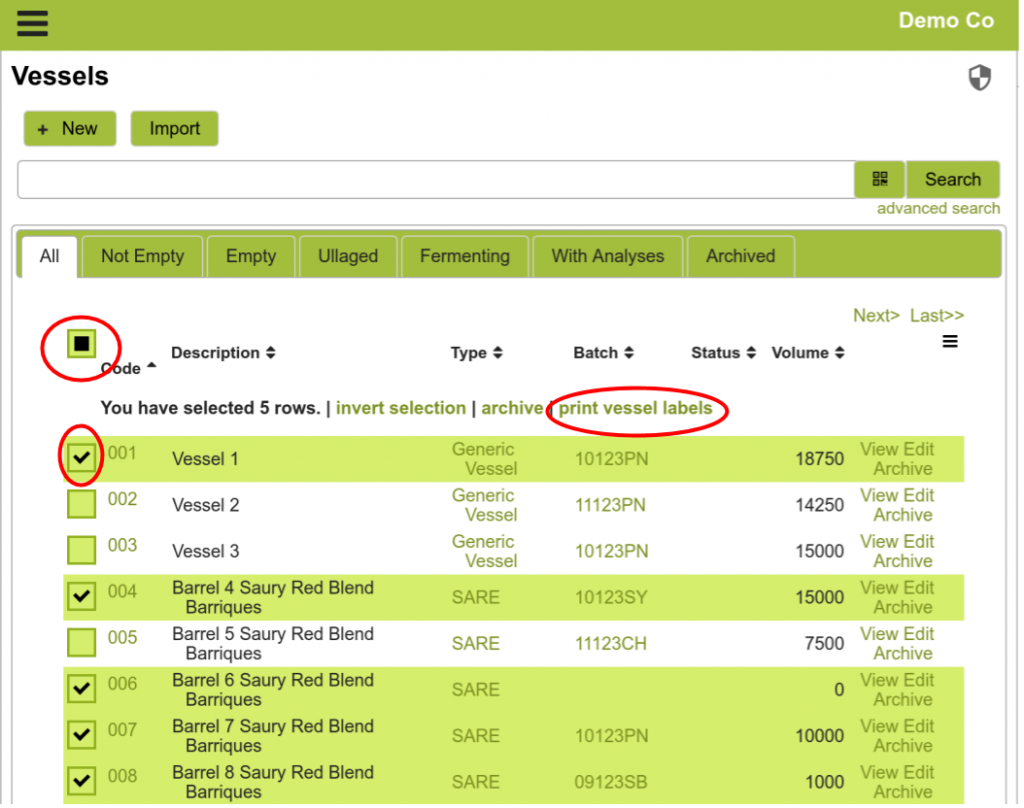
Choose the vessels you wish to print labels for.
Using the tick boxes on the far left of each vessel row, select all of the vessels you wish to print labels for. If you wish to print labels for all your vessels at once, tick the box in the header row and then click “Select all number of vessels rows”.
Once you have selected the vessels you want to print labels for, click the “print vessel labels” button which is located immediately above the vessel list.
NOTE: We suggest doing a smaller test run of labels on your printer setup before doing all of your vessels at once to avoid wasting time and labels.
-
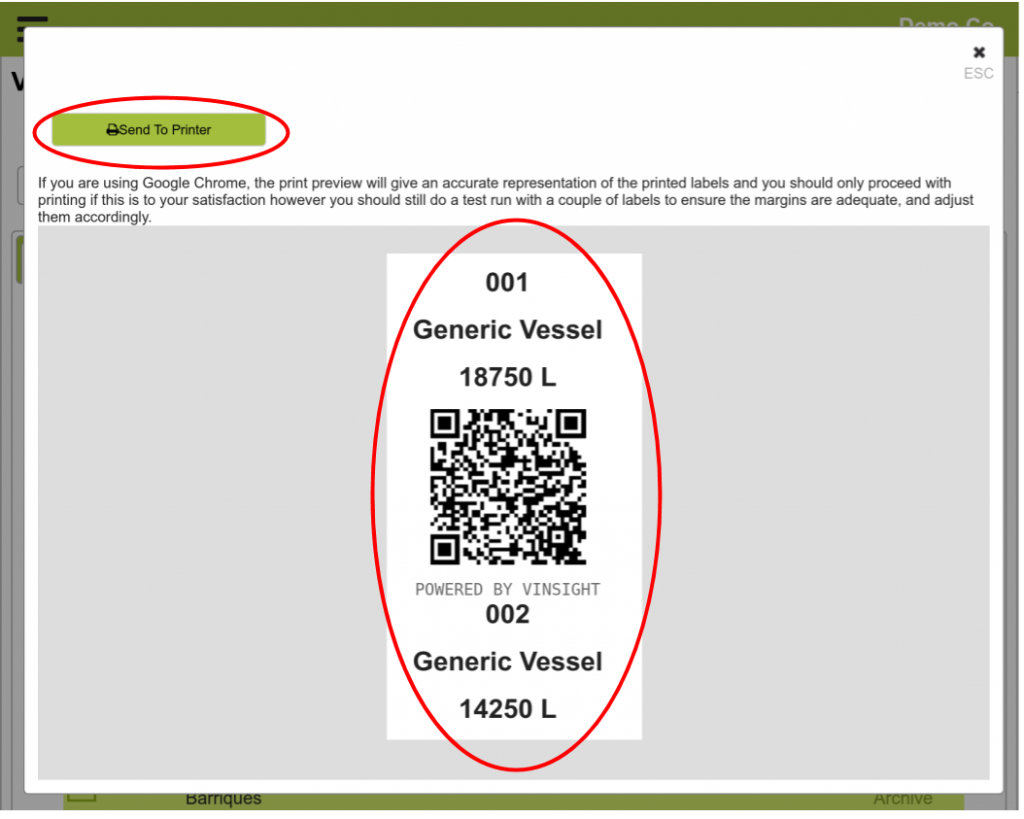
Print Vessel Labels
After clicking “print vessel labels” you will be presented with the following preview. It is recommend that you scroll through the preview here to make sure everything is present because chrome can take a relatively long time to generate the actual print preview if you are printing many vessels. When you wish to print, click the “Send To Printer” button.
-
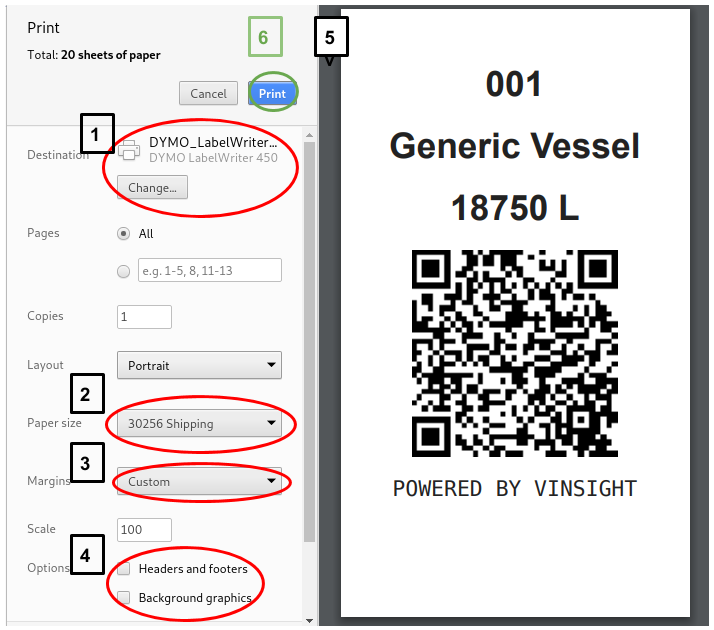
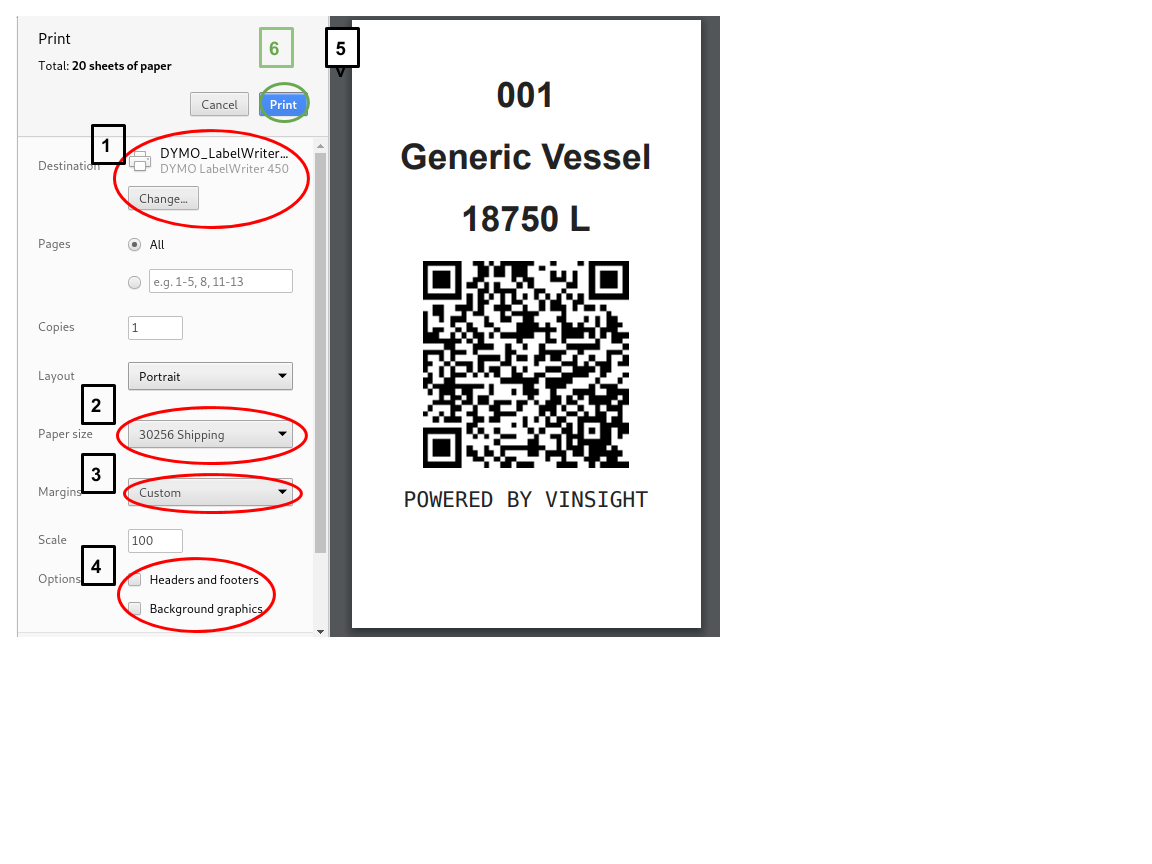
Chrome Print Preview
- Change your printer destination to the appropriate printer.
- Change paper size to the correct size.
- Set your margins to custom and resize the margins appropriately in the print preview on the right by dragging the dotted lines (not visible in screenshot).
- Untick the headers and footers.
- Scroll through the print preview to make sure all the formatting is correct. One thing in particular to look out for if you know you have long Vessel Codes and Type Codes is the possibility that the QR Code is cut in half. This can make the label making inconvenient however with some strategic cutting the label can actually be salvaged. Additionally a extra long label will not affect any of the labels following it so unless you have many long Vessel Codes, this issue should be relatively isolated.
- Once you are totally satisfied with the print preview then you should click the “Print” button to finally print your vessel labels.