Custom Remittance Instructions and Footers – Examples page
Overview:
This page shows how to set remittance instructions and invoice footers on Sales Order printouts. You can set them once for a Company Division, or override them on a saved print template.
Use remittance instructions for how to pay (bank account, payment reference, amount due). Use the invoice footer for a short company line that visually finishes the page. The footer repeats at the bottom of every printed PDF page. Remittance instructions sit in the body of the document, usually just below the totals.
The old perforated tear off remittance strip is not available on the new Sales Order templates. If you liked that strip for the payment summary, or to ground the bottom of the page, you can recreate a similar look with the examples below.
In this document:
Where to Edit Remittance and Footer Text:
There are two places to set this wording. Use the division (Settings > Company Settings > Divisions) to set default remittance instructions and footers for a division. Use a Sales Order template (Open Sales Order, select ‘Setup / Edit Print Templates’ from ‘Print’ drop down list), when only some printouts need different text (for example an export or customer-specific invoice).
For how this sits among the other template options, see Customising Sales Orders for Printing Or Emailing.
About the on-screen preview: The preview helps you see that remittance and footer text are present. It is not always an exact representation of the finished PDF. Repeating footers, page breaks, and spacing can differ. Print or download a PDF when you need to confirm the exact result.
Differences Between Remittance Instructions and Footer Displays:
‘Remittance Instructions’ sit in the document body. In a two page invoice, it will appear only once, below the subtotals.
‘Invoice Footer’ repeats at the bottom of every PDF page.
The footer logo comes from the Division settings. You can hide it on a template from the property checklist, and you can adjust its size and position under ‘Open Advanced Layout Controls’.
If one PDF contains invoices from different divisions, the footer from the first rendered invoice is used for all pages. The same applies to combined templates and bulk list printing: one footer is used for the whole PDF.
Inserting fields
In the remittance or footer editor, click ‘Add Field’, choose a field, and insert it.
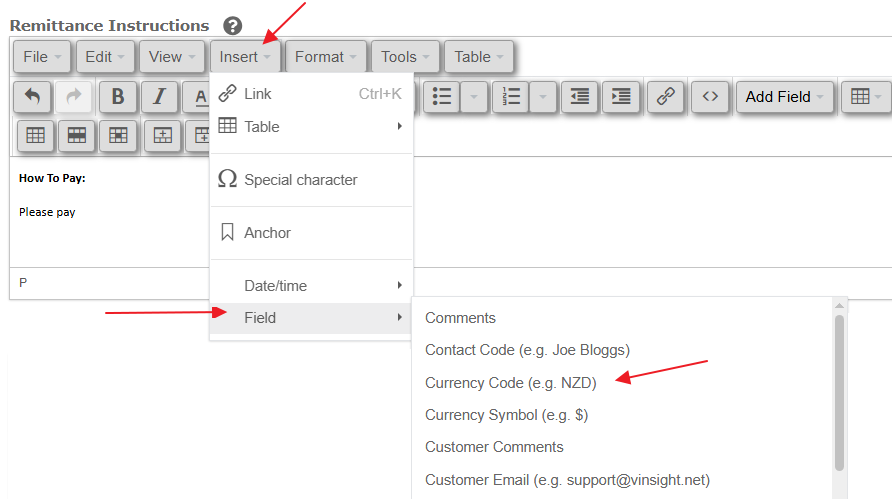
Fields appear in curly braces, for example {{OrderNum}}. When you print, those names are replaced with the values from that sales order. For example, the following:
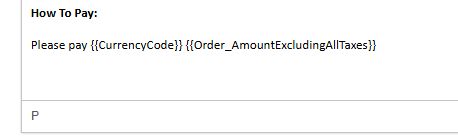
will look like this on a $590.00 Sales Order in AUD:

Useful fields for payment wording:
- {{OrderNum}}
- {{ContactCode}}
- {{OrderReference}}
- {{CurrencyCode}}
- {{Order_AmountIncludingAllTaxes}}
- {{DatePaymentDue}}
- {{PaymentTerms}}
- {{Division_CompanyName}}
- {{Division_LegalName}}
- {{Division_PostalAddress}}, {{Division_PostalAddress2}}, {{Division_City}}, {{Division_PostalRegion}}, {{Division_PostalCode}}
- {{Division_BankAccountNumber}}
- {{Division_Email}}
- {{Division_Phone}}
- {{Division_TaxNumberName}} and {{Division_TaxNumber}}
Line Spacing:
Pressing ‘Enter’ in the editor starts a new paragraph and adds extra space between lines. For address or payment lines that should sit close together, use ‘Shift+Enter’ instead. That inserts a line break inside the same paragraph.
Examples:
Here are some examples of remittance instructions and footers to help you.
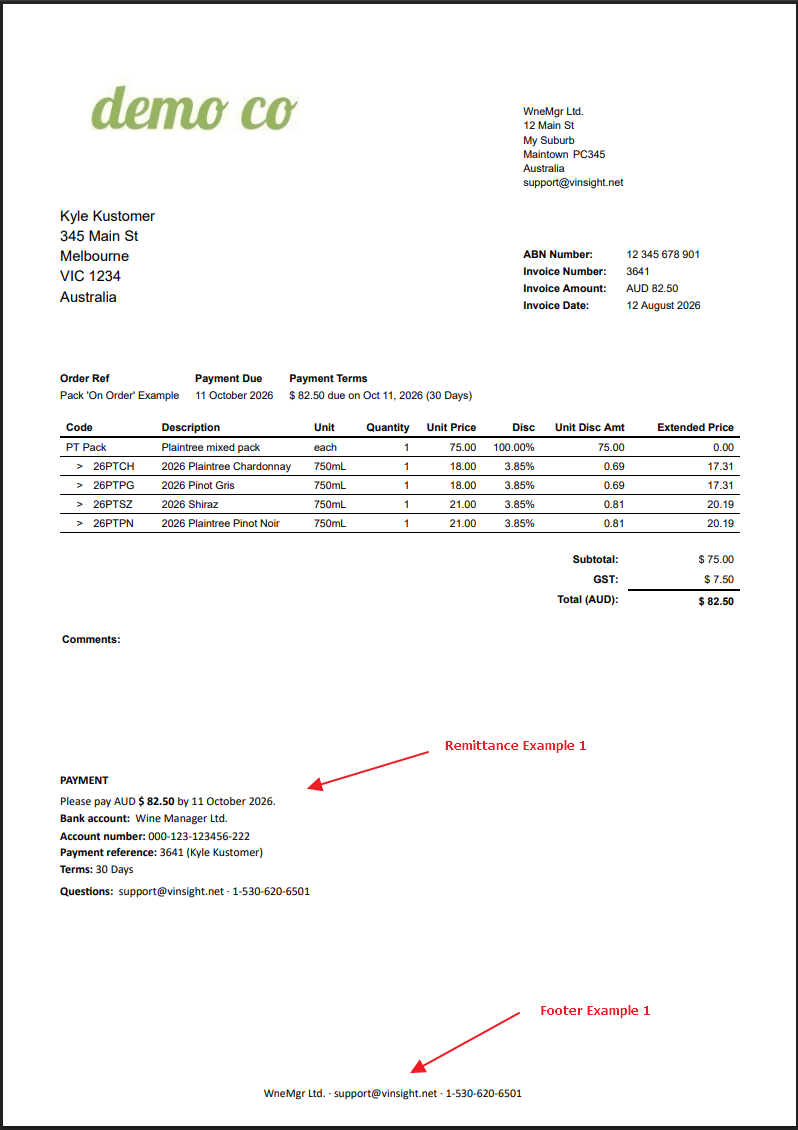
Remittance Example 1:
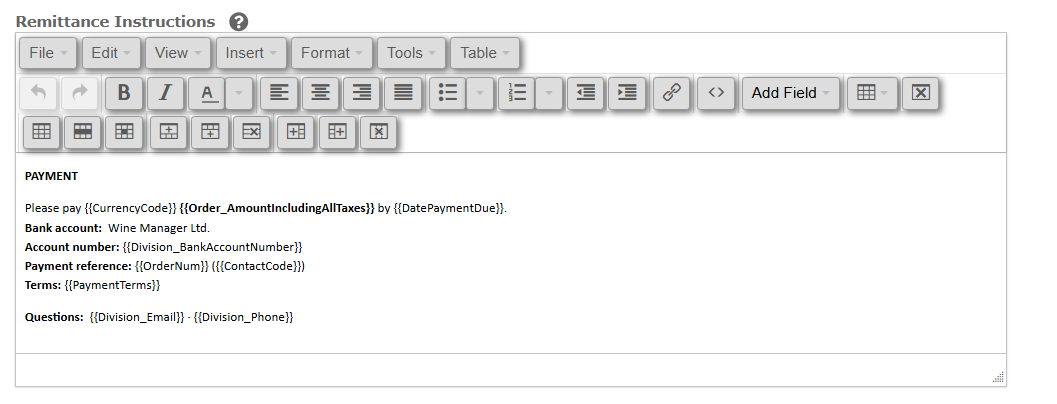
Example display of Remittance Example 1 on invoice.
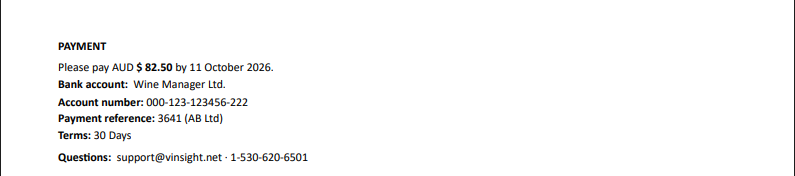
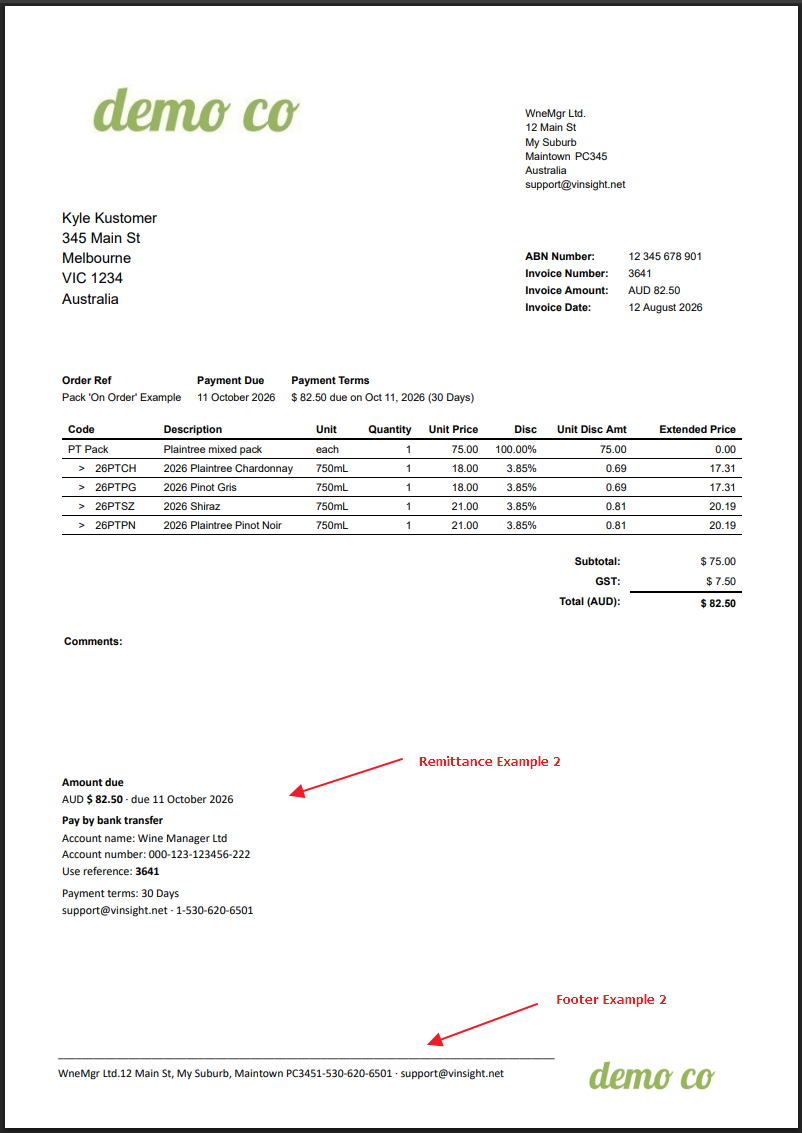
Remittance Example 2:
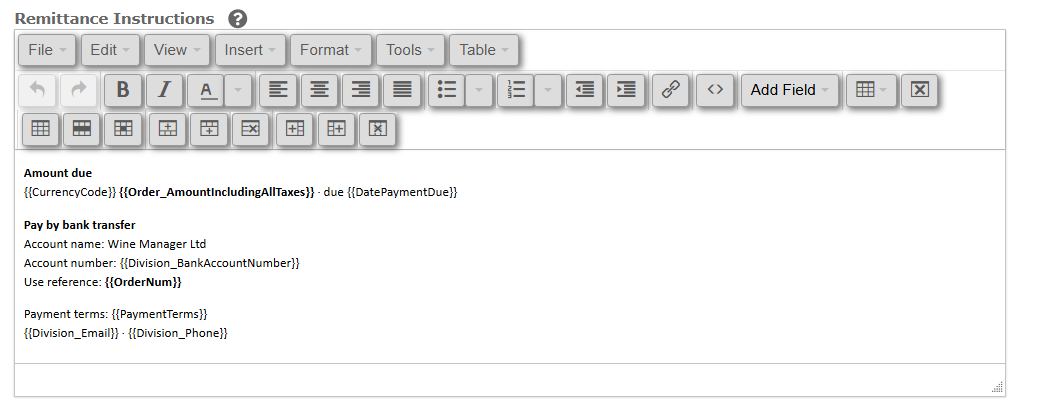
Example display of Remittance Example 2 on invoice.
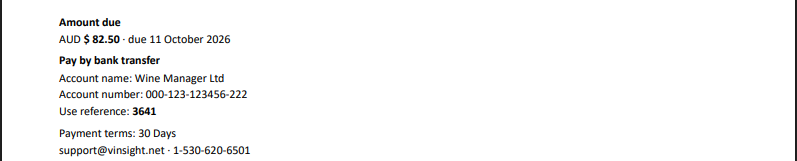
Footer Example 1: (No logo)
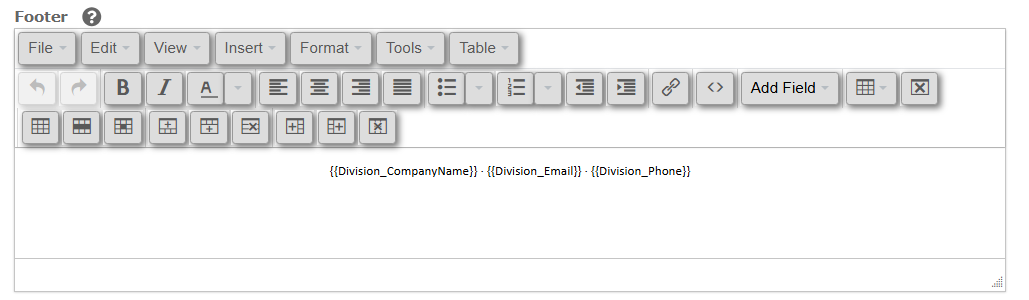
Example display of Footer Example 1 on invoice.

Footer Example 2:
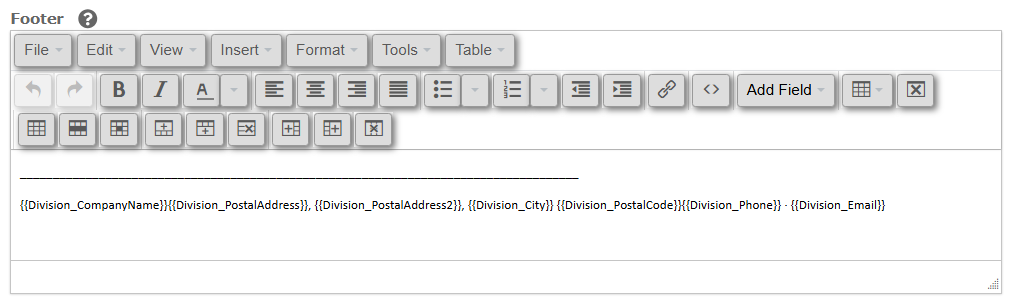
Example display of Footer Example 2 on invoice.

Please note, these examples make heavy use of fields. If not dealing with multiple divisions, you may prefer to type some of this information directly into the editor, rather than using fields.
The following images show how the text in these examples, would be set out on a printed pdf. . .
Legacy Tear Off Remittance Slip
The legacy templates provided an option to include a ‘Tear Off Remittance Slip”. This option has been deprecated, as it is no longer customary to make payment by tearing off a remittance slip, and putting it in an envelope with a cheque and mailing it to the vendor.
If you have previously had this option selected, we recommend that you re-configure your invoices to use customised remittance and footer regions instead. You can see some examples above.
However if it is important to you to re-create the slip, we have provided a template here to help you construct something similar. You would need to add this to the remittance instructions region.
First, copy this code block:
<p>—————————————————————————————————————————————————————————————–</p>
<p><strong>Remittance Advice</strong></p>
<table>
<tbody>
<tr>
<td style=”padding-right: 24px;”>
<p><strong>Post payment and remittance advice to:</strong><br />{{Division_CompanyName}}<br />{{Division_PostalAddress}}<br />{{Division_PostalAddress2}}<br />{{Division_City}} {{Division_PostalRegion}} {{Division_PostalCode}}</p>
</td>
<td>
<p><strong>Payment From:</strong> {{ContactCode}}<br /><strong>Invoice:</strong> {{OrderNum}}<br /><strong>Amount Due:</strong> {{CurrencyCode}} {{Order_AmountIncludingAllTaxes}}<br /><strong>Due:</strong> {{DatePaymentDue}}<br /><strong>Amount Paid:</strong> _______________</p>
</td>
</tr>
</tbody>
</table>
<p></p>
<p></p>
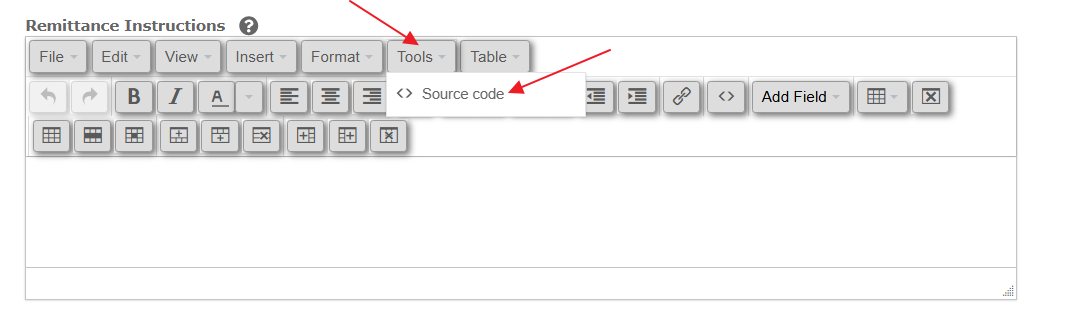
On the remittance instructions editor, click Tools, then ‘<> Source code’,
. . . paste the provided code into the Source Code pop up and click ‘Ok’.
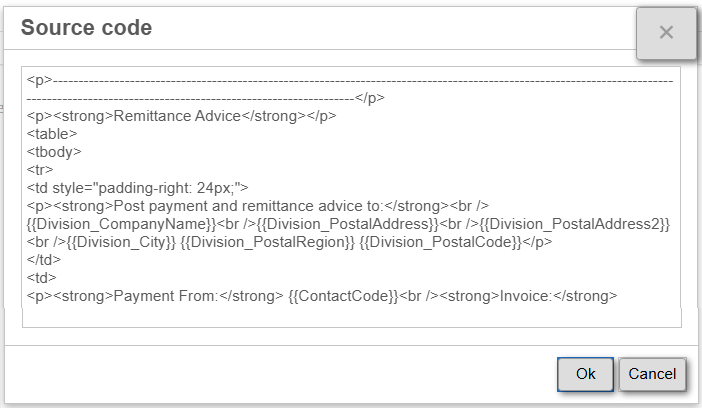
This would look something like this when printed.
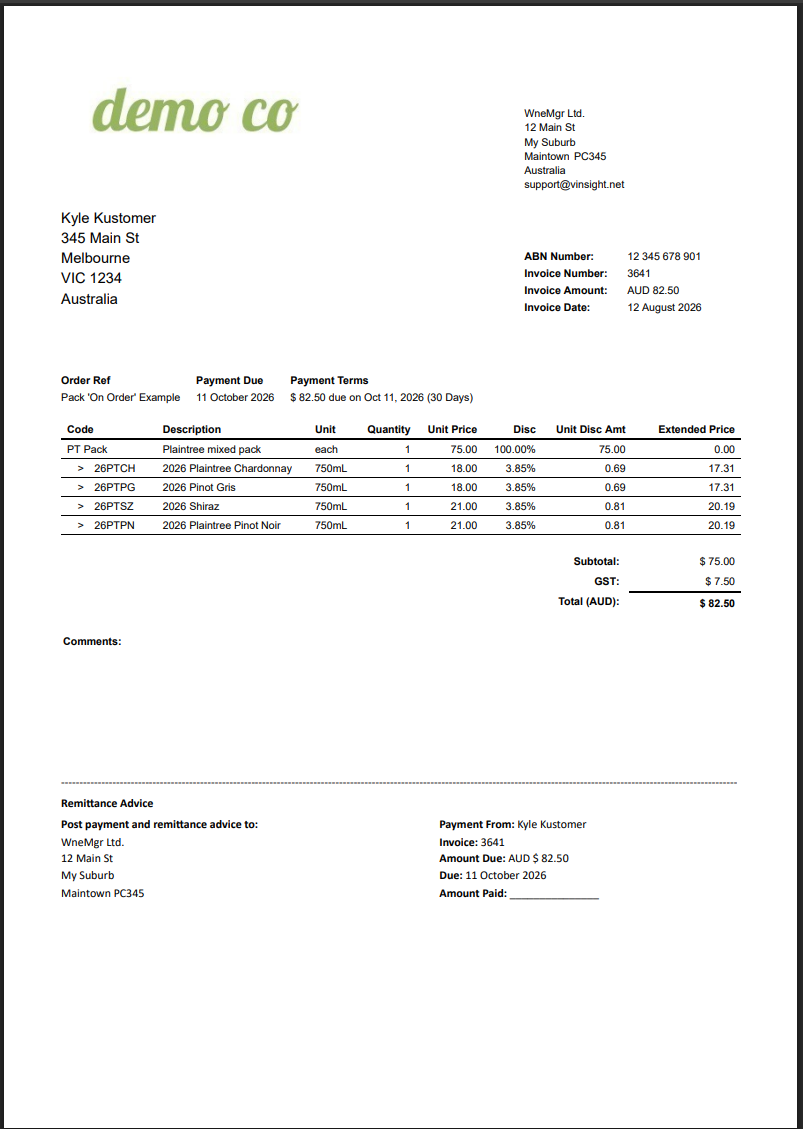
You could also create this by using the main editor, selecting a two column, single row table, and adding the fields, or typing values directly into the table cells.
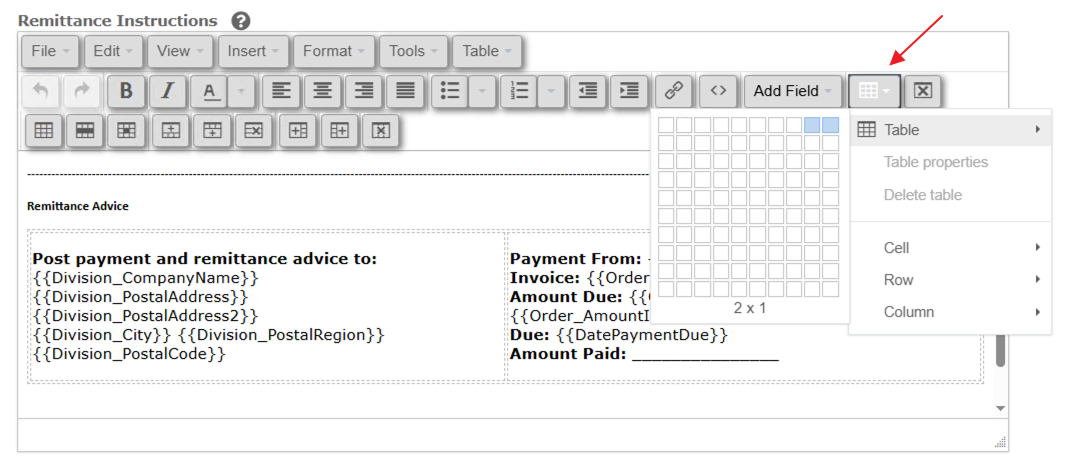
Making sure the areas print
Remittance and footer text only appear if those regions are turned on for the printout.
- On a template, turn on ‘Show Properties (to Add, Remove or Re-order)’ and check ‘Remittance Instructions’ and / or ‘Invoice Footer’.
- Packing slip printout types hide remittance instructions by default.
- If both the template override and the division field are blank, that region will not print.
Tip: After pasting an example, print or download a PDF. The on-screen preview will not always match footer placement or line spacing on the printed page.