Composition Reports
Overview:
Coming soon: Composition Print and Email will shortly move to this new template style by default. Until that change is released, continue using the current templates and follow the existing documentation, Composition PDF Reports
You can customise a Composition PDF before printing or emailing it and save that format for future use as a Composition Template. This way you can produce blend summaries, allergen statements, or Label Integrity Program (LIP) style reports, and choose which sections and columns to include. While this feature is new, old-style templates remain available under ‘Legacy Templates’ in the Print and Email menus. We encourage you to move to the new template style as legacy options will be phased out over time.
You may want to use this feature to:
- Track allergens for packaging and retail
- Verify composition information for marketing purposes
- Supplement product information for customers who purchase bulk wine
- Have a document that complies with the Label Integrity Program (Australia only)
This feature is available in the following views where beverage composition information is already available:
- Vessels
- Batches
- Bulk Despatches
- Packaging Operations
- Winery Operations
- Finished Stock Items
In this document:
Print or Email a Composition Report
From a Composition Tabs view, use the ‘Print Compositions’ or ‘Email Compositions’ split button to see the printing and emailing options.
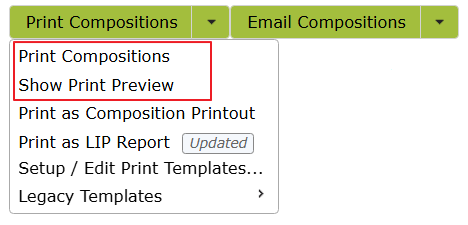
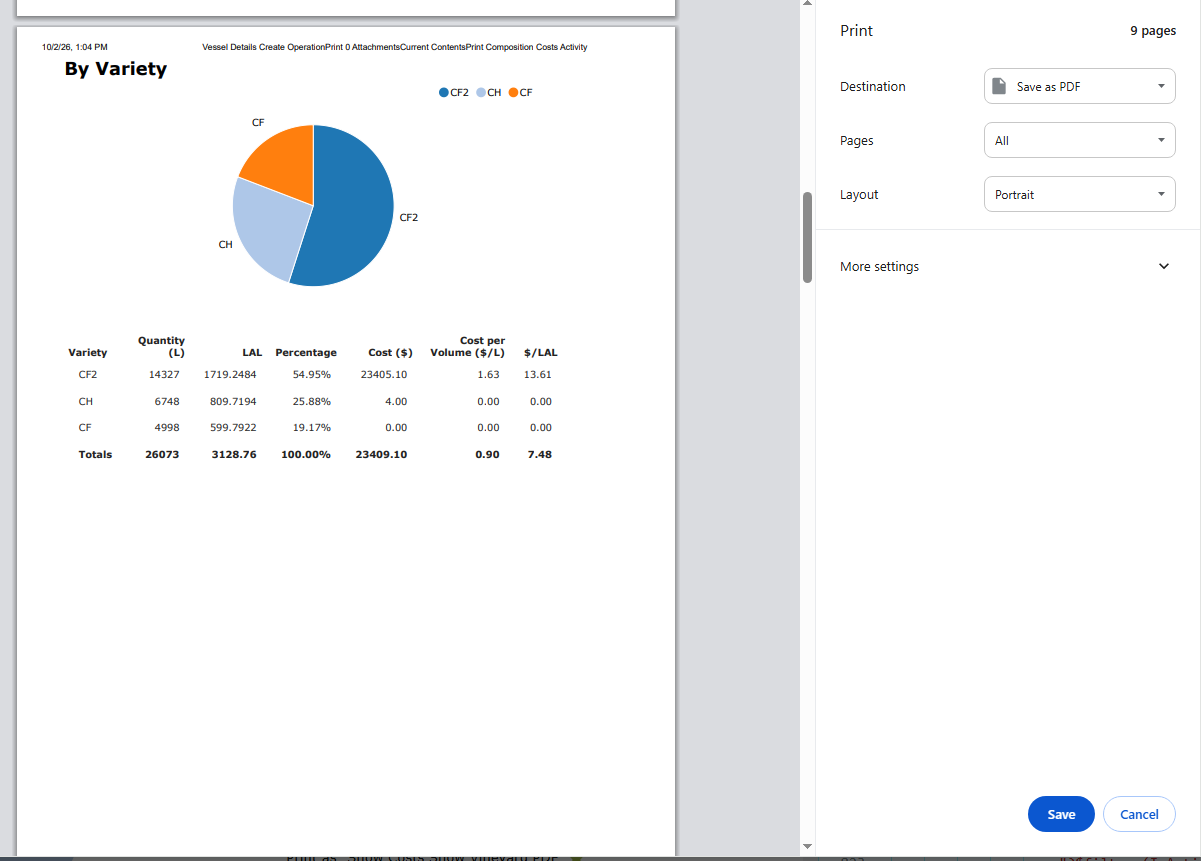
The first two options on the list, ‘Print Compositions’ and ‘Show Print Preview’ will continue to print and / or show, the graphs and windows you see in the Composition Table. These options have not been changed as part of the move to the new printout templates.
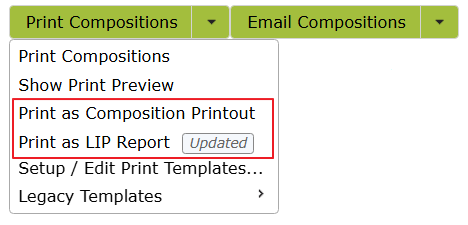
The items on the list, Print as Composition Printout and Print as LIP Report (only visible for divisions with Physical Country set to Australia) are the new default templates, that replace the prior options (which now sit under Legacy Templates).
You will see any customised reports you saved using ‘Composition Report Options’ remain under the Legacy option too. For information on upgrading these to the new style, see Upgrading Legacy Templates below.
To create or edit a saved format, choose ‘Setup / Edit Print Templates…’ from the Print menu.

Initially you will see only ‘Composition Printout’ and, if Australian division, ‘LIP Report’. As you customise and save templates, you will see these displayed here as well.
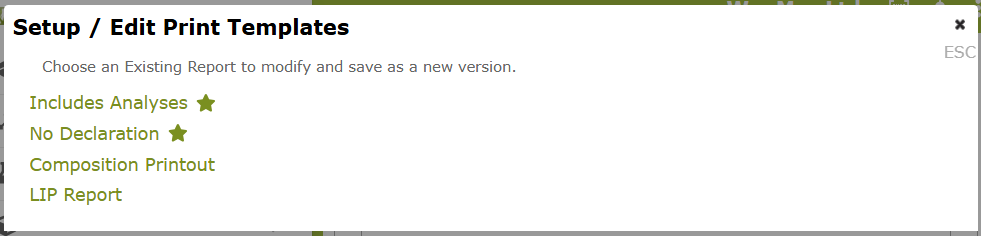
From there, click the template you wish to edit. This will open a template that will look something like this, with a preset filter, some parameters, you can adjust, and a preview of the data that will be shown on the printed display. . .
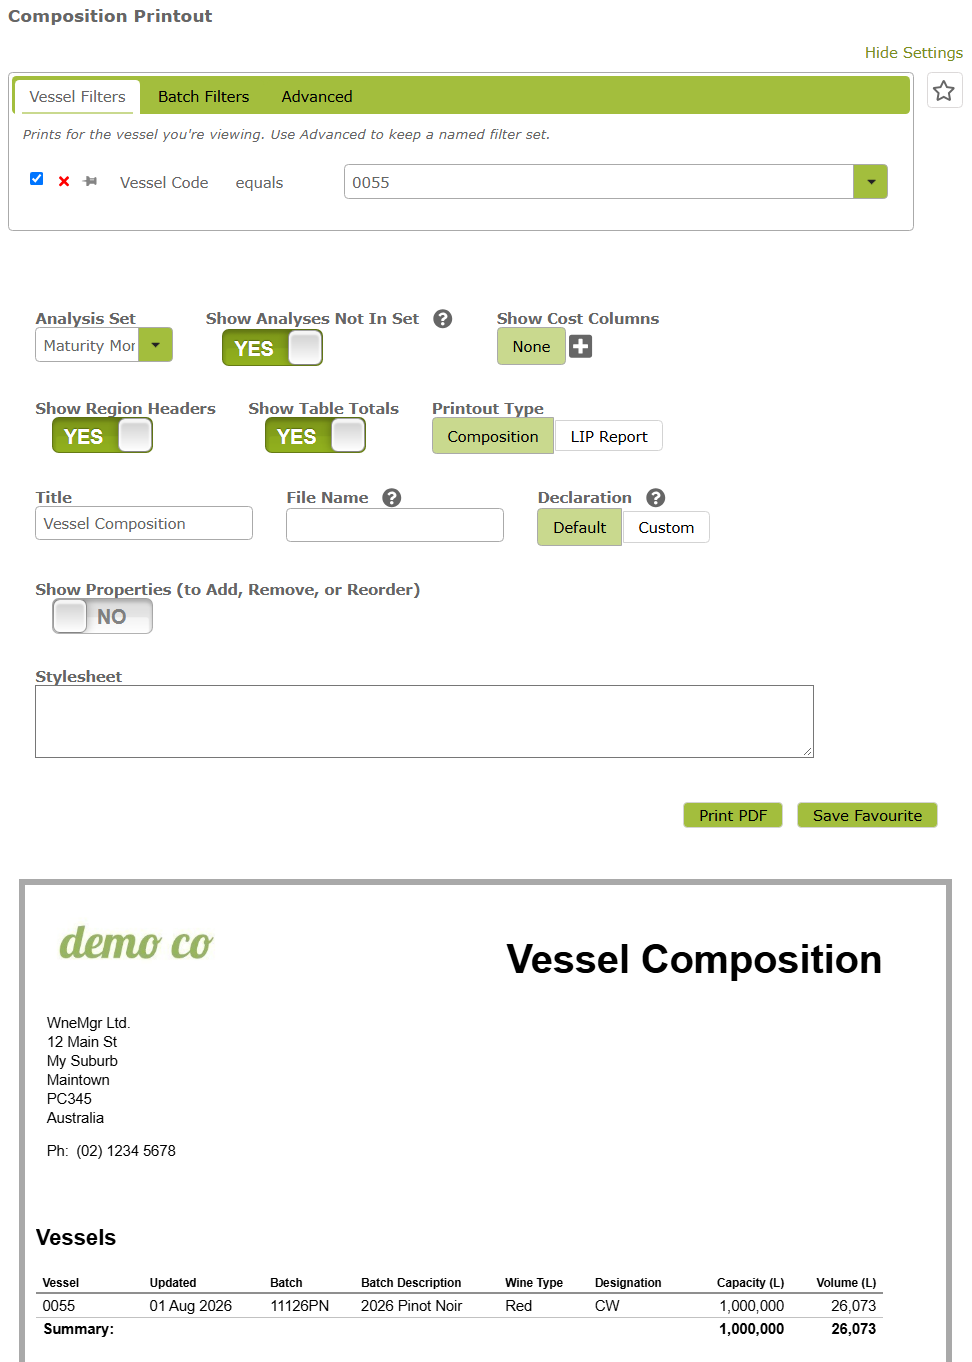
About the on-screen preview: The preview in the template editor is there to help you see the effect of your choices — which regions and properties are shown or hidden, and how they are ordered. It is not always an exact representation of the final printed or emailed PDF. Some details, such as page breaks and fine layout spacing, can differ between the browser preview and the finished document. Print or download a PDF when you need to confirm the exact result of your settings.
Customising Composition Reports
Once you have the editing page open there are a number of things you can do to customise the templates.
- Logo and Company Settings
- Analysis Set
- Show Cost Columns, Region Headers and Table Totals
- Printout Types, Title and File Name
- Allergens
- Declaration
- Showing, Hiding and Re-ordering Properties
- Filters (Advanced)
- Stylesheet
- Saving Your Changes
- Deleting a Template
- Upgrading Legacy Templates
1. Logo and Company Settings
The template uses the logo and company details from the division. Go to Settings > Company Settings / Divisions and open the relevant division if you need to edit those details. Composition content itself reflects the vessel, batch, or operation you are printing from.
Use the checklist revealed by the ‘Show Properties (to Add, Remove or Reorder)’ toggle to show or hide logo, company name, and individual address lines in the header / company details areas.
2. Analysis Set

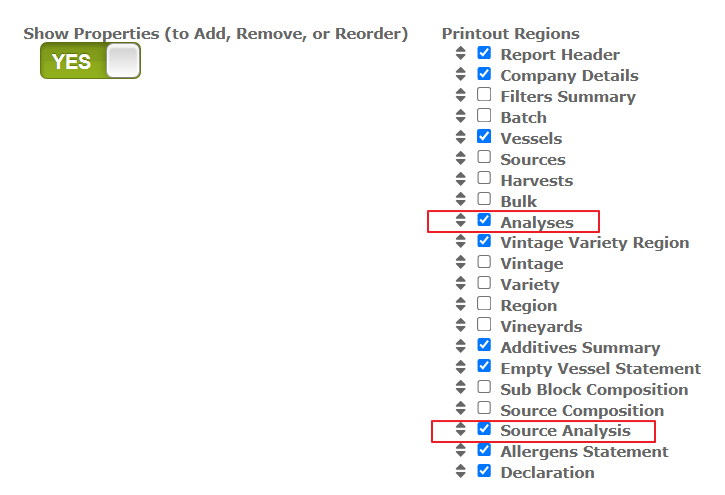
These parameters relate to the ‘Analyses’ and ‘Source Analysis’ regions in the report. Choose the set that matches the lab properties you want listed. ‘Show Analyses Not In Set’ will default to ‘YES’ and drives whether ‘out of set’ values are shown in the ‘Analyses’ region. Switch off if you don’t want these values in your printout.
Please note the ‘Analyses’ and ‘Source Analysis’ regions are not turned on by default, when you first open a Composition Report or LIP Report template. You can see these regions by toggling the ‘Show Properties (to Add, Remove, or Reorder) parameter to ‘YES’ and selecting the checkboxes next to those regions.
3. Show Cost Columns, Region Headers and Table Totals
Show Cost Columns:
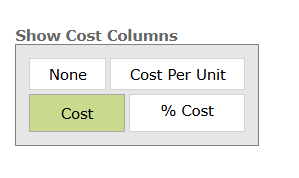
This option allows you to turn the various costs columns (‘Cost Per Unit’, ‘Cost’ and ‘% Cost’), on and off in all regions at the same time. You can still override these settings and fine-tune cost settings region by region in the checklist (See Showing, Hiding and Reordering Properties below).
Show Region Headers:
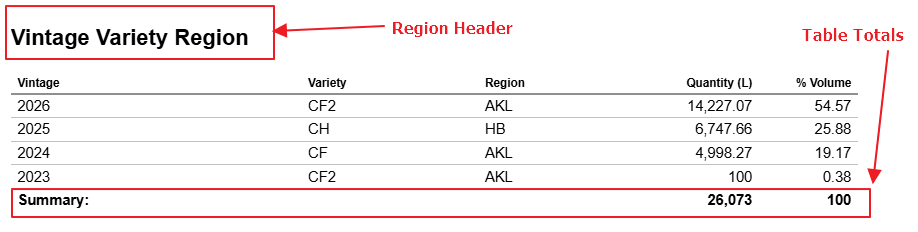
When on, section headings appear above each breakdown table. When off, tables sit without those headings, closer to the legacy layouts.
Show Table Totals:
When on, totals appear at the foot of applicable tables. When off, those total rows are hidden.
You can toggle these parameters and review in the preview to determine which formatting you prefer. The following images show the same region, first with ‘Show Region Headers’ and ‘Show Table Totals’ set to ‘YES’
and secondly with those parameters set to ‘NO’

4. Printout Types, Title and File Name
Printout Types:
The ‘Printout Type’ parameter lets you quickly select a document type that applies a useful set of defaults for which regions and columns are shown. For example, ‘Composition’ shows region headers and table totals by default, whereas ‘LIP Report’ hides region headers and table totals and adjusts some additive columns to suit a Label Integrity style layout. You can still customise exactly what appears by showing and hiding properties yourself. See Showing, Hiding and Re-ordering Properties below.
Changing Printout Type also resets related display defaults (including both the region and column display defaults and the ‘Title’, ‘Show Region Headers’, ‘Show Table Totals’, and ‘Show Cost Columns’ parameters). Override those afterwards if you need a different combination, then save the template.
Title:
You can change the ‘Title’ field if you want different wording at the top of the printed document.
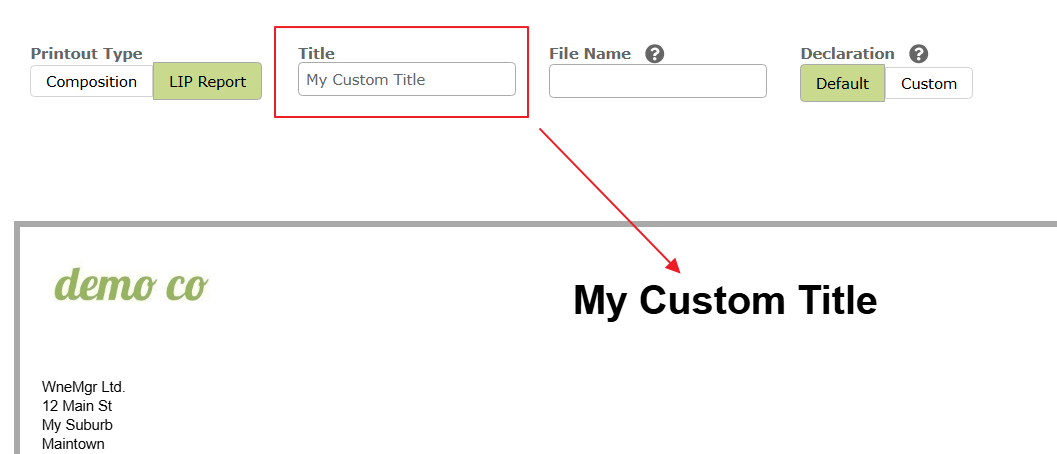
When you print from a Batch, Packaging Operation, Finished Stock Item, Bulk Despatch, or similar context, the App may set a context-appropriate default title for the stock templates. Saved templates keep the title you saved.
File Name:
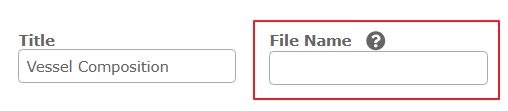
You also have the option of adding a ‘File Name’ if you wish the downloaded or emailed file to have a specific name.
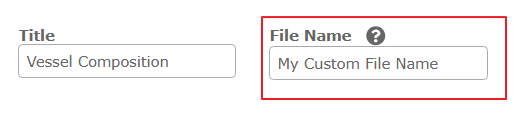
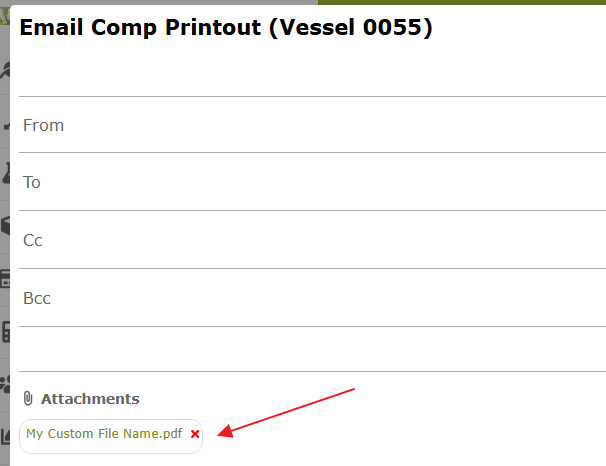
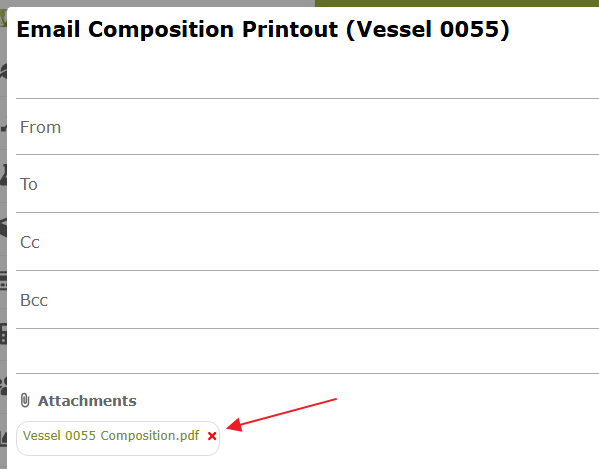
If you leave ‘File Name’ blank, the App uses an automatic name based on the vessel, batch, pack op, stock item, or despatch you are printing from. The following example is emailed from the Vessels page. . .
5. Allergens Statement
The Allergens Statement looks something like the following. . .

and can be turned on or off using the checkbox revealed when ‘Show Properties (to Add, Remove, or Reorder)’ is set to YES. 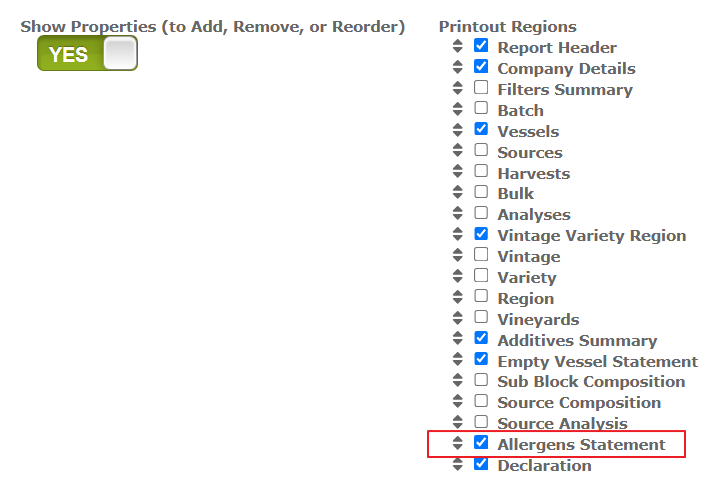 See Configure Stock Item Allergens below if you need help setting up your allergens so that they will appear in this region.
6. Declaration
The ‘Declaration’ setting controls the wording at the bottom of the report (when the Declaration region is shown).
- Default: Uses the built-in declaration wording for the current context (vessel/batch, pack op, winery op, finished stock, bulk despatch, and so on). A Signature and Date line is included below the text.
- Custom: Opens a rich-text editor where you can write your own declaration. Use ‘Add Field’ to insert merge fields such as Vessel Codes, Batch Codes, Stock Item Code, Despatch Number, Other Party, Operation Number, and Date. Signature and Date lines are still added below your text.
For example, 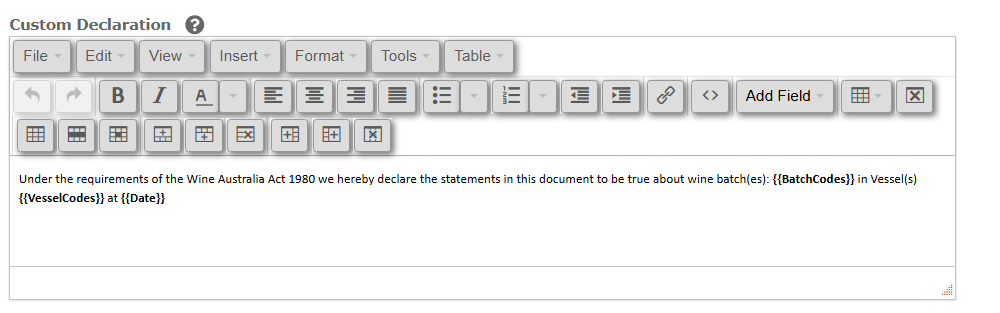
will display on a printed pdf as
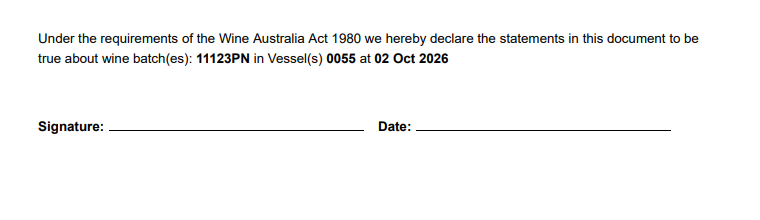
To omit the declaration entirely, turn off the ‘Declaration’ region under ‘Show Properties’ (see below).
7. Showing, Hiding and Re-ordering Properties
When you toggle ‘Show Properties (to Add, Remove, or Reorder)’ to ‘YES’ you will see checklist items for entire printout regions (for example Vintage Variety Region, Additives Summary, Allergens Statement) and for columns within those regions. Tick or untick to show or hide; drag to change order.
The same checklist pattern is used on Sales Order print templates. For a fuller walk-through of drag-and-drop on the preview itself, see Showing, Hiding and Re-ordering Properties on the Sales Order printouts page — the behaviour is the same here.
8 . Filters
The template editor includes Vessel Filters, Batch Filters, and Advanced filter tabs.
When you print from a specific vessel or batch composition, or open ‘Setup / Edit Print Templates…’ from that context, the filter will be pre-filled to match the composition you are looking at. Unless you are building a multi-vessel or named-filter template from the Reports Dashboard, it is best to leave the filters alone.
These Vessel and Batch filters will not be saved when you save a new template.
If rather than print a specific vessel or batch from a composition table, you wish to create a report with saved filters that you can re-use, you should use the ‘Advanced Filter’ tab for this.
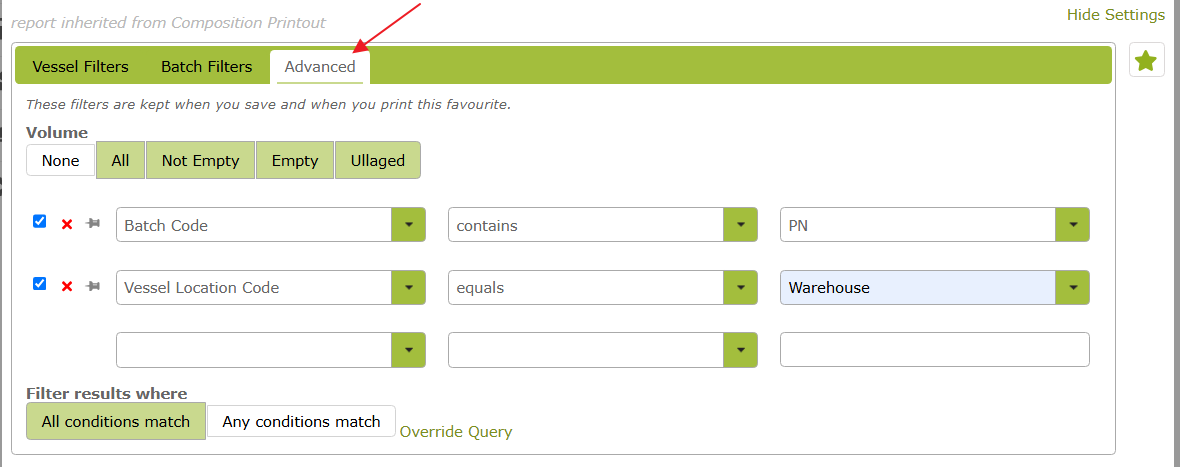
Saving a template with filters set on the ‘Advanced’ tab will keep those filters. You can view the saved report on the Operations Dashboard or the Reports page.
Tip: Filters are an advanced feature. If you are unsure, leave them untouched and print from the Composition Tabs on the vessel or batch you care about.
9. Stylesheet (Only for users who are already proficient in HTML and CSS)
A ‘Stylesheet’ box is available for simple CSS adjustments to the template, in the same way as on Sales Order printouts. If you are not familiar with HTML and CSS, stick to the default options. Support for HTML and CSS-related issues is outside the scope of our services.
For the New Rule workflow and caveats about preview vs PDF, see Stylesheet on the Sales Order printouts page.
10. Saving Your Changes
You will not want to make these changes every time you print or email a composition. Once you have settled on a format you are happy with, save it by clicking the star at the top of the page, or the ‘Save Favourite’ button.
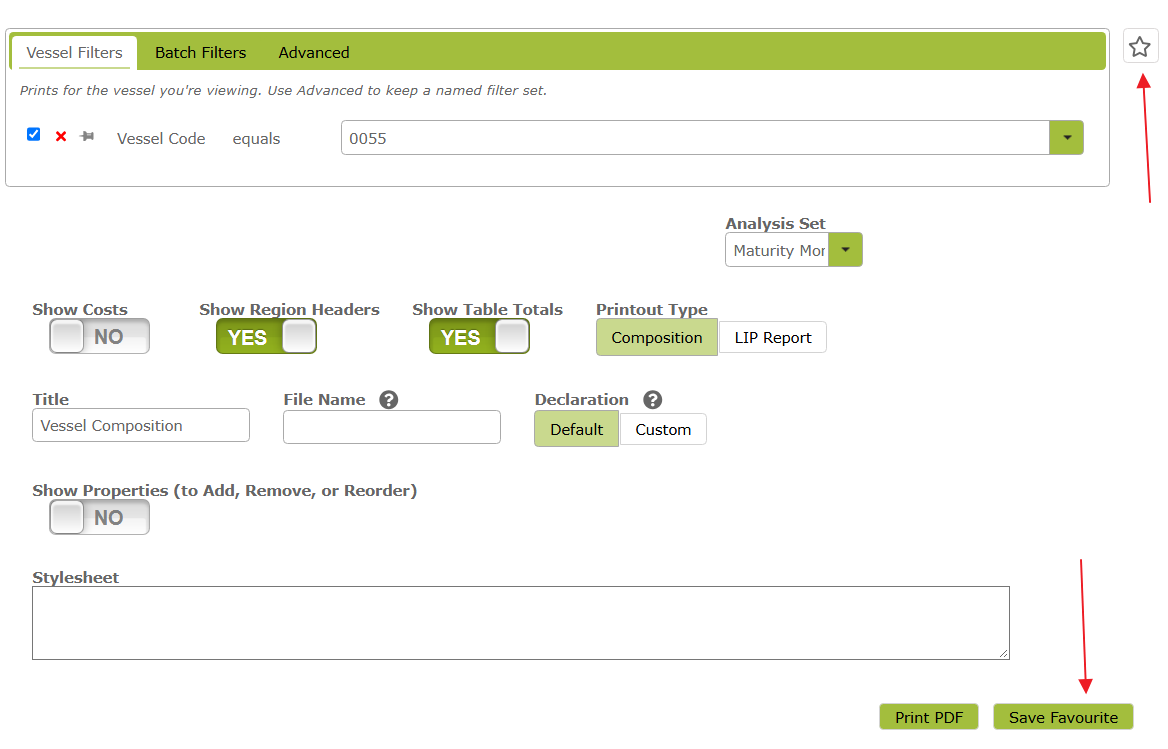
Click ‘Save Template As…’, enter a name for your template, and confirm.
Once saved, the new template appears in the reports list and in the Print and Email menus on Composition Tabs views.
11. Deleting a Template
Open ‘Setup / Edit Print Templates…’ from the Print menu, open the template you wish to delete, then click the star. Use ‘Delete Template’, then confirm with ‘OK’.
12. Upgrading Legacy Templates
If you already have custom templates under ‘Legacy Templates’, you can upgrade them into the new template style. Upgrading creates a new saved template. Your original legacy template is left unchanged and remains available under ‘Legacy Templates’.
Conversion is ‘best-effort’. Most common settings are mapped across, but the new layout is not an exact copy of the old printout. After converting, always review the preview and print or download a PDF before relying on the new template day to day.
How to convert:
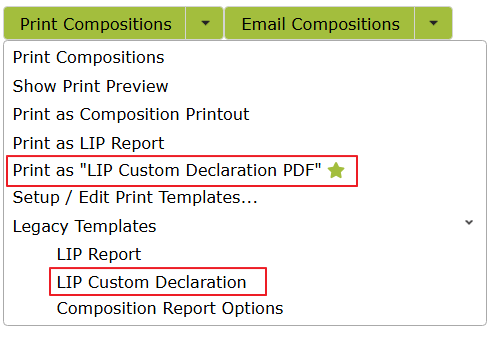
On a Composition Tabs view, open the Print menu, choose ‘Legacy Templates’, and look for your custom template. Templates that have not already been converted show an ‘Upgrade’ button next to them.
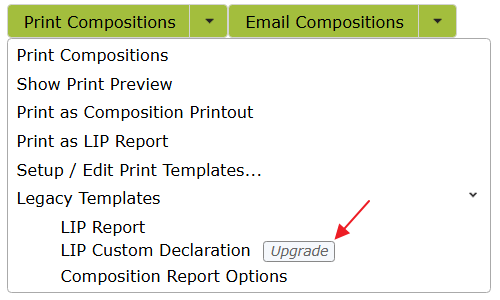
Click ‘Upgrade’, enter a name for the new template, then confirm.
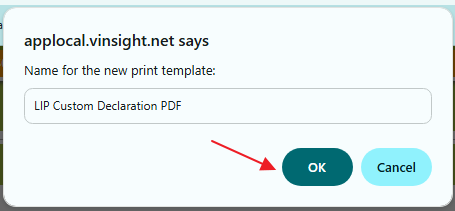
The App saves the new template and opens it in ‘Setup / Edit Print Templates…’ so you can preview the result.
If you make additional changes, don’t forget to save them using the favourite star. (See Saving Your Changes.)
After upgrade, your new template appears in the main Print and Email lists. The original remains under ‘Legacy Templates’, but the ‘Upgrade’ control is no longer shown for that name.
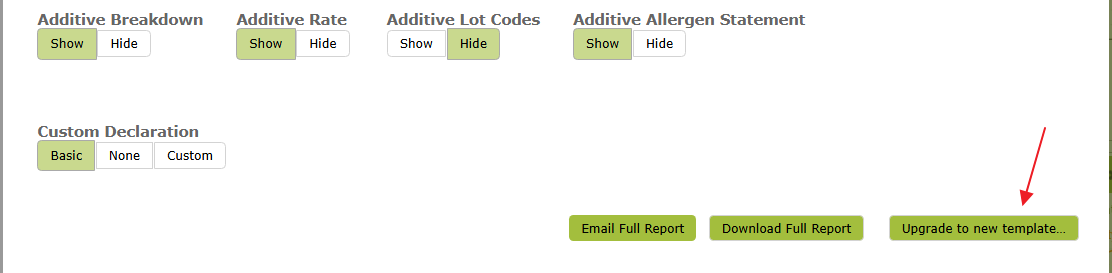
You can also upgrade by opening the report from the Operations Dashboard reports list, and clicking the ‘Upgrade to new template’ button.
What gets converted: Title, custom file name, which breakdown regions are shown or hidden (sources, harvests, bulk, vintage / variety / region / vineyard, additives, analyses, allergen statement), cost and cost-per-unit columns, and declaration settings (including custom declaration text from the old footer when Declaration was Custom). Filters are not copied across. You generally will not need to reconstruct them, because, when printing from vessels, batches, operations or stock items, the printout is designed to target the current item. If your legacy template used bespoke or named filters to build a multi-vessel (or similar) report, recreate those filters on the new template under the Advanced filter tabs, then save the template.
What you should check after converting:
- ‘Show Region Headers’ and ‘Show Table Totals’ are turned off on convert so the result is closer to many legacy layouts. Turn them on if you prefer clearer section headings and totals.
- New regions that did not exist on the old report (for example Filters Summary, Sub Block Composition, Source Composition, Source Analysis) stay off unless you enable them.
- Print a copy of the new template to check layout. The on-screen Preview is only indicative.
Once you have reviewed the converted template, use it from the main Print and Email menus like any other new-style template.
Configure Stock Item Allergens
Setup Product Categories
Create a Product Categories entry with the Code “Allergens” and each value set to an allergen that may be present in any of your additives as shown in the screenshot below. Make sure to tick the Can Apply Multiple setting so that you can add multiple allergens to the same Stock Item if you need to.

Add Allergens to Stock Items
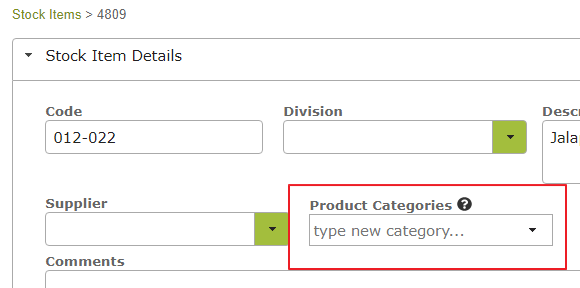
When you edit or create a new Stock Item, you can set the Allergens Product Categories as shown in the below screenshot.