Payment Terms
Overview:
This page details how you add new payment term options to the payment terms drop-down list in Sales Orders.
In this document:
Creating New Payment Terms:
If the payment terms you wish to use are not included in the Sales Order Payment Terms drop down list, you can create your own customised terms by taking the following steps:
1. Create an Expression Definition for your New Payment Term
Go to Settings > Account > Expression Definitions.
This is where you input the ‘Maths’ definition of your new term, The best way to understand how to do this is by looking at a few examples.
Example 1 – 60 Days
In the first example, we are adding an expression to calculate a payment due date that is 60 days after the Invoice Date.

In this example, the ‘Code’ is the wording you will use to select this expression definition elsewhere in the App and the ‘Description’ simply allows you to insert a more lengthy description/ explanation if required. The ‘Expression’ field is where you detail how the payment date should be calculated.
In the example expression ‘{0}.addDays(60)’, the ‘{0}’ is simply a placeholder for the ‘Argument’ or starting point from the which due date will be calculated. When creating the actual payment terms in part 2, you will be able to select, which particular date you would like use here (e.g. it could be in the Invoice Date or Date Required or Date Despatched). For now it is sufficient to simply describe the ‘Argument’ as ‘Date’. From this starting point, we calculate a due date 60 days after the ‘Date’ by adding the expression ‘addDays(60)’ to to the {0} placeholder . Similarly the expression for a payment term of 7 days would be ‘{0}.addDays(7)’ and for ‘Cash on Delivery’ would be simply ‘{0}’.
Click ‘insert’ to add the new expression to your list.
Example 2 – EOM + 20
The following example shows the expression required for a more complex payment term such as the 20th of the month following the Invoice date:

Again, in this example, we start with the ‘Argument’ Date represented by the placeholder ‘{0}’. The next part of the expression ‘addMonths(1)’ will add a month to the starting month. For example, if the argument date was 16 October 2020, ‘addMonths(1)’ will change the month to November and setDate(20) will set the date to the 20th of November.
Example 3 – EOM + 30
If wanting the 30th of the following month, you should do something like the following, rather than using the setDate() option detailed in the prior example. Trying to use setDate(30) would cause you difficulties with February, given February 30 does not exist. Instead, you should use the addDays() function as in the following example.

Here we start with the ‘Argument’ Date represented by the placeholder ‘{0}’. The next part of the expression ‘firstOfMonth()’ will find the first date of the relevant month. For example, if the Invoice date was 16 October 2020, it would find 1 October 2020, the next part of the expression ‘addMonths(1)’ will change the month to November and addDays(29) will set the date to the 30th of November. If the original date was 7 January, the payment due date would be set to 1 or 2 March depending on whether it was a leap year or not.
Example 4 – EOM

In the final example above, we find the last day of the month, using the expression ‘{0}.firstOfMonth().addMonths(1).addDays(-1)’ . Again, if the ‘Argument’ Date is 16 October, 2020, ‘firstOfMonth()’ will take you to 1 October 2020, ‘addMonths(1)’ will change it to 1 November 2020, and finally ‘addDays(-1)’ would bring you back to 31 October 2020. Taking a day prior to the first of the following month, will ensure this expression works equally well, whether the month has 30, 31, 28 or 29 days.
2. Create the new Payment Term
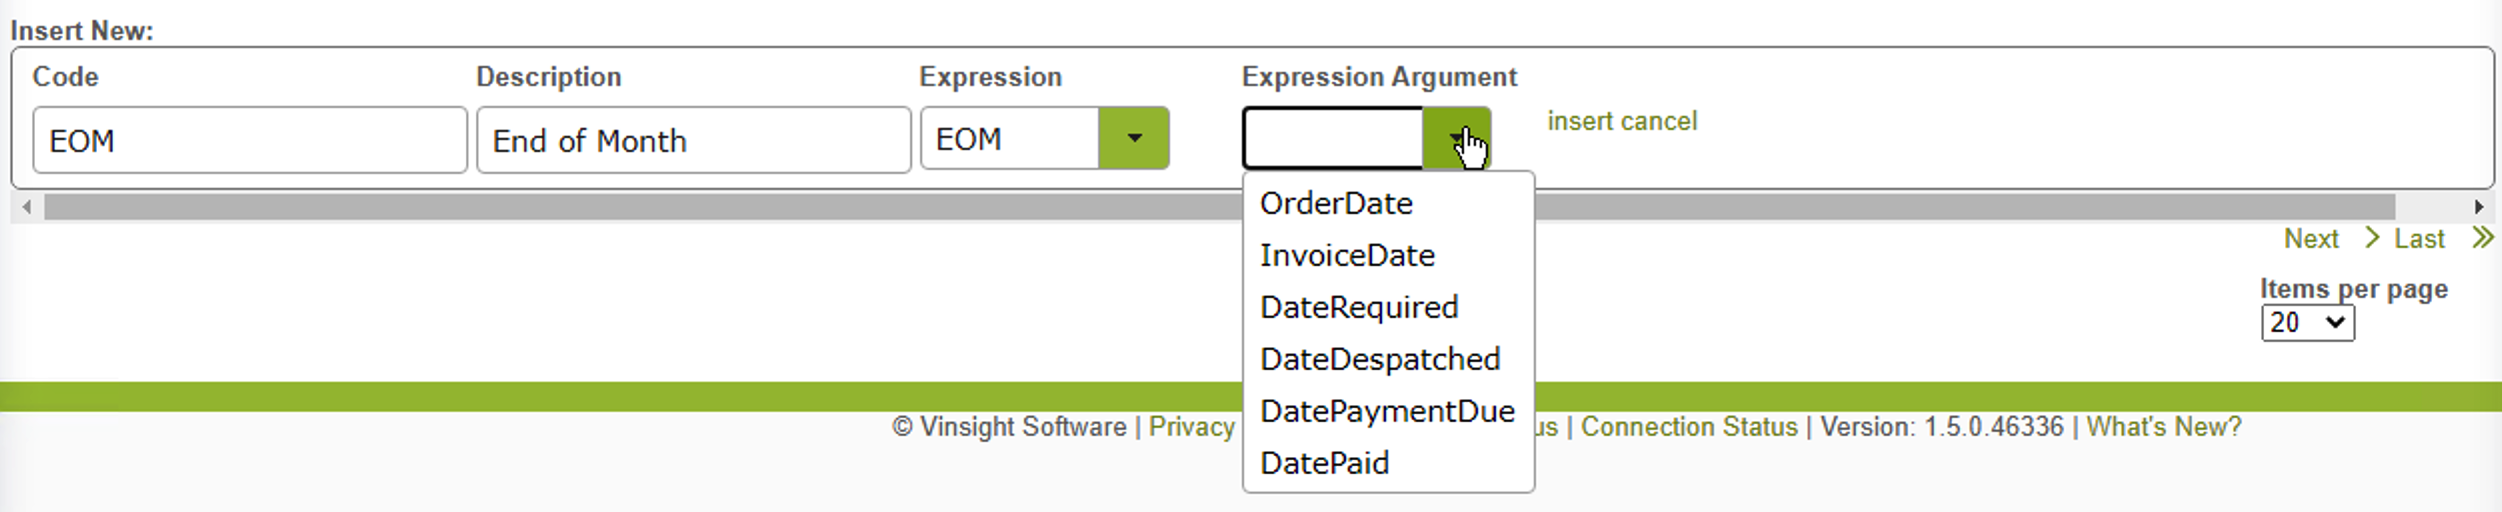
Once you have added any required expression definitions, you can add a new Payment Term, using this definition, by going to Settings > Payment Terms. Create a Code and Description and select the expression you created from the Expression drop-down list.
You now have the option to select which ‘Date’ to use in your expression. Typically, the InvoiceDate is used to calculate the payment date from. However DateRequired or Date Despatched are equally valid options depending on how you run your business/ payments. For example, for a Cash on Delivery expression, a’Date Despatched’ or ‘Date Required’ date argument may make more sense.
Payment Terms- Specific Date
Whenever you like to place a certain date for the payment you will need to setup the below Expression:
Eg. September 30 (function () {var d = new Date({0}); d.setMonth(8); d.setDate(30); return d;}())
Payment Terms- COD (Cash on Delivery)
Cash on delivery (COD) is a type of transaction where the recipient pays for a good at the time of delivery rather than using credit. You can setup a Cash on Delivery expression by {0}
![]()
Payment Terms- Stop Credit
If you need to setup a customer on “hold” until the bill has been settled, you can create the below Expression:
(function () {if (!window._stopCredit) {window._stopCredit = true; alert(‘THIS CUSTOMER IS ON STOP CREDIT!’);} return {0};}())
![]()
For information on using payment terms within a Sales Order and setting default payment terms for customers, see Creating Sales Orders / Payment Terms.